Monday, December 17, 2012

Review: Zombie Tools - The Deuce

 "It's beginning to look a lot like fishmen"and what with the world not having ended with a Julian/Gregorian leap-day miscalculation on the 7th of December and with the 21st rapidly approaching, I wanted to get this message out there before the Mayan calendar starts blinking 12:00.

On December 31 1999 I took my Ontario BlackWind sword along to the "end of millennium / Y2K party. I wanted to have some trusty steel on-hand in case infrastructure went to poop.

I gave you a sneak peek at this a little while ago, and did a Wish-Lust write-up of it ages ago, and when I did some freelance work and had some spare cash, I placed an order for my very own ZombieTools DEUCE.

This arrival filled me with more joy than almost any arrival that wasn't my own blood, for some time. This is 1.36kg (3lbs) and 89cm (35") of singing steel.

No bones about it, this is a serious blade.

Here is me taking a few of my favourite kendo stances with it:

chudan no kamai
hasso no kamai
jodan no kamai
jodan no kamai


The back of the sword is a substantial 5.2mm (0.204") with a beveled edge to keep it snag and resistance free. The full tang of the blade fits neatly and tidily beneath a set of aircraft grade aluminium scales that have been machined to match the tang smoothly. There is great craftsmanship in this piece, and this is just one example of it.

The entire blade has been given a "distressed look" but don't let this fool you. The only distressing thing about this blade is the lack of legitimate targets that it hungers for.

The top of the handle shows off both the aluminium scales, and the very fine leather wrapping. There is a "bump" under the wrap, giving a very positive grip between index and middle finger. The fore-handguard and blade catcher give good geometrical cover for your grip.

The narrowness of the neck might have worried me, had I not seen Zombie Tools own "Destroying the Deuce" video  No fear of this being the cause of failure, for me.


The tail end of the Deuce features the ZombieTools logo nicely laser-cut through the pommel, which again shows off the blackened aircraft grade aluminium scales under the tough leather wrap. It would be simple enough to fit a retention lanyard through here, if desired.

The geometry of the whole of the hilt is really good, and allows both single and double handed grips with confidence and comfort. In my test cuts on some overhanging vines and shrubbery, I felt little or none of the shock that the BlackWind often offers with its single-piece cord-wrapped handle, far more akin to my "really-real" Japanese sword.

Speaking of "really-real" the Deuce has a full-tang blade made of 5160 spring steel, hardened and tempered. I wanted to measure it up against my other two go-to swords, the BlackWind, and my Hanwei Shinto. Going to basics, I put them side-by side with the Deuce and measured the balance points against both. Is clearly shows the differences in both the blade and handle geometry, as well as the fabled "balance point" which a swordsman will tell you governs how the blade feels in the hand, it's responsiveness, control ability, and cutting power.

Not wanting to go into the esoteric points of bladesmithing of which I am only a fan, and no expert, I can tell you as a swordsman, with 15 years of kendo and growing up with real swords that the balance of e Deuce is beautiful, both single and dual handed. Shorter than the Shinto, but with a similar handle, the kukhri-like forward swept head of the Deuce offers a chopping and hacking potential that the slicing Shinto does not. These are different swords, and act and feel different.

Both are vastly better crafted than the BlackWind, as the handling and use clearly tells.


The kydex scabbard the Deuce comes with is fitted with eyelets all the way down its length, at at it's tip, but I found that the throat of it was quite loose over the guard of the Deuce, and when running, or if inverted, the sword slips out easily. This was problematic, as having flailing razor-sharp steel slipping about when you are albeit ally maneuvering is a bad, bad thing. I plan to wear the Deuce on my hip, as I would a katana, or lashed to my back for over-the-shoulder storage, so in order to keep the blade secured, I opted to add some shock-cord to the eyelets, crossing it over the hand-guard which keeps the sword snug, but not so restrictive as to make it impossible to draw. Simple Iaido-style sword control with the left thumb is all that is needed to keep the Deuce snug, or free it, to do what it was made for.


I am thrilled to have the Deuce in my armory, and repertoire of steel. I look forwards to having it on hand for all my adventures, working out the best ways to wear and carry it, and putting its keenness, and it's ruggedness to whatever tests the world throws at me.

Riddle of Steel
The secret of steel has always carried with it a mystery. You must learn its riddle, little Conan. You must learn its discipline. For no one, no one in this world can you trust. Not men, not women, not beasts. [Points to sword] This you can trust.
Conan's father

Friday, December 14, 2012

Review: Platatac - HeadOver


As summer approaches, we get some very changable weather in Melbourne, even more so than the rest of the year. Some days blistering hot, some days chilly and wet. Still days, windy days, wet, dry. But mostly windy. I like to keep a hat in my bag as a part of my EDC, as sun-exposure and skin cancer are no-ones friends,bu t there are times when a hat just wont suit the conditions.

It's time like these that I opt for a bandana, wrapping my head and hair out of the sun and wind, and giving my neck some needed cover, however, even the ubiquitous bandana won't suit all the time. they shift around, come undone and generally fail when most needed. That's where head-socks come in. More adaptable than a beanie, more structured than a scarf or sehmagh, I really like them. I have reviewed the HeadSox brand offering previously.
This however is the Platatac PolyPro Headover .

This lightweight tube of stretchy polypropylene fabric runs at 50cm long by 40cm in circumference, putting it longer but a little bit more narrow than the HeadSox version.

A single seam along the middle makes the tube, but both ends are hemmed neatly, making this a tidy little addition to my collection, especially when I don't want any snagging options. As you probably know, I fall into the longhair Viking side the "grooming standards", with "high and tight" but I've always seen this as part of my warrior heritage (and I'm sticking to that!).

It does leave me with complications on occasion.
Getting my hair hung up in packs, vests and slings is really annoying, and truth be told, probably a safety risk. However, I've managed to go this far without getting into too much strife with it, mostly because I pony-tail it or braid it.

The other option, like I've mentioned, is bandana's, hats and headsocks. Here's how I like to wear my Platatac HeadOver:

As a neck-warmer, note how it drapes low, all the way to my collarbones. Very good for adding chafe resistance to vests and slings!

Doubled over, it acts as a cap, wrapping and shading my head, and keeping my hair out of the way, and secured. In this fashion, it acts as a turban, a very effective and simple form of hot-weather headgear that has been worn for millennia.


With my hair pulled through, it acts like a bandana, as well as a hair-channel. To get it on like this, I pull it all the way over my head to my neck, then drag one end up and over, catching all my hair, and ears, giving a slick and tight cover. I wear this when I have to wear a hat or helmet, but want my neck uncovered (or just want my hair managed). This gives the most breeze flow and wicking contact.


When I want to go "full tacticool", nothing beats the open faced balaclava, with one end pulled up over the ears and nose, with a hat over the top, you have maximum sun/grit/wind and identity protection,  the same neck abrasion protection of the neck-warmer "mode" and look like a bad-ass khaki ninja to boot.

For all my silliness with this, the HeadOver is a great piece. Maintaining protection from the environment and avoiding exposure is a critical element of any survival plan, and a simple, lightweight and versatile piece like this really adds to your options, at very little wight, bulk or fiscal costs.

Wednesday, December 12, 2012

Review: ITS Tactical - MOLLE Stix


Another item that came in my package from the folks at Hornest was a set of the MOLLE Stix produced by National Molding.I had seen these previously whilst browsing around ITS Tactical's pages and "how to" tutorials, and thought they were a great invention. Since acquiring one of Zulu Nylon Gear's CAOS Admin Pouch I've been hanging out for a way to attach it securely to my rig.

I have a single short MALICE clip, which came with me Gerber stap-cutter, and currently affixes my EOD Breacher Bar to my plate carrier rig. They are sturdy, secure but hard to swap in and out.


The idea of the MOLLE Stix are that they are fast-access, easy to install and easy to remove, giving you "tear-away" access to a pouch, whilst far more secure and reliably attached than hook-and-loop (even in a sandwich setting). Each stick is a polymer bar, 13cm (5) long, and weighs only 42g (1.5 oz) for a pair.

The main tongue of the stick has a reinforcing ridge that keeps it rigid, but the magic of the clip, is the locking clasp at the top. This grips the top MOLLE channel that it fed through, and keeps the entire assembly secure and locked in.

Once the pouch is locked on with the clasps, the MOLLE Stix, having fed through two and three channels apiece, give a rock-solid attachment, but that's not where the story ends. the "type 1" cord that loops through the tops of the clasps, which give a "pull and yank" rapid release, pulling the lock open, the sticks out of the channels and letting the pouch drop free, to be tossed to a buddy, or propped in place, as required. Looping the "type 1" cord between the two Stix in a pair means that a single pull releases both, and the pouch comes free.

For me, I like the idea of being able to mount and dismount my modular collection of pouches, especially when the pouch in question lacks its own mechanism for doing so, like the Platatac PLMRS or the Blue Force Gear - Helium Whisper attachment systems.

I look forwards trying these out with a variety of pouches and on a variety of packs, rigs and configurations, as well as how I can best make use of the quick-release functionality.

Tuesday, December 11, 2012

Sneak Preview: Apocalypse Equipped Morale Patch

I have engaged the Platatac embroidery team to design a merch patch for the blog, looking at about $5 a pop.

Tell me what you think.... first five comments wins a free patch once they have been made!

Saturday, December 8, 2012

Review: Strikemark - Contour cam Picatinny rail mount

Here's a cool piece of camera-gear that I picked up, after seeing a post by the guys at SoldierSystems back in March, and then again after looking for mounts for my Contour GPS following the Stampede mud-run I did recently. One of the guys I do Stargate Lasertag LRP with told me I need to tagger-mount my Contour, for extra bad-ass footage, so I was looking for Picatinny rail mounts, both for a helmet-mount, and to mount to my tagger. Reading some reviews, the official Contour Picatinny mount seemed to draw some serious criticism, so I looked around and re-discovered the Strikemark Picatinny Contour mount.
This is a rugged little nugget of a mount. At only 30g (1 oz) this CNC machined 6061-T6 aluminium mount is tightly engineered and sculpted. The slide onto my rails was smooth, but be aware, by nature of the "one piece" construction, they don't bolt on, like other rail mounts might. To secure the mount to the rail, a surface-saving, blue-nylon-tipped set screw tightens down with the included hex hey, Ikea-style. You can see it sitting down-rail of my Sstrike Industries Vertical Sling loop

The mount is hard-coat anodized with a matte black finish and is conservatively laser etched with the Strikemark logo.

The rails to mate to the Contour are extremely tight. I needed to add some lubricant to slip mine on, which I did gingerly, for fear of breaking the Contour's plastic siding. Whilst Strikemark offer a "Lifetime warranty on the mount. If it breaks, we replace." I wasn't so sure about Contour. The connection however is rock solid. No shakes, rattles, wobbles or warping, all the concerns raised about the official Contour mount.

Now, you can see my mount here, riding on top of my current tagger (which is a M16A2/M203 analog), as it currently lacks side-rails and it wasn't really in the way for what I do with it. I have plans to mount rails on my Pro Tec Classic helmet to give me a solid mounting point, to avoid the slide and jiggle worries I had with a cap, shoulder and bag-mountings I have tried.


Props to GeardoShit for beating me to the punch, I think we must have both been reminded of this thing at the same time, ordered, received, tested and decided to post at the same time. I literally had put pics up into a draft when his post published! Great minds!


Friday, December 7, 2012

Home Front: Mayan Long Count disaster!

I've been writing this blog for a year now, its been a good run: 195 posts, 59,456 views, a bunch of good kit and comments, and now, well, this may be the end .....


The Australian Prime Minister, Julia Gillard released this message today.....


Apparently there were suggestions that the usual predictions of the "End of the World" as indicated by the end of the Mayan Long Count on December 21, 2012, was incorrect, due to Julian/Gregorian calendar miscalculations, and it was in fact, due on the 7th of December, 2012.

Woops, that's what you get for leaving your prep till the last minute, folks!


I for one, got home and consulted MY Mayan calendar, and came to the conclusion that either way, I agree with Dr Neil deGrasse Tyson in that I don't think that a culture that didn't predict the arrival of the Spanish, can predict the end of the entire world, either.


I may, or may not take my Aannihilator Superhammer to work tomorrow, just in case ....

and i was so hoping to hit 200 posts and 60k views before the end ....

Wednesday, December 5, 2012

Review: Snow Lizard - SLXtreme iPhone case

I backed a rugged, heavyset and multifunction iPhone case on Kickstarter, before but when the design of the iPhone 4 and 5 was still in question, I chickened out of one waterproof case, but later backed another. More rugged, more functional, and more feature packed, I was relieved to see another project offered, and I had the gumption to back it, and then I had to wait.

This was the case that I backed. Billed as the Aqua Tek S on Kickstarter, and produced by Snowlizard. When it was ready for release it was renamed by popular backer vote, to the SLXtreme. Offered in a variety of colour options, I opted for the coyote-tan, surprise, surprise.

The basis of the case is that it fully encloses the iPhone 4/4s in a water, dust and shockproof polycarbonate shell, whilst still leaving the majority of functionality available to the user. During the design and manufacture process, the forward and back facing cameras, and flash, volume up and down buttons, and the main home and power buttons are all accessible whilst in the case.

 It turned out that the mute/orientation slider and earphone ports were too difficult or impractical to accommodate.


The multitouch screen, mic and speakers are faced by a thin polymer membrane which alternately allows the electrostatic use of the iPhone screen and transmission of sound from the speakers, and to the mic. I was skeptical to start with, but was pleasantly surprised both by the crispness of the control surface (no real difference than any other screen protector) and of the sound, (slightly muffled, but perfectly acceptable sacrifice for the protection offered when adventuring).

The base of the case has an access port for charging and synching the device by micro USB, with the 32pin iDevice plug being built into the insides of the case, the port being protected by a sealed flap, which is secured shut with a thumb screw. Also held in the front base of the case are a set of blue LED battery charge indicators.


The top of the case latches open and closed to accept the phone, which sits very snugly, as it is built with low tolerances, and even complying with IP68 & Mil Spec 810, but not so snug as to be impossible to take the phone in and out, even with the screen protector I have on it.

The latch has a slide lock, to help resist those "unexpected underwater openings"

The two camera ports are equally well designed, and don't significantly degrade the picture quality,

All the buttons could be described as "stiff" and the inlay to get to the edge of the multitouch display is pretty tight, but I'd rather a little awkwardness over a busted screen or waterlogged phone any day. The stiffness of the buttons only goes to reassure me that they won't break, or be a source of failure and ingress.


The case is large, it's bulky. It is very reminiscent of the old brick phones around when mobiles broke into wide circulation. This however, is not a big concern for me, given the nature of the protection offered and the additional features built in.

As well as being rated to 2m submersion, mud, dust, sand and rain proof, shock resistant and generally ruggedized, this case also packs a built in lithium ion polymer battery, providing DC 5V - 1A with 2000mAh capacity, giving an impressive boost to the standby (380-hrs), talk time (7hrs 3G, 17 on 2G), internet usage (7hrs 3G, 10hrs on WiFi) and 46 hrs audio, or 11 hrs video play.

However, the SLXtreme goes one step further in that it's back face has a built in solar panel, capable of generating 10 minutes of talk time for an hour of sunlight. This may not sound like a lot, but in a survival situation, it is plenty of power to send text messages, power up the GPS features of the iPhone, read up instruction manuals and yes, make calls as needed.

I have a lot of navigation, mapping, surveying and "guide" apps on my phone, and for the times when I am off-grid, but still want access to my data, and the stored knowledge, knowing that I have a near infinite supply of charging power, is very reassuring.


The Snow Lizard team took a lot of flak over the delays in production, from the initial Kickstarter which was successful in March 2012, till when I received mine in November 2012, and the iPhone 5 coming out in the interim. I really feel for them, but had no such concerns. Kickstarting isn't an exact science, and I'm just glad I got a product.


I am happy with my "less than newest" model of phone, and the accessories I have for it.

The case is rugged, light (at 317g including the 4s, making it a tad under 200g of battery, solar charger, water, crud and shock proofing that I can take into the field with me, do the Stampede or Tough Mudder wearing, or whatever.

Not being able to plug my headphones into it is a drawback I am willing to live with, for what I get, and I look forwards to Snow Lizard to come up wit hthe PALS/MOLLE attachment they posted mock-ups of. Till them, its off to Platatac to ask the lads what they can do with me to include this case in my loadout.


Tuesday, December 4, 2012

Review: Jill Lite - Constel LED micro lantern


As a part of my care package, this very cool item was waiting for me having arrived from HorNest in Singapore. This is the Jill Lite Constel which is a pocket sized, LED powered lantern. 

The idea of a lantern that can fit in my pocket is pretty appealing, whilst there are a lot of options for using a flashlight to light up a room, but they are not purpose built. Even the Lazerbrite end caps with the glow-domes are accessories, and whilst awesome, are part of a bigger system.


These Type II / III anodized AL6061 T6 aircraft grade aluminium bodied lights are roughly bullet shaped, with a plastic dome light diffuser and a two part metal body. The light source is a 3W white LED, situated in the center of the barrel, and is wired in to use the whole of the unit as a heat sink. O-rings at the dome and end-cap provide a water seal that is rated for approximately 10 meters submersion, which is a lot, when you think about it. Deeper than a number of my "waterproof" watches over the years can go.
  
 A lithium CR123A  battery powers the unit, and provides between 30-40 hours and is activated by rotating the end cap. 

The end cap itself has some cool features, some attention to detail that I really appreciate. The split ring held in the middle is captivated by a raises island machined right out of the base, but not so much as to make it a protection risk when standing the lamp up on its own, which it does on two wide crenelations on the bezel

Those crenelations have slots cut into them, for lanyard strapping, and greatly resemble the handles on a beer keg
 
Over all the lantern is a miniscule 55mm long, and 22mm in diameter and has a really solid, rugged feel. I wouldn't be throwing it -at- things, in case the plastic end cap broke, but I certainly feel it could not only be lobbed a fair way, but would withstand a bunch of dropping, standing and "lost in the bottom of your pack" time. 

Then there is the light. For a 3W LED, encased in a translucent dome, this little lantern kicks out a whole bunch of light. Here it is sitting on a Dead Person Jar , on my bed, lights on, and off. Certainly enough output to not only navigate, but also to do pretty much anything but paint well. 
 
 I can see this lantern finding an excellent home in my camping kit, as it would be perfect for illuminating the inside of a tent, or the cook-fire, dining table, not to mention for late-night trips to answer natures call.


It is small enough, tough enough and powerful enough, that I want to add it to my EDC, and have it on hand, just in case, even with my already fearsome array of illumination ...


Friday, November 30, 2012

Home Front: Care Package

I've been in hospital all week -as a patient-. It turns out that the ankle problems that have been keeping me from kendo training were an early symptom of a bigger issue. Löfgren's Syndrome, a form of benign sarcoidosis, which struck me heavily on Monday night in the form of heavily swollen and painful ankles, and a creeping rash on my feet and legs. Three days admitted, my first CT scan, first joint aspirate, first lung function test, first EEG, first skin punch biopsy, first broncoscopy, ultrasound guided Fine Needle lung biopsy, bronchial lavage under "twilight general anesthetic" which I woke up during. So many firsts.

Turns out that this is a rare, usually fully recoverable condition, targeting the ankles of Vikings (well, men of Scandinavian descent). Like me. Upside is that I am already responding to treatment, feel much better.

Whilst admitted I had a care package delivery of a veritable mound of Skittles, gummi bears and even some flowers and a plush coyote/dingo.

I came home to find a care package from my pals at HorNest, in Singapore, with some goodies to review:
A Mystery Ranch Mystery Cinch
A set of ITS Tactical MOLLE Sticks
A Constel pocket lantern
and a wicked HorNest patch

Reviews to follow soon!

Thanks to everyone who's supported me through this scary time, I won't loose my feet, and will be back on track some time soon.


Wednesday, November 28, 2012

Review: OscarDelta SPD - Deep Carry Tube


Here is the second piece in my order from the forwards thinking folks at Oscar Delta Special Projects Division. 


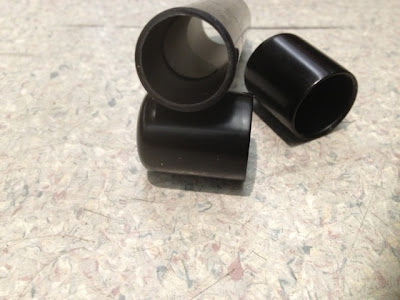
The DCT (Deep Carry Tube) is an airtight and waterproof container, measuring 82mm (3.25") by 20mm (externally) and 16mm (5/8") internally. Both end caps are removable soft vinyl, smooth and extremely snug to the hard tube of the body.  

The idea being that it offers a unobtrusive and subtle space to cache small sensitive or vital items. 

The ingenious folks at Oscar Delta SPD suggests it can be used to store maps, documents, emergency cash, glow sticks, matches, sewing kit, fire lighting kits, spare batteries (fits CR123A, AAA, AA batteries and a variety of button-types) and other small items. 

My SERE v-cutter shipped inside it, and since getting it, I've carried it in the bottom of my front right pocket, it barely registers, and I have no doubt of its ability as a geocaching item, or means to secrete important or sensitive materials. As the folks at Oscar Delta SPD say, "Quite simply, an item that cannot be found, cannot be taken."


Thursday, November 22, 2012

Home Front: Brewing

One of the things I love doing over summer is home-brewing. Humans have been brewing for millennium, and it is a really good way to make use of simple raw materials and make something special. The fermentation process (if done well) will produce sufficient ethanol as a waste product of the yeast doing the fermenting, to kill a significant proportion of potentially disease causing microbial contaminants that may also exist in the water and produce.

Ethanol as many of you will know has a pleasing effect on the human physiology, and I heartily enjoy it, and the carbonation that can also be achieved. This is the home-brew kit that I have, (this is a similar kit, my original brand lost to antiquity). It has served me well. Honey & water mead, ginger cordial, ginger pulp & water beer, ginger beer kit beer, apple cider kits have all worked well for me, but this time I wanted to give it a go with more raw-materials.

I went with the $2 2L bottles of apple juice and $2 jars of apple sauce I saw at Aldi
and regular dried bakers yeast (gasp if you will, brewing aficionados, but its never done me wrong), which I "started" in half a pint-mug of warm water with 3-4 tablespoons sugar dissolved in it. I cleaned the fermenter, and all the parts, with the manufacturer approved sodium metabisulfite steriliser. Be aware, this produces a very irritating gas, and will set off asthmatics, but it does a really good job at giving a food-grade clean to your kit, bottles and also to act as a medium to fill the bubble-valve. I have also never bothered to measure the http://en.wikipedia.org/wiki/Gravity_%28alcoholic_beverage%29of the mixture I am brewing with, to determine the fermentation end point and to calculate the alcohol content, preferring a more rustic "it stopped bubbling much, and tastes good" method. Not very scientific, but in this instance, I depart from my scientific training as a microbiologist, and go with the spirits of my ancestors. Once it is done, I'll be bottling it in the recycled Grolsche bottles that I've been collecting for years.


Wednesday, November 21, 2012

Review: Oscar Delta - SERE V cutter


My good pal Spencer of SAR Global Tool send me a link to a some buddies of his, who are stocking his SOLAS Dog Tag Signal Device I also reviewed while back. So I headed over to their site and checked them out.

That company was Oscar Delta SPD, based out of the UK and they specialise in products to aid and assist in Survival, Evasion, Resistance and Escape .
This little piece is the SERE Black Ops "V" Cutter.


It is a wearable, lightweight cutting piece that can be worn on or around the body, around the neck, attached to keys,
concealed in your boots (
OscarDelta SPD suggest in the top lace hole). OscarDelta SPD make a paracord survival bracelet which includes an elastic sheath to secure and hide the cutter.

At only 3g, this is an ultralight tool, and measures only 5cm x 1.3cm x 0.5mm. The cutting edges of the tool are formed by two razor blades riveted into a V shape to the steel body. 
 Even though it it light, the two blades are reported to cut webbing, seat-belts, seven strands of 550 paracord, duct tape, cable tie plasti-cuffs. This is not a hardened and toughened tool like the Gerber strap cutter but it doesn't have to be, this is a bare-bones escape tool. 

To use the cutter, being so small, it is positioned over the cord or strapping to be cut and pulled through using the lanyard hole and the supplied cord. It is too small a tool to really get much purchase on by itself, but any cord, or a keyring will do. 


I found that after some cutting, a number of fibers jammed between the cutting edges and pried them open a little. Being razor thin, this is inevitable, as the steel flexes. 

This isn't an every-day tool, but it is what it is, a secret escape tool, and I have no doubts as to its ability in that circumstance

Tuesday, November 20, 2012

Wish-Lust: ITS Skeletonised Bottle Holder

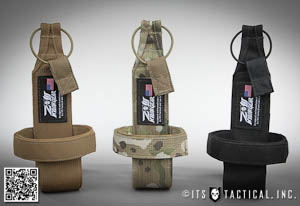
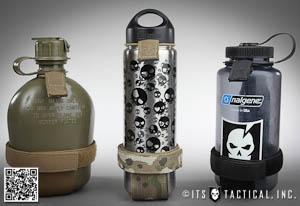
A while back ITS Tactical (of which I am a subscribed "Crew Leader", always glad to support a forward thinking group like these folks) posted their trial launch of a new product that really caught my eye. In a recent newsletter and subsequent posts they have announced that their ITS skeletonized bottle holder is now on general sale! I'm hoping that my contacts at HorNest will get some in...

Here's what ITS have to say about it:


  • Lightweight Skeletonized Construction Weighs 2.7 Ounces!
  • Double Layered Webbing with Strategically Reinforced HDPE
  • Slipnot Textured Pull-Tab for Non-Slip Grip
  • Adjustable 1/8" Shock Cord for Multiple Bottle Neck Sizes
  • Three Levels of Height Adjustment for Multiple Container Sizes
  • True One-Handed Container Deployment
  • MOLLE/PALS Attachment Also Adaptable to Various Belt Sizes
  • Color Matched Webbing and Loop
  • Available in MultiCam, Coyote Brown and Black
  • Hand Made in the USA using American Materials and Labor

MOLLE and belt compatable, adjustable to fit a variety of bottle sizes and shapes, with three points of adjustable shock-cord attachment, the ability to sling your bottle upside-down and bombproof construction. Whats not to like?


So, another collaboration between ITS Tactical and Zulu Nylon Gear, much like their also very cool (and wish-lustful) ETA Trauma kit. I have already commented on how much I like and am pleased with the Zulu Nylon Gear CAOS Admin pouch and the really cool MOLLE car visor sock, but this bottle bolder really appeals as well. I've been very happy with my Platatac FUP pouch, to hold my 1L SIGG bottle, but this is a purpose built piece, and is totally wish-lustable.

Monday, November 19, 2012

Review: SparxGear - Fire Piston


This is a very interesting item I backed through Kickstarter, and is a modern take on the Fire Piston, which is to say, a means of igniting tinder without spark or friction, but rather by rapid compression of air. The principle is that when a well-sealed piston is driven into a cylinder, with a portion of tinder at its tip, the rapid compression of air will drive the temperature of the space at the end of the piston to around 260°C (500°F). This is sufficient to ignite tinder, and you can use it to light a fire.

Eric Gilger started his Kickstarter to build a fire-piston, and I was all for it. The SparkxGear piston is the fire piston is 15cm (5 5/8") long with a 1.6cm (5/8") diameter. It weighs around 65g (2.25 oz) but the weight can vary slightly with additional slot rods, tinder and O-rings held in the storage capsules. There are three slots cut into the side which hose a magnesium (for emergency, thermite tinder), a Ferrocerium rod and a steel rod (fire-steel). The rods are kept in place by the pressure release-valve plug, at one end, which features a storage compartment (for tinder and replacement o-rings for the piston seal). The piston also has one of these compartments in its tip as well.

The piston is operated by placing some tinder (a supply of charcloth is provided) into the cup at the end of the piston, and, once the pressure release-valve end is tightened, and the piston seated, the piston-rod is driven into the shaft, and withdrawn rapidly, to ignite the tinder. This is trickier than it sounds, and I took a long time to get it right. Some lube on the shaft is needed, as its a really tight fit, the whole piece is very well engineered.

But here are a couple of shots of my ignited tinder, gently glowing, and flaring when blown upon, ready for sparkless fire-starting! This is a really cool piece of kit, but one that requires some significant practice to be dependable.The added magnesium, ferrocerium and steel rods, as well as the additional in-cap storage really makes the piece special, a lot of thought was put into these, and I will be looking out for Eric's next projects avidly.


Sunday, November 18, 2012

Video Review: United Cutlery M48 RangerHawk


This is me testing out the United Cutlery M48 Rangerhawk which I reviewed recently.

Hope you enjoy watching me chopping, piercing and hacking!

M48 Kommando Ranger Hawk Axe
Click image to go to Think Geek's store
Related Posts Plugin for WordPress, Blogger...