Showing posts with label guest. Show all posts

Tuesday, August 2, 2022

Nano Oil for your Knives, Tools, and Firearms

Another Guest Author, by way of BB&C,  Jim Davis presenting Nano Oil:


Always on the lookout for cool, different ideas, I happened upon a product that caught my eye. Not just for the content of what's in the containers, but the way the containers deliver it to the target. Nano Oil offers some unique and innovative methods of dispensing lubricant onto firearms, knives, and anything else where you want to deposit a controlled amount of oil into a small space.

They have a few various dispensing containers that I'll outline here.

Nano Oil containers
Nano-Oil comes in handy, syringe-like containers. Here is a package with three different weights: 5, 10, and 85 weights.

What Is It And What's It Good For?

First, though, a bit about Nano Oil. It does not contain any of the following: Silicone, PTFE Resins, Graphite, Molybdenum Disulfide know as Moly, Teflon, Copper, Lead, or Silver. They state that there are "absolutely no metals or harmful solvents."

StClair claims that Nano Oil is suitable for high temperature applications, extreme pressure (load bearing metal to metal), roller bearings, chains/sprockets, machine tools, marine equipment, metal working, mining and printing equipment, armaments, knives & multitools, and a ton of other uses. The list is quite expansive.

It works on bicycles, motorcycles, cars, tractors and farm equipment, and RC racers.

Regarding armament, they claim that it increases muzzle velocity and smooths all moving parts while protecting from rust and corrosion. The oil adheres to microscopic crevices and penetrates metals, which provides a very low friction dynamic.

Weights

There are a couple different weights that are offered for various uses.

*5 Weight. This is the lightest weight oil that is offered, noted for deep and fast penetration. They refer to it as "WD-40 on steroids."

*10 Weight. This is a light weight oil that is suitable for guns, flashlight threads, knives, fishing reels, locks, hinges, bicycles, bearings, cables, chains, sprockets, motorcycle forks, electric motor bushings, model railroads, and more. This one seems to be the most useful weight, in general, as it addresses a lot of different uses.

*85 Weight. This is a heavy weight formulation, developed for the M-14/M-1A and other rapid fire firearms.

I ordered and received one each of these weight lubricants in the Micro Oiler with stainless blunt needle, which contains 8cc/ml of oil. These are extraordinarily handy because that needle can get the lube precisely where you want it. Note that the same weight oils can also be had in 1/2 ounce and one ounce bottles.

Nano Oil containers and applicator tip
One of the beautiful aspects of Nano-Oil is the blunt metal applicator tip that allows the user to get the oil where it needs to go. These are the micro oiler containers.

I also received an applicator of Nano-Grease NGL, which is a Lithium Complex Hi Temp & Extreme Pressure lubricant. The uses for it include bearings, boats, buses, cars, bicycles, chains, conveyors, dozers, excavators, graders, laundry equipment, and a bunch of other items. And since the M-1A/M-14 series of weapons are supposed to be lubed with grease, that was my main intention of buying this, as I am using it with my M-1A Scout Squad Rifle.

Grease syringe M-1A
With the grease syringe, getting into the chamber area of the M-1A Scout Squad Rifle a snap.

Chamber area of the M-1A
Greasing up the operating rod on the M-1A is no longer difficult either.

Operating rod on the M-1A
Nano Oil states that adding its formulations to other existing lubricants will improve their anti-friction qualities.

I have not tried the following, but they are listed on Nano Oil's website:

Gasoline Engine Oil Treatment, Diesel Engine Oil Treatment, Manual Transmission Oil Treatment, 4-Stroke Engine Oil Treatment (Motorcycle, ATV, Snowmobile, Outboard Motors), Small Engine 4-Stroke Oil Treatment, Automatic Transmission Oil Treatment, and Marine Outboard Drive Treatment.

Dispensers

The first is a pen that has something similar to a ball point. The user presses the tip onto the surface where he wants to deposit oil, and the oil comes out. It's fairly controllable too, so you can get a small dot, a larger puddle, or a line. The pen container I received contains 16cc is 10 weight oil, which is listed as "All Purpose." I'd say it would work great for firearms, knives, and anything with moving parts in general. The cap even has a protrusion for hooking onto the user's pocket, so it can be conveniently carried anywhere. The container is white and not see-through. At the time of this writing, one of these pen dispensers costs $27. It appears that it should last quite a while.

Nano oil Applicator
The pen is a very handy container to have around!

Tip of Nano Oil Pen Applicator
The tip of the pen is similar to a ballpoint pen, in that when the tip is pressed, it dispenses oil. The user determines how much oil he wants to come out.

The next type is a Micro-Oiler, which is see-through and has a long, blunt, metal needle for getting the lubricant just where you want it.  This is especially useful if oiling knives and firearms. Normally, I run my knives dry or nearly so because oils tend to attract dirt and other gunk. The 5 Weight oil will be especially useful for knives because when it dries, it leaves very little residue behind, yet still retains lubricant qualities. This is good stuff!! A 3-pack of these dispensers with 5, 10, and 85 Weight lube, at the time of this writing, costs $49.00. At the rate in which I use lube, I believe these will last me for quite a while.

Finally, the grease dispenser is like a giant syringe that comes complete with a long, blunt metal needle, which gets the grease into those hard-to-reach places. This is especially useful when applying to the M-1A rifle, as it allows the user to get the grease into the areas where the bolt rides in the receiver. Those little grooves can be a pain to reach by other means, but with this setup, it becomes very easy. At the time of this writing, this one costs $21.75.

Nano Oil Grease syringe metal tip
The grease syringe has a large volume and the metal tip is perfect for getting the grease where you need it to go!

Does It Work?

Naturally, I went totally overboard trying Nano-Oil out on most of my firearms. Those that know me will not be surprised, as I tend to go all-in on my endeavors.

So far, I've used Nano-Oil on my S&W CSX 9mm, S&W Airweight .38 Special Revolver, Glock 43X, Ruger MK IV .22 Long Rifle pistol, Two AR-15s, an AK-47 (AK-63D) Underfolder, and my M-1A Scout Squad Rifle from Springfield Armory. I plan to use it on my bolt action rifles and my Henry Arms Survival Rifle (AR-7). In other words, I will use this stuff on all my firearms and knives.

 AR Pistol and AK-63D Underfolder
This AR pistol by Xtreme Gun Worx (of Emmaus PA) and the AK-63D Underfolder benefitted from an application of Nano-Oil.

Ruger MK IV .22LR, Glock 43X, S&W CSX, S&W Airweight 642 .38 Special revolver
The pistols that I tried Nano-Oil on, from top to bottom: Ruger MK IV .22LR, Glock 43X, S&W CSX, S&W Airweight 642 .38 Special revolver. They all said they liked Nano-Oil!

Speaking of knives, I've used it on my Emerson Knives Desert Roadhouse. Some of my Spyderco folders will also see Nano-Oil. The nice thing about the 5-weight oil is that it dries up and doesn't leave a gunky residue on knives, but the lubricating benefits still remain.

Nano Oil being applied on a Emerson Desert Roadhouse knife
Getting oil into specific points of a knife action is now easy! Here we see the Emerson Desert Roadhouse getting some care.

I can honestly say that Nano-Oil is good stuff; my firearms' actions were nice and smooth after using it on them. So the quality of the oil and grease itself is sound. Beyond that, what I really found refreshing is the applicators that come with the oil. These really made all the difference when I used them to apply the oil, and they made the job so much easier on most of the guns.

Glock 43X Frame Rails with Nano Oil
Glock 43X frame rails getting a dose of Nano-Oil. Nano Oil is an obvious choice for gun care, but works well on a variety of other things as well - particularly knives and tools. 
Inside of the Glock 43X Slide
And don't forget the inside of the slide where parts create friction.

Those hard-to-reach places that used to be a pain to get oil into now are easy to reach, so I expect this will improve the reliability and longevity of my firearms.

Cylinder of the S&W 642
The cylinder of the S&W 642 getting some lube.

Ruger MK IV bolt being coated with Nano Oil
The Ruger MK IV bolt being coated with 10-weight Nano-Oil. Getting oil inside the receiver is now easy as well.

A special mention here goes out to the Nano-Grease. Applying it to my M-1A Scout Squad rifle is so much easier than trying to get grease into the area where the bolt goes than using a Q-tip. The metal syringe tip placed the grease precisely where I needed it, not only for the channel where the bolt goes inside the chamber and on the receiver, but also onto the operating rod. Kudos to Nano-Oil!

M-1A Scout Squad Rifle
The M-1A Scout Squad Rifle from Springfield Armory is basking in the glory of being freshly lubricated by Nano-Oil.

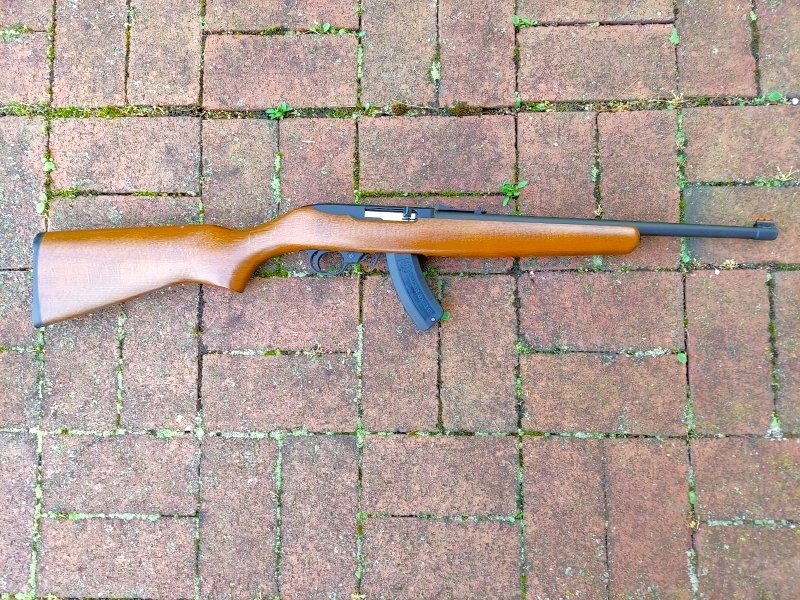
The Ruger 10/22 will function smoothly with Nano-Oil applied. This is the compact model.

As well, applying it to knives also becomes a breeze, getting the oil in those hard-to-reach places without saturating the entire action of the knife in oil. The user has good control over how much oil comes out of the needles.

All in all, Nano-Oil has a successful product that really delivers (no pun intended). The price is not too high for what the user gets, and the supply should last quite a few cleaning and lubes for one's firearms. This is a great product that I wholeheartedly endorse.

About the Author:

Jim Davis served in the PA Dept. of Corrections for 16 ½ years as a corrections officer in the State Correctional Institute at Graterford and later at SCI Phoenix. He served on the Corrections Emergency Response Team (CERT), several of those years as a sniper, and also the Fire Emergency Response Team (FERT). For 25 years, he was a professional instructor, teaching topics including Defensive Tactics, Riot Control and Tactical Operations, Immediate Responder, and cognitive programs as an adjunct instructor at the DOC Training Academy. He was then promoted to the title of corrections counselor, where he ran a caseload and facilitated cognitive therapy classes to inmates. His total service time was close to 29 years. He was involved in many violent encounters on duty, including incidents of fatalities.

Jim Davis


Saturday, May 28, 2022

Sean O' Hare's Knife, the Badger

Here's a guest post, in conjunction with the good folks of Breach Bang Clear!


Sean O’Hare Knives has been making custom knives since 2001, and Sean began doing it full-time in 2009. He hails from Canada, and he is also a very skilled photographer. Sean makes fixed blade knives, including drop point hunters and tactical tantos, and folding knives, including flippers. If you’re into knives, you owe it to yourself to look him up on the ‘net and check out his knife creations. They are utterly beautiful, both in form and function. A Sean O' Hare knife can be very dressy and ornate, while others are simply well-executed and practical. For certain, he makes something for every taste that’s out there.

The fit and finish of his knives are extraordinary, whether we’re looking at the dressier knives or the knives intended for more hard, practical use. He prefers G10, stabilized woods, and Micarta for handle material on his fixed blades. He uses the stock removal method.

Sean O' Hare knife grip
The grip fits most hand sizes like a glove!

The Badger Model   

I have an example of one of Sean O' Hare's knives that I’ve owned for quite some time, over ten years. The Badger model falls under the tactical class of knives, although it could certainly be used for a host of duties, including Bushcraft/Survival, defense, hunting, or knife reviews.

Blade

The blade of the Badger is made from CPM 154CM steel and is approximately 4 ½ inches long, although the choil adds a bit of length (I did not count the choil portion as part of the blade). Blade configuration is of the drop point variety. The blade stock is somewhat thick and stout, but the flat grind lends this blade as an excellent slicer. The CPM 154CM steel is not the latest, greatest wonder-steel, but it is a solid performer that’s been around for quite a while. Its virtue is that it is relatively easy to sharpen and holds an edge for a decent time under use. I’ve been delighted with it.

Sean O' Hare knife striking pommel
The Badger in its natural environment. Note the striking pommel.

Pommel and Handle

A guard is built into the knife in front of the handle to keep the hand from sliding up onto the cutting edge. In front of that is the aforementioned choil, which is helpful if the user wants to choke up on the knife for added control during finer cutting chores. The handle of the Badger is full tang, and it has a triangular striking pommel at the butt of the handle, complete with a lanyard hole and jimping. The pommel edges were sharp and tended to abrade my side when I carried the knife, so I took a diamond stone to them and rounded off the edges ever so slightly, fixing that issue. However, it would still be very effective as a striking surface.

Holding the handle on are three mosaic pins that go all the way through, securing the scales solidly. The handle is made from smooth dark green canvas micarta, yet it provides enough traction for a positive purchase. It allows the hand to slide around enough to reduce friction and eliminate “hot spots” when chopping with the knife so that there is no discomfort to the user. At the same time, the knife is not likely to slip out of the hand during use. Sean got this aspect spot on! In addition, the shape of the handle fits wonderfully into the hand, filling the hand well but not being so large as to be uncomfortable. Several people have tried the knife and, despite having various sized hands, each remarked that it felt as though the knife had been made just for them.

There is jimping on the spine of the blade, where the thumb is placed, which does a perfect job of anchoring the thumb to that spot while not being overly abrasive to the skin.

Sean O' Hare Knife Feel and Finish

In the hand, this Sean O' Hare knife has the most “lively” feel of any fixed blade I’ve ever handled. Not to sound corny, but it almost strikes me as “magical,” the balance, weight, and configuration just become a perfect extension of my hand when gripped. The knife’s weight is 6.2 ounces, and I’m sure the low weight contributes to the liveliness in the hand. The balance point is right where the handle ends, and the guard begins, making the balance perfect. Sean did his homework on this point, and the finished product reflects that.

The finish of the metal appears to be hand-rubbed satin, which gives a pleasing appearance. The overall fit and finish of this knife is outstanding.

Personal Opinion

For years now, this has been my go-to fixed blade when I’m venturing into the outdoors and deciding to have a fixed blade with me. I would feel very comfortable using this knife for camp chores or other woodland tasks such as building a shelter.

Sean O' Hare knife with Spyderco and Glock
A great carry package for woodland jaunts. Fixed blade Badger, Spyderco Native, and Glock 43X.

Beyond that, I look at this blade as a serious defensive tool if it ever came to that. Let’s face it, if we ever have to use a Sean O' Hare knife to defend ourselves, we’re having an exceedingly bad day, but it is what it is, and I like to be prepared for all eventualities. And these days, one never knows what sort of misadventures might rear their ugly head. Knives never run out of ammo, if you know what I mean. And they’re relatively silent in operation. This particular knife would work great for defense, given its lightweight and nimbleness in hand.

The Badger is not huge, nor is it small, by any means. I’d call it slightly larger than medium-sized. It’s not something I conceal on my person when going about my daily travels. But for hiking and the like, it is just what the doctor ordered.

Sean O' Hare knife belt clip
Here the belt clip can be seen. Clipping onto and off a belt is quick and easy, but the sheath is held securely once clipped on.

 Sheath and Sharpness

A word about the sheath: it is simple and excellent. Period. It consists of a piece of Kydex folded over and secured with rivets that allow cordage to pass through them if you want to lash it to a part of your kit. It has a belt clip that slips over your belt and hooks over it so that when you draw the knife, the sheath will not follow (see the photos, my description may not be the best here). It can be donned or removed quickly and easily yet remains secure when it’s on your belt. Tension retains the Badger in the sheath until it is drawn out.

Sean O' Hare knife sheath
The Badger in its sheath is a compact carry package.

How does it cut? Fabulous! Light wood cutting, chopping small branches, slicing through paracord, and a myriad of other tasks, passed with flying colors. However, it’s not a blade that I use regularly; I have smaller folding knives as my workhorses. Instead, the comfort that this blade provides simply by being there on my side makes it golden because I know it will perform, and it’s dependable when needed.

Final Thoughts

On top of all of what I listed above…this Sean O' Hare knife is simply a work of art. There’s no other way to put it, it just looks fantastic on top of being a functional piece of gear. Sean O’Hare is a real artist when crafting sharp, pointy things. If you haven’t checked out his cutlery, jump on the internet and look him up. Be aware, though, his knives are very much in demand, so it’s not certain if he will have inventory lying around ready to go out the door. There may be a bit of a wait, but I can personally tell you that it is worth it! There’s just something about holding a hand-made tool like this in your hand that gives a feeling of satisfaction.

These days, his fixed blade knives seem to be in the $425-$450 price range, but don’t quote me on that. Check ’em out, you won’t regret it!


About the Author:

Jim Davis served in the PA Dept. of Corrections for 16 ½ years as a corrections officer in the State Correctional Institute at Graterford and later at SCI Phoenix. He served on the Corrections Emergency Response Team (CERT), several of those years as a sniper, and also the Fire Emergency Response Team (FERT). For 25 years, he was a professional instructor, teaching topics including Defensive Tactics, Riot Control and Tactical Operations, Immediate Responder, and cognitive programs as an adjunct instructor at the DOC Training Academy. He was then promoted to the title of corrections counselor, where he ran a caseload and facilitated cognitive therapy classes to inmates. His total service time was close to 29 years. He was involved in many violent encounters on duty, including multiple unfortunate incidents of fatalities. He is a regular contributor to the KEEN INSIGHTS column on The Mag Life.

Sean O' Hare


Wednesday, February 12, 2014

Guest Post: Grat's Amazing Pickled Eggs

I recently saw a post that I felt I just needed to share as widely as possible. My friend Gareth and I share many self-sufficiency and Kickstarter-gadget loves, so when I saw this recipe, and marveled at not only the way it was written but the way it must taste, I knew I needed to get it out there. 

Pickling is an age-old form of food preservation that I have covered before and is an excellent means to make good use of a bumper crop, for trade or tribulation.

Without much further ado, I will bring you (with only minor annotations, added by me) Grat's Amazing Pickled Eggs:
*****************************************************************

[Or: Breaking Wind, the story of a high-school chemistry teacher who decided to get rich by making obscure home produce.]

This makes 3 dozen eggs, so alter proportions according to your needs. You need 3 dozen of these AT LEAST, right? 3 doz. is the basic unit of pickled eggs, also known as an Eggmouthsplosion. I have, in my gloriously wild past, made 4 Egmsplns at a time. EPIC

You will need:
- A very large sealable jar, or several smaller ones. Enough to hold all this stuff, obviously.
- A trip to the shops because you overestimated the size of the jars you already had.
- 1 small onion, chopped roughly
- Several large sprigs of fresh rosemary [dried is ok, fresh is better]
- 3 dozen eggs, or one Pre-Eggmouthsplosion [Smaller eggs are better if you don't want to wait ages, larger ones are good if you like lots of pickled egg in your mouth all at once which you do.]
- 1 head garlic, loosely chopped
- 2 tsp mustard seeds
- 1 tsp cloves
- 6 bay leaves
- 2 tsp cardamom pods
- 2 tsp whole peppercorns
- 1 tsp whole allspice
- 2 tbsp Tarragon
- 1 cinnamon stick
- 3 tsp salt [I prefer sea salt or rock salt to the refined stuff]
- 6-7 cups White vinegar [You can use apple cider vinegar or some other deluxe kind, but it gets pretty expensive, and all the flavour comes from the other stuff so you only need this for preserving the eggs and for the characteristic bite.]
- 2-3 cups spring or filtered water [Or at least, not Adelaide Tap water]
- Tweezers to get the eggshell out from under your fingernails. It will happen.

First, put the raw chopped onion and 2 of the rosemary sprigs in the jar. You can be fancy and arrange the sprigs up the sides so that it looks all food-artsy on the shelf if you want. I won't judge you.

Next, hard-boil your eggs. However you like to do them. I won't tell you how, if you don't know how to hard boil an egg, google it. Set them aside to cool.
This will take way longer than you expect, but they need to be cool so they're easy to peel, and trust me, after the first dozen eggs you're going to want them to be easy to peel. You *can* leave them in their shells and let the vinegar dissolve them, but that uses up the amazing power of the vinegar on dissolving shells rather than making your eggs taste like explosions, and leaves a gritty silt layer at the bottom of the jar that is just weird.

If you decide to take this easy path, just use vinegar and no water, to make up for the acetic acid lost to eggshell dissolving and your apathy.
So, assuming you peeled all your eggs, plonk them in the jar. Don't pack them tight, just put them in. Unless you want pickled egg-hexagons, which I did once. Because the whites go stiff and hold their shape. You could probably experiment with this bit and make d20-shaped pickled eggs. If so, I want credit for the idea and pics.

Now comes the fun, smelly eye-watering bit. Take everything except the eggs (and the tweezers) and put it in a big pot. Bring it to the boil, then let simmer for 15 minutes. Take it off the heat and let it cool to the point where, when you inevitably splash it everywhere, it's just annoying rather than a medical crisis.

Now pour this astringent nectar over the eggs. You can strain off the bits, if you're the kind of person who doesn't like to see what torment their food has been through.
Otherwise, just slop it on in there, seal it up, stick it in your fridge. You can keep it on a shelf out of the sun instead; I've done both, and it doesn't seem to make much difference except to how cold your eggs are when you eat them.

Now wait.

And wait.

And wait some more.

No, don't check them after three days, that RUINS EVERYTHING! Why would you do that?!
If you went with small eggs, give it a week, and in the interim fill a spare jar with tears of weakness and desperation as you are obviously ruled by your cravings for delicious vinegary eggs.

If you went with large eggs you are a hero and my champion, so wait two weeks for double the XP and a Pickled Egg Medal.

Once opened, scoff half of them in a few days and then hide the jar and don't look at those hideous yellowish-brown ovoids for a few months. Then get cravings and eat the rest.
Enjoy!

******************************************************************************

If you'd like to get in touch with Gareth, perhaps to spur him to write up more recipes,  you can find him on his Facebook, as Gareth Hodges, or via email.
Related Posts Plugin for WordPress, Blogger...