Showing posts with label tools. Show all posts

Thursday, February 8, 2024

Prepping shed

As the final part of our move from the original home of Apocalypse Equipped Actual, we installed a garden shed in order to store my copious accumulated camping and prepping gear. No room in the new house or garage. My parents were kind enough to gift us this flat-pack, DIY ABSCO 3x3 shed. We built it over a couple of weekends, in a quiet corner beside the house, which was a nice project for me and my good-father. The shed consits of a frame to which pannels are afixed. Assembly is made easier with the help of pre-drilled holes and Absco’s patented SNAPTiTE technology that allows panels to lock into channels without the need for screws. (note, it came with screws and is screwed together, but self-tappers all the way.)

We found there was some manufacturing variance on the pre-drilled holes that needed occasional modification to set things secure and square. The shed is designed to be bolted onto a pre-poured concrete slab, but rental property constraints meant that we instead used a treated pine sleeper frame we anchor-plated together and bolted down to star-picket anchors we pounded into the soft ground. The bare grass we built over was covered in places by salvaged pallets or timber sleepers to set things upon. I put a long table in, along the back wall and a couple of ‘duckboards’ to avoid any seepage that might occur. 

I loaded my collected camping gear ( tents, sleeping systems, cookware and other needfuls, into some old ikea shelves on the table, and many, many stacked Tactical Milk Crates full of my other preps (canned goods, MRE's, and the like) that i'd collected before and during the Covid years. I also have spare tools, crockery and other super-numerate supplies. I also had a number as as-yet unpacked boxes of stuff from the previous house. Initially I just tetras-packed it all in, floor to ceiling in order to get it all in so I could free up other spaces and make them functional. This didn't lead to a very accessible and orderly storage system. 

A process of consolidation and rediscovery over a couple of sunny weekends enabled me to make a little more sense out of my collection, both for ease of access but also to make room to store more stuff and even use the space for additional supplies and furniture, like this cupboard unit, which makes for good assorted pack and kit storage (I have sleeping bags, hydration systems and some tools). 

I also managed to collect all our only occasionally used cold weather snow gear, as well as my various cammo outfits. Under the big table, I've been able to stack my foldable tactical crates. which makes good use of that space whilst having these easily available in the event of a bug-out or camping trip.

 The placement of the shed puts it in the shadow of our side fence and beside some trees and the back corner of our house. It's in the full daylight ark, but has some wind shelter. We placed it on a flat spot but the area is in a slight depression so the duckboards and pallets  keep all the stuff off damp ground. (I open the doors of windy/ sunny days to ensure it doesn't get too humid in there).

I'd noticed condensation on the roof and walls, so I made sure to space my stacks so there was some clearance on all sides (which also improves ventilation)and even though I have  a mix  of storage containers ( crates, chests and bags) I've managed to make an orderly store for my preps, in a safeish, dryish, dark place. I haven't yet put a thermometer in there. but I expect it gets pretty warm in there  (which will obviously affect shelf life of my food preps) but that's a next stage concern. 

How do you store and organise your preps?


Tuesday, February 7, 2023

Review: Stilletto titanium nail puller

I do love a  good salvage. Whether it be road-side junk-swap, flea market bargain or dump-harvest the idea of junk salvage strikes a deep chord in me from both a 

post-apocalypse survivor point of view  and 80's kids sci-fi. That said, sometimes having the right tool for the job, especially if you're working with aged or non standard materials. I do like to recycle timber, for garden-beds and storage shelf construction, and getting the nails out can sometimes be a real pain, especially in well seasoned hardwood pallets.  

Previously I have made do with my pair of  demolition hammers (the Dead-On Annihilator and the Stanley Fat-MAX FUBAR) which are brute force tools, even when paired with pry tools such as Jimmy and the ever rugged Breacher bar. I've had a lot of success with this combination of tools but they're inelegant. I'm also a sucker for titanium. I know its not a miracle metal, neither mithril nor vibranium/ adamantium but its pretty rad.

Now on to the tool!

This is the original Stiletto Titanium framing nail puller with the Patented nail removal feature! In essence it is a 30.48cm ( 11.5") pry bar, made of one piece of titanium. It has an open-truss design to cut weight but retain rigidity, weighing in at 300g (8.5 Oz)


One end features a standard cloven hoof pry edge, which is quite pointy, for aggressive purchase finding, and the other end its a cat's paw, 90 degree pry bar, with a similarly pointy tined  cloven end, and a smooth, rounded fulcrum for mark-free nail-pulling. The key feature of the cats-paw end is the perpendicular dimpler. This open-ended conical protrusion is used to punch a circular indentation into the wood,below the level of the head of the nail, in order to allow either of the pry ends to find purchase and pull them out. This is achieved by centering the open end of the dimpler around the had of the nail and striking the back face with a hammer, hard enough to drive a dimple into the wood around the nail-head. 

The dimpler has an internal diameter of 1cm (0.4") which should be plenty big enough for common nails found in timber. Stiletto specifically state it be used for "common nails" only


The divot allows the tines of the nail pullers to be worked under the nail-head without gouging the wood too much ( divot aside). I found that for especially stubborn or embedded nails ( or punched down, or otherwise deep) that the tines can be driven in by hammering in the tool from the other end. It should be worth noting that Stilleto claim the titanium strike faces outlast steel bars 3X longer - doesn't spall, crack & mushroom like steel bars. I also use the back face of the cats-paw to drive some nails, and though it took some transfer marks, the satin matte finish was un-marred. It's a bit light to act as a hammer effectively but in a pinch, just fine. 


The open truss body is clean edged and smooth to the hand, allowing a strong grip be taken without roughing up your hand.
The shaft of the tool is slim enough to be threaded through PALS/MOLLE channels, for belt, pack or carrier  carry, but I wnt through my leather scraps bag and whipped up a quick holster with a belt loop for my use. I look forward to easy break-down of pallets and furniture for firewood or lumber needs.

Its a great tool, multi-functional, rugged and fit for purpose. 


Wednesday, March 23, 2016

Review: Para TPS Pulley systems

I love paracord. I love titanium, I love pulleys, I love Kickstarter so when a titanium paracord pulley came up on Kickstarter, I knew I had to get on board. I've covered a titanium paracord pulley system before, in the Ti2 PB-9 Parabener systems which live on my daypack, just in case. However, they are pretty chunky, being loaded with other features, and might be overkill when all you need is some lifting and shifting.

That's where there the TPS system comes in. A bare bones pulley system, it's a Universal Pulley System made from grade 5 titanium and ready to be used for making work easier and putting no matter what you're doing. Designed for paracord, or any other 4mm line of your choosing.

The TPS pulley systems are available in four formats, the TPS-2, TPS-3, TPS-4 and TPS-5. the number value corresponds to the number of "sheaves" which are the wheels inside the pulleys, designed and produced by Andrew of Root Designs R&D .

Root Designs spent a lot of time determining the design and materials they wanted to use in these pulleys. The side plates and pins are made of Grade 5 titanium (Ti-6Al-4V) because of its strength and corrosion resistance. The sheaves are made of a homopolymer acetal (which is a very strong plastic that is used for bearings because of its low friction coefficient, perfect as sheaves). The clip-in retaining rings are made of stainless (304SS made by Smalley).

Some serious design and research went into the development of these. Based on using paracord with a minimum breaking strength between 250-340 kg (650-750lbs) for Type III to IV paracords, a FOS of 3 puts the maximum breaking strength (MBS) of the pulleys around 2250lbs. These values were tested on a computer using failure-and-finite-element-analysis software. Bearing in mind that most civilian paracord is type II to III, with minimum breaking strengths of 180-250kg, (550-650lbs). Doing these studies are part of why Root Designs needed support from crowdfunding.

Having gone through rounds of testing and prototyping, they have pulley systems now rated for a Working Load Limit (WLL) of 68kg (150lbs) and a Tested Breaking Strength of over 900kg (2,000lbs). What does that mean? it means the TPS is recommended for loads of around 68kg, and is known to catastrophically fail at 900kg. Given type III paracord will take at least 250kg, my money is on the TPS working long after the paracord snaps, if you're looking at points of failure.

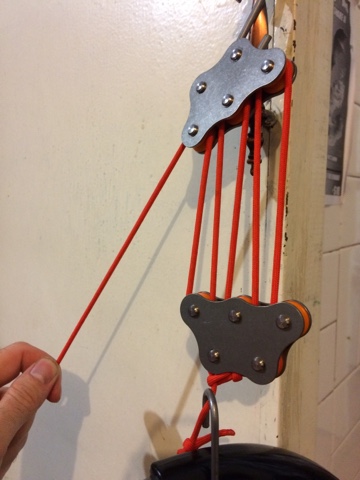
What's the big deal with pulley's in the first place? Mechanical advantage! Anything you need to move or lift, these pulleys can offer up to a 5:1 mechanical advantage with paired TPS-5's. By setting them up in sequence, and threading paracord through the sheaves correctly, the power of simple machines can reduce the effort needed by up to 1/5th of the force needed by a single loop alone. A single pair of pulleys halves the effort, three, a third and so on.

I backed for and received a twin set of TPS-5's and also got a TPS-2 as well. They can be used in a variety of combinations, or singly depending on your situation and need. One thing to remember that with all pulley systems, your ability to lift is only as good as your weakest component. Any attachment accessories (I've used two steel S-hooks from Ikea, so useful) as well as Type 3 paracord. However you also need to take into account the features of the load, and it's ability to haul itself, as well as whatever you are mounting your load too.

The other aspect to be aware of is the length of cord used. For every sheave used, the length of "fall" between the sheaves increases. This needs to be taken into account when reeving (lacing) the pulleys.

Pulley systems mean that someone with little hands and arms, like Tactical baby, can lift this 2.5L kettle full of water, and hold it, in her non-dominant hand, and nonchalantly pose for photos before bedtime.

Here's a tidbit of information from the Royal Canadian Sea Cadets Seamanship manual,
Parts of the Tackle:
a. Standing Block: The block that is anchored and is not moving. This block changes the direction of the running part.
b. Moving Block: The moving block is attached to the moving end of the rope (the end the cargo is on).
c. Fall: The fall is the rope that is rove through the block.
d. Standing Part: The standing part does not move. It needs to be secured to either the standing block or some other fixed position.
e. Hauling Part: The hauling part is the part that is pulled.

But acting as mechanical advantage gaining simple machines aren't all the TPS can be used for, you can combine these little workhorses to get other tasks done too. If you need to send some gear across a ravine, creek or river, or between abandoned buildings in a desolate wasteland, each pulley was designed so it could be used as a zip line shuttle. Setting up a static line and fitting one of the TPS's on it, with either one, two or three sheaves to spread the load over the line means you have a very stable and secure system for shuttling loads back and forth.


You could even use the spare sheaves to run pilot lines to haul back and forth, as well as for suspending your load. In other applications, you could even make a dog run, or other off-ground tethering system for pets or small people whilst out and about.

I even found that by setting the TPS-5 up in a cross-woven pattern, I could make a friction belaying zip-line, in the style of the mechanical decent RACK devices offered by Petzl


Being made from titanium, acetal polymer and stainless steel, they work great in harsh environments such as the ocean, or gritty, hot environments. They could just as easily be used on a fishing boat as in the bush. The limits to their application is really up to your imagination, and material strengths you have to work around.


One of the really nice design features is their small profiles. By using clipping retaining rings, the side profile of the pulleys stay small. The TPS-2 is5/8" x 1-1/2" x 9/16". The TPS-5 is 2-1/2" x 1-1/2" x 9/16".

Basically pocket sized, no matter how you put it. The pins do not stick out from the side plate as much as a nut or the head of a bolt would, which means they are far less likely to snag or catch, as well as reducing weight The TPS-5 weighs 45g (1.6oz) and the TPS-2 a mere 18g (0.6oz). Each pulley can be user-serviced if needed using common tools, and spare parts are available from Root Designs on their website. They also offer a snap-bolt which can be fitted in place of the machined pin, around the existing sheave, to offer a built-in attachment point in the place of any of the existing pins. This is an awesome addition to have designed in, and I'm kicking myself that I didn't put in for some with my pledge. However, there's nothing magic in the bolts, and it is just a matter of finding a bolt which fits, and somewhere to shackle your pulley!

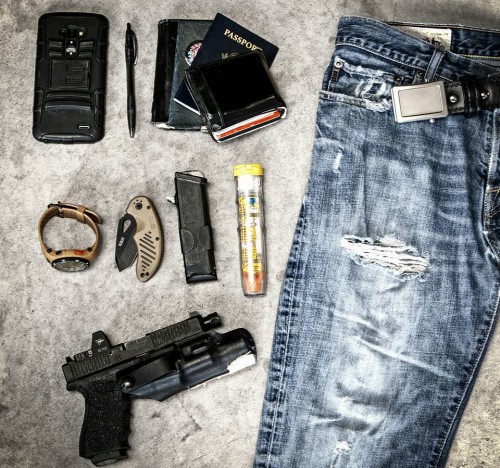
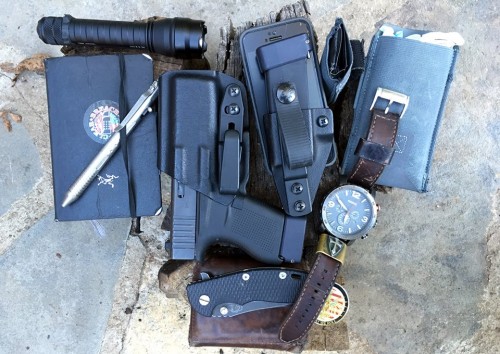
 This is the kind of gadget that you probably wouldn't think to pack in your bug-out-bag on first pass, but to kit out a minimalistic problem solving swag, you could do a lot worse than including a set of TPS's to give you an advantage over your environment!

Sunday, December 13, 2015

Wish Lust: off-road vehicles

I was heading home from work, and I went past this vehicle, parked in the parking lot entrance of an apartment block, and I was so impressed that I wanted to snap a few pictures and tell you what I thought about it. There has been so much done to the set-up that I couldn't even tell what the original rig under it was, but it has a fully enclosed tool and storage locker suite, with four lockable cupboards, two of which were vented, possibly to house pig-dogs or some such. Big off-road tires, with two spares on the back, as well as dual front and back dynema cable-winches, and a heavy-duty jack .
An awning canopy which looks like it might be a full tent version  was fitted to the roof, as well as a roof-rack full of camping and bedding gear like bed-rolls. Packs set to the back of the spare tires give even more storage, though probably not for anything too valuable. Might even be solar shower reservoirs. Extra LED lights, running-boards, a snorkel, a big cow-pusher and a heavy duty suspension upgrade finish off what looks to be a very impressive off-road and off-grid setup. It made me envious!
My own little Toyota Rav4 AWD is rather soccer-mom in comparison. Given that I don't do much off-roading, other than getting to and from some pretty family-friendly camping sites and the occasional trip to the snow, I don't really have much regular excuse for a more workhorse set up, other than in the interests of preparedness. Family utility won out when I got this vehicle. That said, I do keep a variety of useful and important kit stowed away in its Millennium Falcon like storage bays: 
First Aid kits, my in-the-car Bug-Out-Bag, a pretty comprehensive tool-bag, rain-gear, Hi-Vis gear, oil, fishing rods, jumper-leads, a hatchet, some really neat collapsible fishing poles and a tackle box, as well as my trusty Stetson all live stowed away ready for any emergency that comes up. I also have a Hercules Off-road Recovery kit,  which isn't pictured. I also have two removable roof-racks, which strap on to the top, through the door-frames, and give me instant top-side storage when I have even more to load. 
These originally came to let me haul my AquaYak tandem kayak, but have been invaluable camping and both salvage and shopping. Given the size of our family, I often ponder that I would have been better served with a people mover, but the Rav4 has served me well. The boot by itself is spacious and lets us haul a whole lot more than you might expect. It would be awesome to one day have a decent rough-riding, off-road, Mad Max worthy vehicle, and I know one of my friends recently got an ex-Army Land Rover Defender  which will make an excellent bush-basher, so I know its possible.


Wednesday, December 2, 2015

Review: Mininch - Mini tool Pen and Tool Pen

Seen first on Breach Bang & Clear, here:

I am all for small, modular and resilient tools, and there comes a time when you just need to have a handy stealthy tool ready to go.

This is the Mininch - Mini tool Pen and Tool Pen set which I picked up via Kickstarter.

I opted for the full bells and whistles set, which included all the extra hex bits and both the new mini-tool pen, and the original tool pen.

They are for sale, live, here:
The mini-tool pen is milled from 6061 aluminum, sand-blasted finish. The tool itself measures 133.5 mm  / and is 12.8 mm in diameter  and weighs 46 g (with 5 bits inside).

  •  The bits are S2 tool steel and measure  35.6mm  long and 7.1mm in diameter. They weigh a mere 4.5 g apiece. The tool Pen mini comes with 18 bits: 
  • Slotted Bits (Flat): SL1.5, SL2, SL2.5, SL3
  • Phillips Bits: PH00, PH0, PH1
  • Hexagon Bits (Hex): H0.9, H1.3, H1.5, H2 
  • Torx Bits (Star): T5, T6, T7
  • Torx Security Bits: TR8, TR9, TR10
  • Square Bits: S1
  • SIM Eject Tool: 0.8
  • Pentalobe Bits: P2, P5, P6

The classic Tool Pen is made of the same 6061 aluminum, sand-blasted finish as the Tool Pen mini. It does however weigh 93g (with 6 bits inside) and measure up a hefty 150mm in length and 17.5mm in diameter.
 
Both tools are offered in Snow Silver, Gunmetal and Champagne Gold anodization finishes. I chose gunmetal because of reasons, ha!

The bits for the classic tool pen are 36mm long and 9mm in diameter   and weigh 7g each. The bits are not cross compatible between the tools, but given the ranges of the two, thats not really a problem.
 The classic tool comes with:
  • Slotted Bits (Flat): SL3, SL4, SL4.5
  • Phillips Bits: PH1, PH2
  • Hexagon Bits (Hex): H2, H2.5, H3, H4 
  • Star Bits: T10, T15, T20, T25
  • Imperial Hex Bits: H5/64, H3/32, H1/8, H5/32
  • Robertson / Square Bits: S1, S2, S3
  • Pozidrive Bits (Pozi): PZ1, PZ2
    Both the Tool Pen classic and the Tool Pen Mini feature magnetically closing caps, and a really interesting tool seating and shifting system.

    Inspired by “Pop-A-Point” rainbow pen & mechanical pencil,  the bits all sit within the tool, in hex-shaped lanes, each nesting into the base of the one above it, and held in place, top and bottom, but a steel ring, much like a press-stud is. You shift the bits by feeding another bit up from the back end, and along they go.  Each bit has the sheer support of the hex-shaped tool to support it internally, so they are really effective. You do need a full pen's worth of bits to make them effective, however.

    Cut-out windows in one face of the tool allow you to see the contents and order of the bits stored within, using a very clear icon engraved on the side of the bit. The magnets in the caps don't interfere with the bits, although they don't really effectively allow you to store the caps when using the tools.

    Between the range of bits offered, and the ease in which they all store, either internally for your most-often used sets, or in the solid, flip-top bit cassettes you can get a pretty wide range of tools in a very dense package with either of these tools, doubly so with both.

    This is super useful when traveling, especially overseas, when you might find yourself needing to get into something, fix, repair or open some technology that you can't reliably ask someone else to do so, and having a fully decked out specialty screw-driver set is simply brilliant.

    Friday, October 23, 2015

    Reblogging: >>>ISO NSA EDC pics, Hosting Now<<< -MadDuo4You (Everywhere) pic [x]

    Cut and Pasted and swiped wholesale from BreachBang&Clear to boost their signal .....

    my EDC was featured in the last picture ... check out my pocket-dump!


    >>>ISO NSA EDC pics, Hosting Now<<< -MadDuo4You (Everywhere) pic [x]

    If you can decipher the acronyms in the subject, you’re ahead of the game (and you prob'ly Craigslist). Read on to find out how to win $511 credit toward 5.11 Tactical gear.
    MerrillEDC
    Mad Duo Merrill's EDC. #madduo #511EDC
    We’re hosting a 5.11 giveaway… you just have to send nudes post your EDC. Sharing is caring, and we’re giving it all around. We mean that in a no-homo way. Unless, you know, you're into that, in which case carry on with pride and motivation.  Even though we said NSA, we don’t mean it. We’ll pick one lucky winner for the 5.11 credit…it’s NSA for everyone else.
    Rules:
    1. You must use the hashtags #madduo #511EDC when posting your EDC pic
    2. You can post on Facebook, Instagram, Twitter, or Tumblr, the more places you post- the greater your chances are to win. If you post to our Facebook page, you've still got to use the hashtags.
    3. Make sure wherever you post, the picture is set to public
    4. Winner will be selected 10/26
    ReederEDC
    Mad Duo David's EDC. #madduo #511EDC
    CraigEDC
    Civilian as F#@k Craig's EDC. #madduo #511EDC
    What is EDC? If you're seriously asking that (which is certainly possible) then bring it in, take a knee and allow us to explain. Not too long ago IG blew up with a gearcentric new trend that combines people's natural narcissism with the reach of social media and a burning love for braggadocio. Huge numbers of tactitools and tactards posted vast numbers of pictures in which they claim to carry three pistols, five knives (fixed and folders), two rifles (sometimes an SBR), 11 spare mags, a bottle opener shaped like an animal, a beard comb, brass knuckles, flashlight, some sort of metrotactical key fob and a tactical pen. Typically the only thing missing is an IFAK, a Cerakoted dildo and a pair of custom ben wah balls in AOR2.
    If you have seen any of those, then you are probably familiar with the term "Every Day Carry."
    Grunts: braggadocio.
    So we're clear, we think a bunch of those people are full of shit. Unless you’re a traveling, temple indexing pseudo-Asian magician, we don’t believe anyone carries all that shit every day. EDC is (or should be) legitimate every day carry; it is what you carry with you no matter what.
    PettyEDC
    All the lumens, all the grains, and all the magic. Petty's EDC.
    There is of course and another "EDC." That one is Electric Daisy Carnival. Go on and Google image that, you can thank us later… here’s a preview of what to expect from that kind of EDC:

    Check out what some more of our minions carry:
    BradWalkerEDC
    FreddyEDC
    BrianEDC
    MurrEDC
    JoshEDC
    Post your #madduo #511EDC pic before 10/25 at 11:59pm EST to enter for your chance to win a $511 credit towards 5.11 Tactical. Good luck!
    511_advert
    Mad Duo, Breach-BangCLEAR!

    Thursday, August 13, 2015

    Review: Smart Wrench


    Here's a little tool that I backed on Kickstarter, and was really expecting big things from. The idea was elegantly simple. A CNC milled titanium ratcheting wrench, with storage for additional drivers built-in the housing. 

    It was a relatively small project, and only had low numbers, due in no small measure I suspect to the high price, but at the time I was flush, and eager to add some more multi-capable titanium tools to my collection.
    The development was a bit slow, but we had design and prototype pictures along the way, and this is often the case with first-time Kickstarters, so I didn't worry much. Eventually, the tool arrived, and I was really impressed with the beauty of the thing. Smooth lines, lovely graduations and a very smooth screw-on tool housing in the handle. The tool bits were also very nicely produced, and nested really well, without any significant rattle when fully stowed.
    The bits included are: 2mm, 2.5mm, 3mm, 4mm, 5mm hex bits, and a flathead bit, all CNC turned from the same Grade 5 titanium alloy (commonly known as Ti6Al4V) as the rest of the tool.

    The extender bar that marries to each of the bits to the wrench body has a rubber o-ring on the tool-mating head, as well as the two sides where the extended marries to the wrench. These bind the bits to the bar, and the bar to the tool by friction, some other users commented eu were disappointed that a ball-bearing indent attachment wasn't offered, but it seems to work well enough for me.
    The ratchet has a cute engraving to indicate the direction of ratcheting to use, but here is where the tools biggest fault lies. The ratchet slips extensively, and either doesn't catch at all, or slips under what I would call "normal use" in hand tightening or loosening bolts, screws and the like. 

    I was really disappointed with this, and it seems my fellow backers were too. Such a beautifuly put together tool, and when it comes to the primary action, such a disappointment. With some angling, you can get a better or worse ratcheting action, but even then, it's barely functional. 

    Considering I'd want to be using for small electronics and devices access, where bolts are often held in with Loctite glue, and need a fair amount of delicately applied torque to initially shift. Outstanding ergonomic and practical design, such a let down for the functional basis of the tool.

    Friday, August 7, 2015

    Review: Platatac - S&M Side Opening Pouch

    I follow a couple of gear swap-buy-sell groups online, and every now and then something comes up that piques my interest. The last time was my Condor Plate Carrier, which I've enjoyed running in at a few events, and was value for money second hand, for my purposes. A bonus from that deal was the carrier had a couple of extra pouches that the guy "threw into the deal". One of these was the pretty recent Platatac S&M Side opening pouch. I hadn't thought to get one of these of its own merit, but having had one in my collection now, I can see this may have been a mistake.

    One of the first things I noted was that it looked quite different to my other Platatac pouches, which mostly run into the magazine pouch category, but certainly had the same quality of construction that I'd expect of their products. Constructed of 1000d Cordura, and double stitched throughout. The big-enough to be strong, small enough to keep grit out No.10 YKK zipper wraps around three of the four sides, but interestingly, not top to bottom, but from the side. The twin zipper pulls are equipped with nylon extenders which are grippy, but snag-free.


    One of the things I really liked about this design is that the front panel has a broad lip, that can completely wrap over the zipper, giving you a fully Cordura enclosure, even of the pouch isn't fully zipped up, and eliminating rattle, and giving further dust and water protection. Inside, the pouch measures 15cm (6") x 10cm (4") x 4.5cm (1.75"), giving you quite a lot of capacity for personal electronics, like a GPS unit, strobes, a survival tin or small medical kit, or even snacks or drinks.
    The internal of the pouch only has one feature in particular, a wide, broad band of elastic webbing, too big for the strobes I have, but perfect for a 600mL bottle sized item. No extra flaps, pockets or anything to get in the way. One thing that was obvious though is that all the seams were really well finished off, no bare edges or seams to catch or fray. The non-zipper side features a big chunky drainage grommet, which even though it's on a vertical face, gives a good headphone jack access point, or dummy-cord lashing point.
    Attachment is via twin channel PALS/MOLLE straps and takes three rows, to give a pretty solid connection. The "handedness" of the pouch is simply governed by flipping the way you attach the pouch, with the PALS/MOLLE connectors feeding "up" rather than "down" to have the opening side either way. I've been using this pouch on my baby-poo khaki-green gear, and Multcam, but threw it onto my black pack for contrast, but really, it's smooth lines and snag free profile don't really make it stand out. Perfect for all your small S&M needs. Cuffs and gags, anyone?

    Thursday, June 11, 2015

    Wish Lust: Rhino Ropework - MAD Stick pouches

    My mate Shane from Rhino Ropework (note: they're going to be going through a branding change soon, stay tuned) have teamed up with my friend over at SORD Australia to put together a line of pouches for the most excellent and useful MADSticks by Rhino Ropeworks. You'll recall the MAD Sticks are a compact solid breaching and pry bar, and be pleased to note that they've gone through some more design iterations and are even madder! Here are some pictures of the prototype SORD made up for him.

    One aspect that Shane wanted to address, is their very pointyness, which even when looped through PALS/MOLLE, can jab and scrape, and the pen-clip type retaining clip sometimes just weren't up to the rugged outdoor needs of some folks, so he and SORD Australia have come up with this 1000d Cordura pouch. You'll remember the SORD 870 back scabbard I have reviewed in past, well, this is it's littler, sleeker cousin.


    Able to be looped though PALS/MOLLE on packs, or plate carriers, or worn on the hip and thigh, the MAD Stick pouch will be fastened with a Fastex style buckle, with a wide flap to allow ease of access, and secure carriage. A steel drainage grommet at the bottom seats the glass-breaker tip, so you don't get undue poke-age, and they are snug enough to not require the pen-clip, but can accommodate them if your MAD Stick has one.

    SORD used scrap MultiCam to make the prototype, but RhinoRopeworks is likely to stock Sniper Grey tools with black sheaths for urban usage and  Olive Drab tools and Khaki sheaths for field use.

    There is even some talk about Kryptek if there is enough interest (minimum 20 per pattern, I'm told).
    Related Posts Plugin for WordPress, Blogger...