Showing posts with label Surefire. Show all posts

Saturday, October 11, 2014

Review: SureFire - Sonic Defender EP4 EarPro

I've covered a bunch of PPE in the past: body armour, rain and weather wear, helmets, goggles and buoyancy gear. What I haven't really covered before is ear protection.
I have always worn earplugs when out at clubs and concerts, sporting events (RollerDerby all the way!) but also for power tool work and for industrial noise. Generally I have worn the squishy foam earbuds, but have resorted to rolled up cloth, wadded paper and even Blu-Tack in order to preserve my hearing in loud environments. Mostly nightclubs.
The problem with all these kind of earbuds is the loss of clarity. Or you go to over-head ear-muffs and lose even more.


When I saw the Sure Fire Sonic Defender EP4 on Platatac's website, I thought I'd take the plunge with something more professional.

These hypoallergenic, medical-grade polymer framed plugs fit into the contours and folds of the ear, in ways that are both comfortable AND secure. No more foam popping out, these suckers stay in place, regardless of how much I am enjoying the PWEI reunion concert I am at, or rattling myself with a hammer-drill fortifying "the bunker". The triple flange design incorporates a patented Hocks Noise Braker® filter, lowering potentially dangerous noise levels above 85dB by upwards of 24dB whilst the little stoppers are in place, but allow for near-normal range of hearing when out.

I also noted that the high and mid-range loss was quite different to that with regular foam plugs, there was much more clarity in human speech, without the sharp high-end sting that naked-earways might expect, around loud sources. Removable lanyard lets you pull them out have them draped around your neck, or gear and not drop them in the muck, should you need to.

The soft, durable, and long-lasting plugs were comfortable wearing for hours, and I was able to answer a call on my phone with no problems. Being a low-profile design that allows you to keep them in place while wearing a mask, helmet, hat, headphones, or supplemental ear muff means you can wear them without being caught with unprotected hearing for those unexpected noises in non permissive environments ....

Tuesday, November 19, 2013

Review: Fenix - TK-51 light

I had the good fortune to be introduced to Braent Hong,
Asia Pacific Sales Manager for Fenixlight Limited at the SSAA SHOT Expo by my friends at LEGear Australia and made an impression about my love of all things lighting.

He recommended I contact their marketing department, and sign up to be a beta-tester, and after many month of negotiations, I received this pre-release TK-51 model light. This is a BIG light, and it certainly performs.Here it is stacked against the HexBright crowd-funded light, I have covered previously.

Let me tell you about the TK-51 ....
At 18.8cm (7.4") long and having a grip diameter of 4.8 cm (1.9"), and weighing 430g without the batteries, this is quite a serious hand held light. At the buisness end, it features two  Cree XM-L 2 (U2) LED's, in a tear-drop configuration of reflectors.

The body of the light is made of machined aircraft alumiunium, Type III hard-anodized and features a toughened and anti-reflective coated glass facing. The two Cree LED's sit in differing reflectors, one large and deep, the other quite shallow. Both reflectors were mirror finished. The glass was in-set from a smooth lip.

The tail-cap was crenelated, and two of the opposing crenelations feature a strap hole for securing a lanyard. The tail cap unscrews to expose the battery holder, which is well labeled to ensure that not only the battery holder, but the batteries themselves are properly loaded, avoiding any misloads.

Speaking of batteries, it is designed to take three 3.7V Li-ion 18650 batteries, which for those who don't know are the big-brother of the CR-123A batteries becoming so prevalent in the resilient gear market. It will also take six of the CR123A's in place of the 18650's, and even the 3.2V 16340. In the absence of a full load, it will even operate with one or two batteries alone, but at much reduced performance.


the TK-51 has some interesting controls, with individual controls for the spot and flood LED's, which ramp up from Low, to Medium, Medium-high and High modes, each accessible by a tap of the appropriate control. It also features a memory, such that the on/off button will recall the previous settings for both LED's. Momentary Strobe can be produced at any time by holding either LED controller, and cycles between two distinct flash frequencies. Momentary "TURBO" mode is achieved by depressing the on/off button, and gives full power to both LED's. Which is a LOT.

Each LED has a Lumen output of 10, 150, 400 and 900. This effectively ramps up with a button press for each LED control, offering considerable control of light output for the user, given their need. with a Single LED runtime, running from 420h at Low for a single LED, to 1h 45min for both LED on high, there is also considerable operational variety. I found that the buttons were perhaps -too- easy to press, being raised from the surface, and had a very light pressure needed to activate.

Fenix state the beam distance is effective to 425m, with a peak beam intensity of 45200 cd. Put simply, it packs a whole lot of light, and can throw it a long way.

This shot is of the TK-51 with both LED's at high, in TURBO mode, putting out 1800 lumen, and lighting up my whole street. I angled the spot down, so as not to side-blind passing cars at the end of the road.

Low Flood
Low Spot
The low flood and spot were hard to catch on my iPhone 5s, but the reflective paint of my old car glinted well enough, remember, this is 10 lumen
Medium Flood
Medium Spot
The medium options, at 150 lumen match most over the counter service station and supermarket lights that I've had. My trusty "household blackout light", the 5.11 ATAC-A1 is only 103 lumen (but off a single AA) .
Medium High Flood
Medium High Spot
At Medium High, the TK-51 is putting out 400 lumen from each LED, doubling that of my CR123A powered Surefire 6pX.
High Flood
High Spot

At High, the LED's are outputting 900 lumen, which even outstrips my HexBright FLEX, and is just shy of my new car headlights. On top of that, the built in circuitry has both output lock-out, meaning that it will produce the same light output for as long as the charge allows, then drop to the next level, and so on, rather than dimming gradually. At the lowest power levels, the light will blink its LED's three times as a last-ditch indicator of power loss. There is also overheat protection, which down-shifts the output until the light cools. During my use if the light, the finely machined texture on the grip was good in the hand, and the light had surprisingly good balance. I hate to think what it would feel like wielded in anger.

Combined with the mass of the light, its 1m shock resistance, and IPX-8 (2m) water resistance, this is a serious light, for serious use. I bought rechargeable batteries for it, and a charger, which comes wit ha car-adapter, which I think will greatly expand the use I get from this light. Now to find a pouch for it!


Tuesday, June 4, 2013

Review: Civilian Labs - Hazard4 - Loader RG Harness

Ages ago I covered an essential piece of my EDC, my custom made EDC holster harness. This faithful piece has been with me for years, and has reached the end of its life. I had contacted Darrin Talbott of Extreme Gear Labs to commission him to build me something, but alas, he's just far too busy to make a wacky one-off custom job for a blogger.

Check out his Facebook to see the cool Operator gear he makes. That news sent me looking for an alternative.

I was lucky enough to spy the Jerking The Trigger post on the Hazard4 Poncho and following the links, saw that Hazard4 offered a modular holster rig! Tay from HorNest did me a solid, and shipped some over.

Hazard4 are the "Tactical" arm of Civilian Lab makers of fine modular kit. The link I followed brought me to these, this is the Loader rig
with the optional extra anatomic harness.

What it is is two sets of the Escape Rig, one for each side. The two halves are identical, so I'll cover them as just the single unit.


Here are the two Escape halves, with the Anatomic shoulder harness, and another piece at the bottom to hold them together for stability.

The pouches are made of Dobby Nylon and have "PU X 2" treatment, and measure 12.5 x18 x4 cm
(~5" x7" x1.5") externally. The main panel is faced with two hook and loop closing pockets, one that fits my
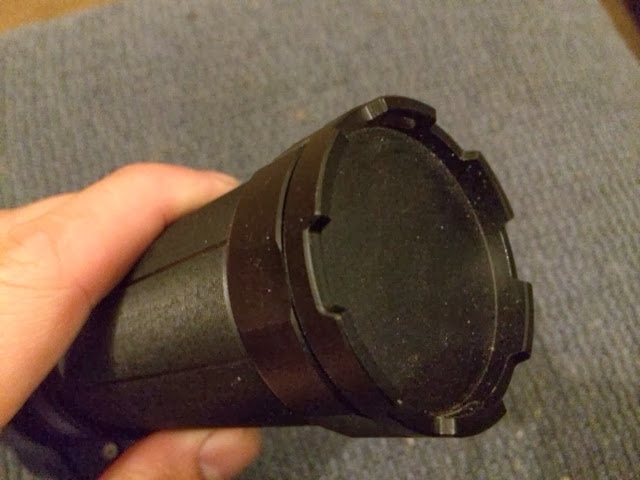
 Surefire 6PX like a glove, and the other which his more squat. Both of these pockets are elastic sided, and open cornered. Bear this in mind when looking to fill them.

In this shot you can see some of the rotating buckles  that are fitted to each corner, each backed with a tab of the same padded material that backs the pouch for wearer comfort.  This is some very thoughtful and innovative design. no more buckle-pinch!

You can also see one of the tri-glide buckles that sit on the middle of each of the four sides. These are for accessory loop and strapping, and I'll get into that a bit later.

The 2013 version of this pouch has all black labeling and non-reflective zippers and fittings, for even lower profile wear.


The "back pocket" of the pouch is an open slot, wide enough for my receipt and card filled wallet, and is mesh-sided to cut weight and improve breathability and drainage. (Luckily Australian money is plastic, in case I ever take a dunk...) You can see another of those elastic-looped tri-glides here, to which I have dummy-corded my wallet. No more dropping it into the toilet, off piers, or leaving it on cafe counters for me!

My iPhone sits in the corresponding other side.

What you cant see is the wide swathe of black loop field, for affixing a hook-backed holster, like the Stick-Up.

You can also see the double zipper here of the inner pocket. Very useful!

Inside that inner pocket, you see where some real thought has gone into making these pouches. As well as the tough nylon outer, they are lined with quilted micro-suede

They also feature a series of webbing and elastic channels to fit your tools and needful gear, I have my SAR Dead Ringer comb and CRKT K.I.S.S. folder in mine on this side. Passports, and paperwork on the other side.

The pocket opens all the way to the bottom, but, like a good admin pouch, it has webbing retainers, keeping it from flopping flat, but catching it at about 45o so your pens, USB sticks, or whatever don't tumble off into the wide blue yonder.

The back pocket has a press stud on webbing closure, with two sizing options, which is great. I tend to clip my wallet in with the big, and my phone in with the snugger length.


The back of the pouch features a belt loop,wide enough for all the belt I tried it on ( both my 5-11 TDU belts, the 215Gear Ultimate Riggers belt, and the PM Leather Hobble Belt.

It also features a press-stud flap option, for quick-release needs.

Why even have a belt loop? Modularity!

 Those corner buckles attach to the included cross-straps, which are two fully adjustable nylon webbing straps, with a press-stud in the middle, to connect the two.

One of the coolest things about this whole system is that it can be worn so many ways.

All of the straps will "double-back" through the buckles for a really secure fit.and the tri-glide attachment points allow you to rig any number of stability or alternative attachment options. The rotating corner clasps mean that the straps stay flat no matter what configuration you wear them in, and they stay upright as you move, depending on how you wear it.

The included cross-straps are a little more versatile than the Anatomic straps, but not nearly as comfortable. The pouches can be worn under the arms, holster style, singly or in pairs, horizontally or vertically, but also on the hips on a sling, as a backpack, slung cross-ways like a bandoleer, on the thigh as a drop-leg or on the front of the chest or even as a shoulder bag.

I used one of the cross-straps to act as a kidney-height stabiliser,  having found that on their own, the pouches slid forwards when i bent over without them.
 Here's the package insert, showing some of the carry options.....


One last thing. Each of the pouches comes with a "Shuttle Pouch" which is made from the same Dobby Nylon, and lined again in the quilted micro-suede with mesh pockets along with nylon strapping. The Shuttle pouch is designed to fit into the "Back pocket" of the main pouch,and be clipped in. It features waterproof zippers and a set of webbing eyelets on each of the four back corners for dummy-cording (mmm, dummy-cord: looks silly, keeps your gear on you...)


This was a seriously feature and function filled set of kit.

I've been wearing it now for a few weeks, getting the configuration and fit right and I must say, it has been one of my better EDC investments for some time.  I wear it every day, almost all day in some cases.

I don't feel "dressed" with out it, and it really is my go-to item when it's time to run out the door; be it emergency, fire, flood or groceries.

Friday, May 10, 2013

Review: HexBright - FLEX Programable light

I'm really excited to be bringing this one to you. This is another Kickstarter project that I backed ages ago, (Launched: May 21, 2011Funding successful : Jul 19, 2011) that finally arrived about a month ago. 

That's a long time, you might say. It was. However, creator Christian Carlberg made it up to me and all the other backers with his constant step-by-step updates, keeping us up to date with every design iteration, testing run and exchange of parts. The included videos of the whole process kept the faith, and my interest the whole, long, wait.

When it finally arrived, I was as thrilled as could be. This is the HexBright FLEX, open-source programmable, rugged, high-performance light. (Here, stacked up against my Surefire 6PX)

Christian pitched the HexBright as "a stylish, rugged, high-power compact light you can use as-is or reprogram however you want using open-source code." and yes, it is all those things!


The Flex has a max light output of 500 lumens thanks to the
CREE XM-L U2 LED super bright LED light source that sits at the pointy end behind the TIR Lens. The lens is made from PMMA, optical grade acrylic.

What does that give me? According to the Kickstarter page, and the Hexbright site, that means you have a High Mode output of 500 Lumens for 1 hour, a Medium Mode output of 175 Lumens for 8 hours or a Low Mode, 50 Lumens for 30 hours. Five HUNDRED Lumens. The Surefire 6Px is listed with a 200L output, and the 5-11 ATAC A1has a 103 Lumen output rating.

For those interested in color temperature, the FLEX sits at  5380K - which apparently is "just shy of daylight". Thanks to all that circuitry, you also have regulated light output, the light stays constant and has a 1.6amp max output, thanks to the USB rechargeable Lithium-Ion battery, which is apparently 3.7 VDC 2400 mAh, 4.8 Amp Protected). All that circuitry however, isn't just for power-metering, it also houses the programability of the unit.


The HexBright Flex comes shipped with default program modes of high (500 LM), medium (350 LM), low (200 LM), and blinky. but by plugging the FLEX into a computer via the micro-USB port, and then loading code with Arduino software. (You need to do some downloads first, both the USB drivers, the Arduino application and then the Arduino code files for whatever programs you want to run.

Part of the fun about this light is that versatility. As well as the press button at the tail-cap, the circuit board also has a temperature sensor, which can be used to monitor the lights heat for emergency shut-off due to overheating, but also can be used to report ambient temperature (reporting through flashes of the tail-button LED's). It also features a accelerometer which enables rotation and tap based signals to be used to govern the light (ie, rotate to dim or brighten, or tap to change settings, or message)

The inner housing rotates out via heavy set threads at the -tip- of the light, rather than the tail, which was a cool addition, and seals up with a well-seated o-ring gasket at the tail end. Accessing the USB port can be achieved by simply unscrewing the tail cap enough to expose it. It also means I can charge it via my solar chargers.


The body of the FLEX was machined from solid hexagonal aircraft-grade aluminium bar stock. both the tailcap, and the internal carrier body with its threaded end are made of the same stock, giving you a rock-solid construction. The tailcap button is a translucent rubber, also fully sealed, allows you to see the green and red status lights (charging, and mode-changing).

 
 At 145mm by 34mm, and weighing in at 215 g  (5.7" long by 1.3" , 7.6 oz) this is big for a pocket torch, but all that body houses the electronics, AND acts as a heat sink for the mighty CREE XM-L U2 LED. The knurled tailcap end is ever so slightly raised above the hexagonal sides of the main body, so the FLEX doesn't sit quite as flat as i'd have liked, but the meaty finger groves and that hexagonal body make it an ergonomic dream to wield or stuff a pocket with. A couple of narrow lanyard holes in the tailcap give you a carry-loop option.

Here's me doing a bit of an indoor test and comparison with my Surefire and ATAC A1, turning a cave into day.

Outside, the limitations of my iPhone to capture good night footage don't do the FLEX justice, but all the same, 500 Lumen is nothing to be scoffed at. I'm not sure if my car-headlights are this bright (bigger, yes, but as bright? I'm not sure).

Once I connected my FLEX to a PC, and messed around with the Arduino programs I found online, I settled with LOW-MED-HIGH, hold for flashy, hold and tap for strobe, and using the accelerometer, "go to sleep after 20 seconds of inactivity/wake on movement" for that "find your light in the dark tent" option. 
Going LOW-MED-HIGH at the tap of the button means I dont dazzle myself unnecessarily, or give my self away too badly if I am being careful about light discipline.  


Here's the comparison shots of the LOW-MED-HIGH settings indoors.


The HexBright FLEX is an awesome piece of engineering, I was really pleased to have received mine, even after the deliciously long wait, thanks to Christian's awesome updates and cute videos. This is definitely going into my EDC load, and my main concern is learn how to code new programs for it!


Non-US enquiries,  contact Christian directly at christian@hexbright.com

Thursday, December 8, 2011

Review: Surefire 6PX

I killed my last set of boots at the beginning of last winter, and the good folks at Platatac had a boot-and-flashlight deal, which I jumped on, and came away with one of these beauties, the Surefire 6PX. At first I felt pretty flippant about it. Sure, its a pretty hard-looking piece of kit. Machined and anodized. Then I noticed a couple of things. The bezel had a line of beading around the lip, spacers, and a warning on the insert said that it gets HOT. It also said something to the effect that the flash was sufficient to act as an emergency weapon.

Well. colour me impressed. My very own photonic-blaster. 

What does it do?

Related Posts Plugin for WordPress, Blogger...