Friday, June 29, 2012

Review: Zazz LED tent pegs


Following up from a recent care-package from my friends at Zazz, I have a second piece of out-doorsy gadgetry to review for you. Zazz often have some pretty funky items, several of which I have reviewed in past, so when they asked if I'd like to see what they had coming up, I was only too happy to see. These tent pegs are an example of the kind of gadget they offer: What you have is a set of four polycarbonate tent pegs, with a X cross section for strength. Each peg comes with an intergral hook, as well as a lanyard hole, to give you several different tie-off options, as well as a somewhat reinforced hammering face, to drive the pegs into the ground. The most interesting feature of of the pegs however are the adjustable LED lights at the top end of each peg.


The LED is activated by twisting the top of the light, and produces a striking bright cone of illumination for its size. Two button batteries provide the power, but I don't have an data on how long each light would last. I suspect you would bet several sets of "dusk till bedtime" out of them. The lights are fitted with a snug swivel, such that they can be angled to project light in 90 degrees. The LED case is not waterproof, so you'll want to be aware of the risk of rainwater ingress.

When upright the LED illuminates the plastic body of the peg, casting a warm orange glow. The package seems to suggest that orange light "frustrates mosquitoes" which seems to be part of urban folklore.


Whether or not it repels mosquitoes, having a ground level LED spotlight lighting a path in front of my tent, angled back in to my vestibule so I can put my boots on or get at my supplies, or warmly marking my campsite seems like a good idea for the kinds of recreational camping that I do currently. I will welcome illuminated tent pegs on my next social camping trip for two reason: it will help me find my tent whilst staggering back from the firepit and they will dissuade other revelers from stumbling into my guy-ropes as they themselves are staggering back from the firepit.

Trailblazing without the blaze!


Thursday, June 28, 2012

Review: Dead On - Annihilator superhammer


A very happy surprise was another birthday present I received from a good friend who knows my proclivities, something I in fact tried to find for myself but had alas been unable to find for myself. So, last week I was handed A Dead On - Annihilator Superhammer as fearsome a smasher as I could hope for in such a package.

This is a 35cm (14"), 800g (28oz) piece of forged steel. Tools adorn it top and bottom. The split head is made up of a solid and 1" square striking face, which features a Dead On® bottle opener at its chin. Good for those post-wrecking but pre-zombie smashing bottle of Nuka Cola (because you don't want to open bottles that are going to go in your mouth to have infected brain matter contaminated chunks stuck to the lip ...). The flip side of the striking face is Nail Puller/Tile Ripper which is a strong chisel edged tool-face, curved slightly to assist in slipping under and levering up what ever you are prying up.


Between the striking face and the "Nail Puller" the "Board Straightener" sits ready to grip and twist. The two sets of teeth are just over 4cm (1 5/8") and just under 3cm (1 1/8") in width, respectively, which is reported to fit standard board sizes (I don't actually know what this means). Below the chisel edged Nail Puller/Tile Ripper lies the frightfully formed Demolition Axe, which curves down almost to the edge of the rubberised grip. This is not a shaving-sharp axe, rather that the steel of the haft is formed to a triangular ridge to an angle of around 45 degrees to the full width of the haft. This leaves a very hardy working edge, and is intended for drywall, thin wooden structures, shingles and conduit. The middle of the curve is notched with what appears to be a wire-stripper, but could also be used as a nail-puller as well. Here you can see the Annihilator in it's current home, which is wedged in the middle of the Bullock Echo daypack and the Bravo hydration Pack combo which I reviewed recently. It fits in the mid-channel of double-wide PALS/MOLLE quite nicely, and nestles nicely behind the main drag-handle, without protruding out the bottom.At just over an inch in width, it is too wide to slot into PALS/MOLLE on it own.


The tail of the tool features several other interesting combination tools. The tip is a rugged ridged point, which could be used for penetration, or scoring as needed. Within the tip is the "Multi Purpose Wrench/Nail Puller", which as suggested includes a hex-bolt socket, and a wide feeding nail puller. The manufacturers suggest using the wrench for releasing concrete forms and other general uses and the tip for smashing, cracking and chipping away at tile, brick or other things deemed "to go away".

So, I felt it was a good idea to put the Annihilator up against the mighty Stanley Fatmax Fubar to give a good comparison. Let me first say I haven't yet done any real smashing with the Annihilator, just waved it around and banged a few posts and bricks. However, at 800g vs 1300g it already comes up significantly leaner. You can see in the side-by-side pictures that it is thinner and narrower. If a slighter tool is what you are after, this is it.


I noticed a slight bend to the left in my Annihilator, I cant tell if this is a design feature or a flaw, but it was certainly of little concern. The Annihilator lacks the curved pry-bar end of the Fubar, but it has the curved Nail Puller/Tile Ripper at the back of the head,  and has a number of other features built in that the Fubar lacks.

I plan to leave my Fubar in my in-car bug-out-bag, but will be sorely tempted to keep the Annihilator in my every-day bag. I am also strongly considering commissioning a kydex holster for it, so I can lash it to my other PALS/MOLLE kit. This is an awesome piece of kit. Who's up for a "lets smash things" video-blog?


Find one on Amazon here:

Saturday, June 23, 2012

Home Front: Grocery Run

So, taking a pause from the usual tactical/hardcore kit, and looking more to the preparedness side of disaster preparedness, rather than response. I've discussed stocking up on supplies before, at least to the extent that we do it here, which is to say keeping the pantry stocked well enough to weather the slings and arrows of misfortune, at least for long enough to regroup and make other plans.

A little while ago I stumbled across an online shopping site called Grocery Run which offers a variety of discounted products, with different deals every day. They tend to do CostCo-like bundles of products, in two's or three's, and allow multiple orders of items too (although usually capped). A flat shipping rate will see an order straight to your door.

The items listed are always canned, or dry goods, no fresh produce is offered, but that's just fine for the kinds of things that we want to use this service for.

Staples, household items and the like, a brilliant way to stock up on items, far cheaper than to go to a major supermarket chain, delivered to your door. We've placed a couple or orders now, and have been very satisfied with the quality and condition of the goods we're received.

I was worried they would be all at "end of life" or "dented and broken" to come at the prices offered, but thus far none of what we've gotten have been in any way store-quality. I can only assume they are over-runs.We saw almost exactly the same stock on the shelves at the NQR shop we went to last week.

Sometimes being able to stock up is more a matter of being able to afford to do so, and the cheaper you can find your produce, the better prepared you can be.

Probably the best part about this particular method of shopping for us is that they take PayPal, which means we could convert our online credit for actual food!


Wednesday, June 20, 2012

Sneak Preview: upcoming reviews

I was a very lucky birthday Coyote and scored the full suite of KA-BAR Zombie Killer fixed blades, which I will be reviewing as soon as I've given them a good solid trial.

Early thoughts: hefty!

Tuesday, June 19, 2012

Review: S&W Tactical Pen

This is the first of my birthday-present posts, and I wanted to start them off with a bang: A Smith & Wesson bang. I'll even jump right in with the anticipated "pen is mightier than the sword" comment here, because you can indeed achieve more with a pen than you can with a sword, but it can be a lot more satisfying to do so with a sword.

Then again there are times in all of our lives when carrying around your favourite piece of live steel, say for tree-chopping or perhaps laying waste to anything in sight is not what the authorities, or your workmates, have in mind.


I understand their fears. I don't agree, but I understand.

For those times, however, you can always fall back on your pen. Especially if that pen is machined out of 6061 aircraft aluminium and designed by the likes of Smith & Wesson. This is the S&W Tactical Pen  and one of my lovely girlfriends imported it for me (with all the trouble you might imagine of Australian Customs) but it was so worth it!

The machining and finish are a delight. The groves along the body lend themselves to a very positive grip in a variety of holds, as well as affording a very comfortable writing grip.

As well as a series of grooves machined along its circumference, there is a broad, raised, cross-hatched region which reinforces the achievable grip. The bullet-headed tip is pointy enough to be an aggressive tool for control or compliance, as well as being sizable enough to present a realistic force multiplier in defensive situations. I would not like to be on the receiving end of one of these in even unskilled but motivated hands. That said, it is also rounded and subdued enough that I have no fear of Tactical baby hurting herself with it if I leave it laying around. It's fairly innocuous until wielded. Which is mostly the point.

The pen part is a regular ballpoint ink cartridge, housed in the reverse end, again, all well machined and anodized. The pen end is capped by pressing the cap on directly, the cap has a nylon liner which accepts both pen and pointy end equally securely and firmly. The butt-cap and the retaining clip both feature the
with the Smith & Wesson logo and name which are laser engraved. Two hex screws affix the spring retaining clip without jutting out overly.

There is even a lanyard hole in the butt-cap, so you don't loose your prized writing implement in some ravenous mutie's head, or if you share a workspace, pens seem to go walking.

This is my first piece by Smith & Wesson, and so far I am very impressed, both by the elegant functionality, the ruggedness and the simplicity of this delightful tool. So, when I'm writing up my next set of notes at work, taking a order list at a cafe or signing my next piece of licensing documentation, you'll have to ask yourself: "do you feel lucky, punk?"


Monday, June 18, 2012

Review: Zazz - Survive Army Fire Steel tool


The good people at Zazz were kind enough to send me one of these little guys this week. I have quite the collection of fire-steel's now, between my Swedish FireSteel (which was a gift a number of years ago, and has a prize position in my EDC) and the fire steels found in both my Gerber Bear- Grylls Basic and also in the Gerber Bear Grylls Ulitimate survival kits.  I really like these pieces of kit. They work in the rain, in the snow and last for thousands of strikes.


This one has some additional features which are worth mentioning. Firstly, a goodly sized ferrocerium rod (all the better for striking with) and a saw-toothed striking steel. The back side of the striking steel is marked with millimeters to act as a small ruler. The body of the striker, as well as being dished to better fit the thumb, is also equipped with a signalling whistle. Lastly, the body of the ferrocerium rod is also equipped with a button compass.
Here are some shots of me testing out the striker, a very impressive rain of hot sparks, certainly enough to light a camp-stove at the first strike, and can get tinder going in no time at all, in good conditions.

Including a compass is a terrific idea, even if it is not up to military grade navigation, it is far better to have -any- compass rather than none at all. Rod and striker are affixed with a nylon cord and a stopper. The cord appears to be sufficient to reduce the effect of the steel on the compass, for rough navigation, at least.

I'll leave you with the packaging, which is quite entertaining in and of its own right.

I'm certainly going to include this is one of my packs, because frankly, not being without a source of fire is something I strongly encourage. Now to decide which one to put it in!

Friday, June 15, 2012

Linkages!

It occurred to me that some or all of you are coming to this blog via a variety of paths. In case you fancied following my posts via alternate means here are a couple of alternate means to stalk me:

Get me in your Face: ApocalypseEquipped Page on Facebook


Join the Tweeps: ApocalypseEquip on Twitter

"follow" my Blogger page: http://apocalypseequipped.blogspot.com/


Or just bookmark my site:  http://www.apocalypseequipped.com

Also, I'm thinking of doing some video blogs, but am unsure of what you'd all like to see in moving pictures with sound and lights, so, link up and send me comments....

Review: Platatac - Harry 1.2 Softshell Jacket


Winter rolled around with alarming speed this year, I felt and I am remarkably displeased with this situation. Winters in Melbourne are typically blustery, damp and cool. It rarely drops below freezing, but we do have some frosty mornings and bitter nights for sure. The time came around when just layering jumpers simply didn't cut it, to either shrug off the rain or cut the wind. I've enjoyed wearing my Microfleece Half-Zip coupled with either my kendo club vest, or any one of my salvaged jumpers but the combined wind and wet have left me unhappy. So, when the opportunity arose to upgrade my winter-time wear, I jumped at it. What I'm sporting here is the Platatac Harry 1.2 Jacket, my new best friend in winter. This is the XXL in BRO Olive, which blends nicely with my other things, and avoids "Melbourne Black" an aesthetic choice.

What can I tell you about this jacket...? Firstly that it is solid. Not heavy, because it's not all that weighty. Not stiff or bulky, because it's neither of those. It is solid. The fabric has a really "present" feel, unlike the feathery polarfleece jumper feel that I am used to.

The outer material is densely woven and has a leather-like heft. I was immediately impressed by this. My usual winter-time option is my Matrix-style floor length leather coat, so I appreciate the solid feel without the weight of all that leather.Secondly, I can tell you this about the construction: It's rugged, and tough. I don't tend to be gentle with my clothes, they get tossed, dragged, stuffed and trodden on. Tactical Baby and Triceratops Girl are always hanging off me, climbing over me and generally using me as a staging / feeding platform. Water resistance I've tested, having trudged around in the rains a few times, and been very happy with how dry I've stayed. The best part has been the wind-stopping. Putting this on, you are instantly cocooned in a double layer of that densely woven nylon and a polarfleece liner. I've had snow-jackets that haven't been as toasty. Speaking of which, it is also flash/flame resistant. Good for Flamin' Moe's, campfire mishaps and for those putting their very only body in harms way. It's also feature packed.


There are three distinct sets of pockets, each recessed under a fold of the outer layer: The first pockets are the regular "jacket-hand warmers" and are exactly what you'd expect. Zippered, deep enough to shove your hands in, wide enough to accommodate the cuff of the jacket (avoiding that "ride-up" effect) as well as having space to stow every-day items like keys, gloves or whatever. A bonus feature is that they are fully backed. No thin nylon mesh leaving a wind-penetrating hole into your cocoon of warmth!

The second set of pockets are a pair of nicely tailored bicep-pockets. Not only are these angled for ease of use by the wearer, but also angled so you don't need to keep stuffing items back in if you happen to leave them unzipped. The cavity is roughly the size of a CD, and is cut such that the lines of the pocket are obscured and blend into the lines of the jacket. A loop field at the upper edge of these pockets adds to that, whilst giving a couple of spots for adding your favorite, or needful patches. Here's one of my TAD Spartan mountaineering patches

Each arm-pit features a double sized zippered vent, which I must say, is an AWESOME addition. Being able to open up a little and vent, whilst still keeping your front zippered up is a great boon, allowing you to regulate temperature whilst keeping your core dry. It also means I get access to the contents of my holster harness whilst keeping my front zippered up. I don't know if this would be of any use to the "concealed-carry" types out there, but it means I can grab my Myki train-card without having to get a chest-full of drizzle.

You can see here that the sleeve/torso junction is well gusseted leaving plenty of mobility, without either bunching up when arms arm lowered, and not making the waistline ride up when giving a "French Salute". Having your arms free to climb ladders, scale fences, lay prone and outstretched all whilst not exposing your belly and kidneys to the elements, or exposing my under-layers to the elements is very desirable. The bottom hem of the jacket features two adjustable drawstrings to further tuck in your parts. The wrist cuffs are hook-and-loop cinch-able, to close off the elements as well.

  The detachable hood also bears some detailed discussion. The hood attaches to the body of the jacket with a solid zipper, feeding into a recessed flap on the collar. It also features two hook-and-loop tabs at each collar-corner, which sandwich into corresponding pockets on the collar, giving a more secure, and broader wind and rain-stop. The back of the hood features two separate drawstrings, one for the brow-line, the other pulls the lip of the hood back from the face. This gives a remarkable amount of customization to the fit and wear of the hood. A third more conventional drawstring at the front of the hood controls the face aperture. It also controls the built in bill, which I loved, as a glasses-wearer, I hate getting rain splatter on my specs.

Where are those third sets of pockets you ask? I didn't forget. They're hidden, concealed in the hemline of the main zipper at pectoral level. This is a great place for my iPhone, I've found, but could just as easily hold ID, passport, a billfold or a a nasty surprise item like my SAR comb,these pockets accommodate a CD case easily, to give you an idea of the dimensions and are cut such that the contents don't bulge or "hang", divulging the position of your hidden goodies. As with the bicep and hand pockets, the pocket lining is fully covered by the polarfleece internal layer of the jacket.

The main zipper line is double ended, and features a chin to hemline tongue to block wind and wet incursion, giving you plenty of ability to rug up, the double ended zipper gives you access to your beltline or regulate temperature. I have had a few issues with lining up the two zippers, but I seem to always have that when it comes to double-ended zippers, but that is really my only point of contention with this jacket as a whole. There aren't any internal pockets, but given how I layer my tops and pockets, this isn't an issue for me. I always have my Holster-Harness on, which is all the internal pockets I'll ever need. This jacket really makes winter go away. Now to do something about my legs!

Wednesday, June 13, 2012

Re-posters, thank you!

Over the last little while, I've been reaching out to some of the supplier and distributors of the kit that I collect (and have been reviewing) and I wanted to take a moment to give a shout out to those folks, explicitly, as a thank you, and a heads-up to you my readers.

First up, I'll point you to my fellow blogger, and gear-fancier, Ninja Space Monkey who has a great eye for the shiney, pointy and awesome that breaks ground on the internet; More than once I've read one of his posts and said "cool, I want one!" and its been a pleasure to exchange some data-packets in that regard.  You can read up on what he has to say and woot about here:
http://ninjaspacemonkeys.blogspot.com/

Next up, my favourite patrons of pantsless-mens wear, the lads (and lasses) of Utilikilts, who produce Seattle finest export, the Utilikilt, in all it's many-splendid styles. I have several these days, and can't seem to have a day go by without someone complementing me in them, or at the very least, asking if my legs are cold, or what I wear UNDER  my kilt. (The answer is always, "boots" ).  A quarterly publication from Utilikilts came out recently with one of my reviews, and they may yet have some of my pictures too, so be on the look out, and revel in the FREEDOM that comes with a kilt, for pants are tyranny!
http://www.utilikilts.com/2012-spring-anti-catalogue/3/

I was fortunate enough to be in touch with someone from marketing at LEGear, following a review of some of their stock, and they posted my review on their Facebook page, which was ace. I look forwards to hearing more from these guys.
http://www.legear.com.au/
http://www.facebook.com/LEGEARAustralia

Lastly, the good folks at Platatac and I go way back. Back in the late 90's I was working just around the corner, and was a frequent window-shopper, and occasional crazy-cool item buyer (the retail guys probably still remember me as "the boar-spear guy"). Since I've been writing this blog they've been great about helping me out with advice, and kit suggestions,  hooking me up with some super deals and posting my reviews on their Facebook page as well.
http://www.platatac.com/
http://www.facebook.com/pages/PLATATAC/385059649151

 So, I just wanted to say thanks to everyone who's been following, re-posting and commenting. I really appreciate the support for my crazy little blog and my desire to share the joy of getting ready for whatever may come!

Tuesday, June 12, 2012

Review: Drop Leg Holster

A while back I attended a comic convention, Armageddon at which there were a number of stalls selling a variety of costume pieces, including a bunch of military looking kit. There was a considerable military cos-play contingent, so it was a good opportunity for me to see how other people wore their costume. Almost all of the costume pieces I saw were just that, poorly put-together costume pieces with bad stitching, un-taped seams, cheep light nylon and flimsy plastic hardware.  I did find one piece that I wanted to add to my collection: This no-name drop leg holster. The material is a stiff quilted nylon, in woodland, my most populous kind of cam. It is a highly adjustable "universal" holster, and to keep the "I don't own any firearms" tradition going, I have it holding one of my Nerf Scout pistols.

As far as a piece of rig goes, its a pretty standard setup as far as I can tell. It follows the same pattern as my 1/2 Leg rig in that it has a vertical belt strap and two thigh straps. A magazine pouch sits just at the forward facing edge of the holster, with a hook-and-loop closure flap.
In this rig, all the key components are adjustable. The top of the belt strap ends in a broad 50mm hook and loop belt-loop, with a hoop of  elastic webbing to give some shock absorption and give for the wearer. A wide Fastex type buckle about half way down gives a fast-on/fast-off option for those times where you need to shake a leg, so to speak, and a thigh-rig gets in the way. At the bottom of the belt-strap is another adjustable hook and loop closing webbing section, which is fixed to the main body of the holster by a plastic hardware loop, again adjustable by hook-and-loop.

Two thigh straps are sewn-in to the back of the holster directly, and following the same pattern as the belt-strap, and features an elastic webbing section, at the body of the holster, with a Fastex style clip. The webbing strap is adjustable with a plastic slide. I found, even with my fairly slim thighs, this was a tight fit. Someone with larger thighs would have considerable trouble wearing this particular model.


The holster section itself is also highly adjustable: Internally there are two strips of hook-and loop, one of which makes up one half of the closure system, the other is positioned such that the loose webbing strip (somewhat obscured by my fingers here) can be affixed to it to cradle the barrel of the holstered pistol. At the top of the holster you can see the webbing tabs with a press stud, for securing the carried pistol. Mine is faulty, and will not "snap" closed. Sign of the low-quality knock-off that this piece is. It also seemed a little "small" and may not accommodate a real pistol, or at least not one with a lighting system.

The holster closes with a three-piece hook-and-loop seam, in which a middle layer (the left side) loops around to the right, and is covered by the long strip of hook-and-loop held out in this picture. This gives a very secure and form-fitting carriage, and the holster is complete.

From this position you can also see that the security-snaps are also adjustable.

All in all, I was happy with this addition to my collection, for what it cost me and what I will be using it for, I will get my money's worth. I would not recommend it however for someone who was going to stake their life on their equipment however. It may well have been made off a good pattern and I like the functionality, the ability to widely adjust its layout and "fit", but this is a theatrical quality piece at best. 

Friday, June 8, 2012

Review: Platatac Bullock Echo daypack

So as I've covered recently, I've been searching for a day-pack to replace my long-time love, the Crumpler messenger bag. Not because there is anything wrong with the Messenger bag, far from it, it's a workhorse, and therein lies the problem. I loaded it up like a horse. I needed to down-size and reduce my tendency to take everything with me, everywhere, like something out of Labyrinth. I think that I have settled on something that suits my needs, and certainly fits my "tough, modular, multi-functional" aesthetic. Chatting with the guys at Platatac gave me the opportunity to get an idea of both my requirements and the possibilities. My primary requirement was one of carriage, but was not a capacity or volume question, but of dimensions. I wanted to be able to pack my "slightly bigger than A4" CSI folder into it, whilst not being a monstrous 48hr or even a modest 72hr bag. Don't get me wrong, "right job, right tool" is a maxim I hold in high regard. I just wanted a little bag. I have previously reviewed the Platatac Nomad and the Maxpedition SITKA-s, but here for your edification and appreciation is the Bullock Echo.Not to be confused with the more basic Echo.


The first thing you need to know is that the Echo is not a stand alone "pack" in its own right, in that it lacks it's own shoulder straps. This isn't as much of an issue as you might imagine, as long as you are aware up-front, and the Platatac retail it's will clue you in right away. The reason this isn't a problem is because of the vast array of attachment options built into the pack, and the option of attaching a separate shoulder straps (as seen in the Kilo Med Pack). Looking at the back of the pack, you can see that it has two 5/7 row deep PALS/MOLLE channels spaced to fit onto a 4-channel wide set of webbing. This is what I use, but I'll get to that later. It also features plastic loop-hardware at the top and bottom corners to attach those removable shoulder straps I mentioned earlier. Six plastic D-loops give even further lashing options. The back of the pack is the same Airmesh material to promote cooling and airflow, and you can see the reinforced webbing drag/carry handle at the top of the pack clearly here too.
 
Note the six cinch-straps (two bottom, two top and two towards the top just above the side pouches.

Lets have a look at the front of the pack. The sloped "kidney pocket" at the front of the pack would be perfect for big, wide angled goggles. I keep my battered old first aid kit , and a poncho in mine. A large loop-field gives lots of patch real-estate, and the three sets of elastisied loops are perfect for cyalume sticks. The zipper is shielded by a lip of the material above, a clever afterthought.

Above the "kidney pocket" is a two row, four channel set of PALS/MOLLE webbing, with a nifty small pocket, good for ID, cards, cash and other small, get-to items. This pocket is covered by a close fitting lip of the material above, so is both well shielded from any possible water ingress, but also from prying hands! You get a good view of the para-cord fitted zipper-pulls here, which give not only a good firm grip, but also greatly reduce the metal-on-metal sound that these can otherwise have. I haven;t thought what I might fit to this particular sport, accessory wise, but it's good to have the option, as need arises. This whole panel, above the "kidney pocket" makes a lid for the next level in, the "Fixed Ballistic Helmet Carrier" which I'll get to in a moment. The Fastex clips that jut from the corners of this flap form part of the closure and cinching system for that carrier. When I look at it like this, it looks like the chest piece of a very small plate-carrier, perhaps it would make a good spot for a mascot to ride, keeping an eye on your six...

Next stop is that "Fixed Ballistic Helmet Carrier". As I've mentioned previously, I don't have access to military/LEO-grade arms and armour, but I do have a pretty adventurous life. I recently bought myself a new helmet, a ProTec Classic Skate, which meets my needs of not braining myself whilst doing dumb things. The problem with helmets for bike and skating, at least, is that they can be fragile, which is kind of counter-intuitive, but mostly a Quality Control issue. The guarantee's offered by the manufacturer tend to revolve around the idea of "one-impact-only", I presume the same kind of rules apply for ballistic helmets. I've read similar things about ballistic plates for body-armour, which is why "training plates" are available. SO, having a dedicated pouch for your helmet, rather than slug off the side of you tossed-around pack, is a great idea. Keeps it secure, out of the muck, and lends it a certain amount of padding. This pocket is mesh-sided, presumably to aid in ventilation.


I can tell you, from kendo, pulling a cold, clammy, sweat soaked helmet on the morning-after is never a good thing. The side-cinch clips can also be attached to the top-cinch clips, to stow contents of the helmet-carrier pocket, by putting that "kidney-pocket" MOLLE flap flat, as opposed to upright. Very clever design. Never ones to waste real-estate, the inside of the "helmet-carrier" is lines with 4 rows of 6 channel PALS/MOLLE webbing. You can see that I use mine to stow my camping cutlery and my metal chopsticks. Day to day, this is where I stow my CSI folder, and loose paperwork I "file" and often, the book I'm reading at the time. As well as the mesh-lined pocket, and the webbing, there is also a full sized zippered pocket as well. A second loop-field tops the back-side of the "helmet-carrier" area, which you can see I've migrated my AFT Angry Ranger patch who is part hero/part role model for me, and a Triple Aught Designs Dog&X-bones glowing rubber Ranger Eyes.


Now on to the "main pocket" of the pack. This tall pocket has a zippered closure that runs the length of the domed top of the pack, but not down the sides, giving a mouth-type access to the internal areas. This means two things; items are unlikely to spill out the sides, but you need to dig to get to the bottom if it's full. I'd much rather dig than have my gear either spill out all over, or the zipper failing, and the bag being useless. With a 4/5 closed pocket, this isn't an issue. Inside are two zippered compartments, one over the other, on the front-side face, and an elasticised Internal Bladder Sleeve, which is a great size for an iPad, as it happens.There is a drainage grommet in the bottom of the pack, and the internal stitching is all top-notch. The seams are taped, bartacked and as with all the Platatac packs and pouches, is make up of the same 1000d Cordura. It's probably well worth noting that as well as the elasticised Internal Bladder Sleeve, there is also a hook-and-loop fastening back pocket, which is where I would be putting a hydration bladder in this pack, although it could also be a place to stow items you want kept extra secure and out of sight.
Above both the two hydration pouches are two methods for securing your hydration bladder. A double sided loop of  hook-and-loop, in the "roll to close" format familiar to those of you with laptop power-cords. The second option is a stitched in loop of paracord. As well as these attachment points, there are three eyelets which I have threaded safety-orange paracord through to show the placement. These eyelets emerge from under three of the eleven loops of daisy-chain webbing that is spread over the arch of the main pocket's lip.

This acts both to shield the insides of the pouch from dirt or water ingress, but also gives the user three options for feeding hydration hoses, or cables out of or into the pack. 


At the sides of the pack, are two additional zipperable pouches, each featuring a three row, two channel set of webbing. These pouches are great for all kinds of accessories, I have my needful tools in one, and lights and compass in the other. I put my faithful SIGG bottle FUP pouch on one side, and the Half-Med kit pouch on the other. These twin pouches feature zippers with the similar philosophy of the main pocket: not all the way to the bottom. They won't spill your needfuls if you forget to zip them back up, with a sizable "cup" being left un-zippered at the bottom of each. They also each feature a drainage grommet, for those times when you find yourself taking a fully-laden dunk. You can note at the bottom of this pic, the shoulder strapping fed through the plastic loop.
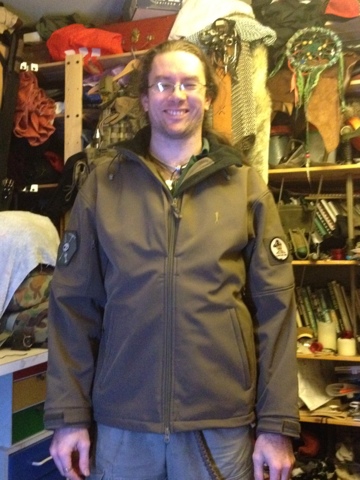
This is how I mount my Bullock Echo, piggiebacked on my Alpha Hydration pack. This gives me shoulder straps, and whilst not as slim-line as i might have otherwise achieved with just stand-alone removable shoulder-straps, enables me to use my existing kit to build myself a functional day-pack. You can see my CSI folder strapped in, and not going anywhere, and between the top, side and bottom cinch straps (each of which also feature a hook-and-loop retention loop to keep the excess webbing under control). You can see here that I have my two extra pouches affixed, and a cyalume stick at the back. I figure keeping it there gives drivers something to see in their headlights as I cross roads ...

I fed the shoulder straps of the Alpha through the bottom plastic loop of the Bullock Echo, to give it a little bit more cohesion, and so far, its been fairly comfortable.

Best yet, the Bullock Echo holds all my stuff! I down-sized, removed duplicates and the unnecessary, pairing back to just the useful and needful.  Here is my usual load-out, just out of interest:


So, in summary, I'm really happy with the Bullock Echo. It has pretty much solved my day-pack requirements, it has an impressive carriage capacity, modularity and the same ruggedness I've come to expect of Platatac kit. Not having been able to get my hands on a set of those removable shoulder straps is something to look at down the track, and I think I can see the advantage in a set of the zipperable MOLLE panels that enable rapid transfer of one pack (like my MEOP Medic Pouch) to another, either to the Alpha, or onto the back of my MAC Armor Carrier, perhaps.


Thursday, June 7, 2012

Home Front: Book Learning - homesteading

Taking a step back from all the boo-yah, of military style packs, pouches and things that go "stab" in the night, I thought it would be useful to do a quick review of some of the literature that I've read and plan to or have been utilising, both in preparedness, and also in recovery from a potential society-changing disaster. Not only that though, these are things that can improve your day-to-day life, if you're into that kind of thing. I have some other friends of similar ilk, Mr Not an Urban Hippie for one, who like to get into this kind of thing: growing, preparing and preserving ones own food, for fun, economy and satisfaction. The fact that he and I share common interests such as adventuring, Japanese martial arts, and raising families is encouraging, if for no other reason, that I know I'm not the only one.

I digress. The kinds of knowledge and skills that are called for to do this kind of thing, seem to be the kinds of things that many of us urbanites either ignore, have never considered, or assume that "someone else will do that for me". Take a visceral example: Meat. Where does meat come from? The story goes that a school kid asked that question innocently answers "the supermarket", and when pressed as to -where- the meat, the actual flesh comes from, answers, "umm, a cow? on a farm?" The same could be said for "bread" or "your shoes".

Well, I like to know how to do this kind of thing myself. Because it's fun to know how, to make things, and it might just be hands some day. I've previously talked about preserving (canning, mostly) and growing our own food items as well as training and practicing "survivalism" and "useful skills" which leads me to the main focus of this post: Where do you go to learn "homesteading"? I myself have turned to books! Four of the book I have used to teach myself how to do some things are pictured here; Guide, Canning, Freezing, Curing & Smoking for meat keeping, Tan Your Hide! for turning skins into leather, The Urban Homestead for its down-home DIY ideas and Toolbox for Sustainable City Living for more of the same.

Perhaps these are "too simple", "too hippy" or "too out there" for your needs, but I want to have an understanding of not only what I don't know, what I do know, but also to have tools at hand to educate those around me. Electricity is a tenuous resource, those of you who have visited third world nations can attest to that. Books, whilst delicate in their own way, are power-independent. I'll be sad, come the EMP, the power station/lines being out or apocalypse, if you are unable to read my blog, and that I won't be able to continue my postings, but having a stash of books with valuable knowledge at hand will be a comfort. Sitting back at home whilst everything is fine, reading up on "how things are made" or planning out my next urban homestead improvement, making delicious and lasting foods.

So, for those of you who didn't grow up on farms, or had parents, or grandparents who taught you all "the old tricks" but still want to be able to do all the "old timey" for when you can no longer just order a pizza delivery online, or duck to the 7-Eleven for that whatsit, I heartily recommend finding yourself a selection of "how-to" book, comparing, contrasting, and trialing out their techniques, suggestions and finding what works for you, and your situation, before there is no choice. It's fun, informative and very satisfying.


Monday, June 4, 2012

Review: SpiderFire Infrared X6V-IR


A while back I reviewed my Yukon NVMT 3x24 nightvision scope but didn't manage to take any pictures of it "in use" as I couldn't manage to work out how to get my iPhone to do a macro-enough capture of the display. However, Omega loaned me her Nikon d3100 and with two tripods and some jiggery-pokey, I managed to capture some images. Sure there is a camera adapter but all I wanted to do at this stage, was demonstrate the features of my new flashlight, the SpiderFire Infrared X6V-IR  which apparently is fitted with an IR 3W CREE LED.  I set the scope up in my hallway, and adjusted as best I could to do a "down the barrel" set of photos to demonstrate both the flashlight and the Yukon scope. Actual view of my long hallway is much clearer through the scope, its a camera focus issue.


The SpiderFire is a machined aluminium body, with 2 CR123 batteries. It features a press button on/off tailcap and a glossy paint coating. The reflector is pretty standard geometry and finish, and there are three LED emitters bundled into the lens housing. It comes in a hook-and-loop, and PALS/MOLLE compatible nylon pouch, with a retention lanyard.

The light is powered by two CR123 cells and when viewed from anything other than an acute angle, there appears to be no discernible visible glow. At acute angles the emitters are a strong deep red, and can generate a recognizable red flash when looking "down the barrel" to an observer downrange. This caused me some trouble, which I'll get to later.

So, some further testing: My hallway is around 10m long, to give you an idea of the scale here, and again, the poor-focus is my inability to photograph the internal screen of the Yukon, rather than the optics of the Yukon itself. Compare the top picture which is the passive view of the hallway, with this one, where the internal IR illuminator of the Yukon is on.  The beam is tight and bright, and when viewed directly puts a nice ~1m circle in the center of the field of view. As I previously reported though, both the scope and its internal illuminator have indicator lights which essentially shine directly into your off-scope eye and also drains the single CR123 battery in the process.


This photo is of the SpiderFire held just above the Yukon, and shone down the hallway. It really drives back the shadows, filling the doorway and the far end walls. I took it out into the night of my suburban street, and could see its light glinting off treetops in the next street, but a bit ineffectively, given the ambient lighting from streetlights and the city. It cast a useful beam at around 25m down a somewhat darkened laneway, which gives an idea of the range.

Last time I used my Yukon at Stargate Lasertag LRP, I had also wanted to have an additional source of IR illumination, not only to boost the range, spread and brightness of what my Yukon can discern but also to have a light I could set up AWAY from my position. As stated, when active, the IR lights cast no visible beam, but the actual emitter was visible and brought unwanted attention to my position. In future, where possible, I hope to set the SpiderFire up at a pinch point, and stand-off, gaining the benefit of a passive scope, with the added illumination in a dark place of my choosing.

IR is an interesting technology, night-vision is an all-around awesome concept, and I wish that more goodies were available for me to order to play with. The SpiderFire certainly makes a good start in this, and definitely adds to the ability and depth  of penetration into the murk in very low light and total darkness situations. When all the lights go out, I'll be glad for the ability to see into the Abyss, without the Abyss being able to look back at me.

Related Posts Plugin for WordPress, Blogger...