Friday, August 30, 2013

Review: Manta Strobe helmet light (replica)

I've been meaning to post about this for a while. As my regular readers may know, I simply can't get enough lights. I love lights, and illumination. As one of my favourite designers states "Dark Sucks" 

I saw one of these little guys in my feeds and instantly felt the need to add one to my collection. However, there were two problems. First and foremost was one of the banes of my existence. 

"This Item is ITAR controlled and cannot be shipped or carried outside the United States without express written permission from the United States Department of State. We do not export outside the United States. PERIOD!"   

IR products are just so hard to get from American producers because if this. The second reason was almost irrelevant as a result, its a pricey gadget. I was super lucky when I was sent the
CJ Engineering - Phoenix jr IR strobe .

However, the original Manta Helmet Strobe from S And S Precision looks to be an excellent addition to many real-world users kits, so I wanted to see what I could find.

I managed to find a replica-for-paintball version by Canis Latrans Trading, out of China. These are the same folks that supplied me my "Ops-Core like" bump helmet . Now, before I go into the item, let me reiterate, this is how I could get one of these, legally. It is a replica, so is unlikely to have gone through rigorous QC and testing that an original from S&S would have. I wish I could have a real one, but I can't. This will have to do. 

However, that said, it works a treat!

The manta-ray shaped device is 7.5 cm (3") long, 5cm (2") wide and 3cm (1.4") high. It is curved on its underside to mate with the curve of a helmet and is covered in hook-field for attaching to loop-fields.
 
The underside of the unit (the tail) features a textured button which when depressed, triggers the IR strobe. Because of the risk of switching it on unknowingly, or to confirm that it is in fact on, the strobe has a vibrate function, which gives three pulses when it is activated. This is an awesome feature, and can be easily felt with the helmet strapped on, but is essentially silent.

There are two buttons on the side of the tail, recessed, which trigger the "overt" green strobe. This can only occur when the strobe has already been put into IR mode, and then only by a three second squeeze of both side button simultaneously. This is a great feature, especially for those users who may need to be very aware of not breaking light discipline.

The strobe takes one of the CR123a batteries so prolific in high end electronics and lights these days.
The IR strobes uses three IR LED's, which when activated are barely perceptible within 2 meters to the naked eye, as three faint, pale pink blinks. I have pretty good night-vision, and beyond 2 meters in a blacked out room I couldn't see them. 

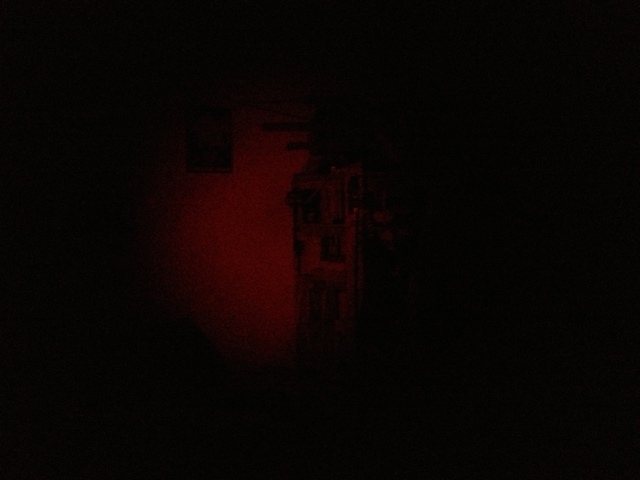
The overt, green strobe however, was almost painful to look at, with its twin lime green LED's that all but lit up the room I was testing them in. 

I had a go capturing the IR and overt green strobes both directly with my iPhone, and also down the barrel of my Yukon IR scope  and that really demonstrated the efficacy of this light.  The IR LED's cast so much light that the reflection made the blacked out room.

So, for my use as an emergency beacon  when I am out adventuring (like when I was out testing the Aquayak Snapper Pro, or running about through the mountains) I think it will work out just fine. I want to be able to be spotted by Search and Rescue, if the need arises, or just stay out of oncoming traffic's way. It is a rugged little toy, waterproof and bump-capable. I'm going to pack it whenever I go adventuring, and see who is watching ...

Visual light test of Manta

IR test of Manta, through Yukon IR scope

Tuesday, August 27, 2013

Review: Strike Industries - Battle Case iPhone4


I tend to burn through "regular" phone cases, which is why I have had ones like the Opt Silicone Armor as my every-day case, and collect "extreme use" cases like the Snow Lizard SLXtreme and the Griffin "Mossy-oak" Survivor and as cool as they are, they are overkill for my regular use. I need something that will give me easy access to all my ports and buttons, protect my glassy faced iPhone 4S from drops, spills, and sticky faced and fingered small humans, without being a brick on the board room table.

I has spotted the Strike Industries - Battle Case when I had been cruising their site for the Tactical Sling Catch that I picked up, along with the Picatinny vertical sling-loop and later on, the Simple Plate-Carrier satchel they were kind enough to send me, so I finally got around to placing an order.

What had initially caught my eye, other than the slim design, was the large "quick pull loop" not unlike the Magpul loops available for magazines.
I also really liked the extra features hidden away within the case.  I am a sucker for extra features, as many of you will already appreciate, but these two were very simple, and elegant additions.

Recessed into the case was a large depression, which Strike Industries have designed to fit a special kevlar insert (for non-ballistic protection only) to bolster the protection offered by the stiff but flexible thermoplastic of the case. A second recessed spot allows a protective lens-cover to be inserted.


 The outer face of the case is macroscopically honeycomb patterned, with a fine grained rough texture for added grip. I really liked the pattern, it is sufficiently contoured to add grip, without being overt. A very subtle surface.

I had wondered about the lack of padding, and how that would protect my phone, but I can honestly say that I've had no reason to have been concerned. I've not changed my usage, and the phone is just as whole as when I had it wrapped in silicone and wire.

The thin side edges are even further textured, with these seven notches in the front and back, adding to the positive grip you can get on it. Between these, and the quick-pull loop, through which I usually curl my little finger when holding the phone, I have not once dropped it, and have frequently carried the whole thing in my teeth, mostly by the ring, when I've needed to go "hands free" without wanting to re-holster my phone.

That loop will easily fit three fingers, two when gloved, which also means that I have been able to secure my phone into much tighter pockets, as I can yank it out easily, with no snagging, no hanging-up just a clean pull.

The honeycomb pattern on the surface of the case really adds to the grip, as well as offering a nice visual pattern. Each of the hexes is also textured with a fine leather-like pattern. This pattern is not unlike the Magpul magazine pull-rings, it fits really snugly in the hand, lays flat on a car bonnet, dashboard or whatever, even at quite an angle, without sliding.


The sides of the case have an extra layer of gripping features, the seven notches on the bottom half of the edges. These really add to the drop-free design and give me a lot of confidence, even when I don't have fingers curled through the quick-pull loop. The leather-like patten continues along the sides as well.

As well as the large loop, there are two eyelets that not only add to the flexibility of the loop, but also adds a connection point for a lanyard, if you don't want to add it to the main loop itself.

I found that my only gripe with the case is how well it fitted. Ironically, the snug fit of the screen-edge lip tended to lift my screen protector, leading to it bubbling from time to time, mostly as a result of the alarm-clock-dock I use not accepting such a hard-core case (this is true of almost all my cases, as it happens, no fault of Strike Industries. I suspect if I didn't continually pop it in and out of the case, that wouldn't be an issue.

I haven't had any issues with the factory-standard accessories for the phone, but some after-market chargers need to wiggle the case apart a little to get them to seat properly.Totally workable. This is one of my favorite cases and it gets a lot of positive comments, even at work. This is a top notch case, that offer slimline protection for my favorite electronic urban-survival tool!

One last thing, the fine folks at Strike Industries also sent me a deluxe set (including lens covers and plug-caps) of their even MORE rugged, spring-enhanced iPhone 5 SHOX Battle Case to review, but alas, I don't have an iPhone 5 .... so, if you live locally to me (Melbourne, Australia), hanve an iPhone 5, and an interest in a rugged, hard-core and stylish case, hit me up, and I will send it your way, with the proviso, that you give me a review to publish!

Wednesday, August 21, 2013

Review: Benchmade - 8Med Rescue hook

Back in April I picked up a couple of Benchmade safety hooks from LEGear.com.au, one I have already discussed, and the other, I put in the MOLLE visor panel in my car and promptly forgot to cover. I knew it was there, part of my cross-check when I get in the vehicle is to check where my essential kit is, and there it was, one day when I was wondering what to cover next.

As with the 5hook, and the Gerber strap cutter I covered before it, the principle element to these tools is the safe-on-skin cutter at the business end but this particular tool has more going for it than just a blade. This is the 8Med Rescue Hook.

Made of a single piece of 440c steel, which is a pretty standard tool steel, Is made long enough to take a full knife type grip, with a ring at the far end to loop a finger through, along with a crenelated spine and three ergonomic finger notches in the leading side.

The finger grips are sufficiently widely spaced that it can be operated easily with full fingered gloves, surgical gloves or even bare handed with ease. I found that I could wield this with both my little finger in the ring, or reversed, with my index finger through the ring, not dissimilar to how I might wield my other Benchmade blade, the CQB Dagger

The blade has the same 0.5" "length" as is sharpened not only on the inside of the back, but also the arms of the edge, meaning that it will cut at an angle, before the main belly of the hook bites in. Especially handy if you are cutting in an awkward possition. The blades reported to have a hardness of 58-60 HRC which should not only keep the cutting hook keen (as they aren't easy to sharpen) but also to maintain the wrench slot from deforming when opening cylinders. More on that in a moment.


This model (as there are several in the Benchmark 8 range) has several additional features that the basic models lack. First up is the O2 wrench, which enables you to open compressed oxygen cylinders, it's placement means you get the whole length of the tool as a leaver to assist in this, as needed, without compromising your grip, or need to remove the tool from your hand, especially useful in a crisis when motor skills might be compromised.
It also features a notch at the tip, which Benchmade describes as a "syringe popper". I wracked my brains about this, and looked at some of my medical kit, as well as some of the lab supplies I have access to at work, and am as mystified as these guys... 

There is also a  notch inside the finger ring that should also fit an O2 regulator, but I'd be more likely to use it to keep a lanyard tape secured. 

On security, the hook comes with a soft case, which is fitted with PALS/MOLLE compatible loops on the back, which doesn't add to the profile significantly, but expands the connection options. The interesting thing about the case is the elasticised cap. With a hook-and-loop closure to begin with, this case has an additional feature, in the band of elastic wrapping around the top of the case enabling you to pop the top and the elastic snags the lid out of the way, to prevent incidental restriction to the finger loop.

I really like this hook, it fits the hand nicely, allowing a full, solid grip for rapid and continual cutting action, key when you need to rapidly strip a casualty, or in my case, might need to rescue someone in distress from a harness or bound up in rope. Having this in my car gives me a sense of security that I have an escape tool handy, for myself, my kids and other occupants of my car or those at the scene of an accident or disaster I come across. 

Sunday, August 18, 2013

Review: Ti2 Sentinel S4S cache

Following on from my brief review of the Ti2 SentinelX macro-cache  the maker, Mike Bond was kind enough to send me an example of his previous project, the Titanium Ti2 Sentinel "S" series.

This cache (seen here on a ring along side my other keychain toys the Jil Lite Constel LED microlight and my Cybernetic Research Labs Tactical Whistle.) is made from grade 2 titanium, purported to as strong as steel at half the weight, I must say, I am enjoying the booming Ti gadget boom that we are in.


This piece measures 0.5" x 2.75" externally, and has internal dimensions of 0.37" x 1"
The best part of the design is that it will open from both ends, a philosophy that Mike has passed on to his Sentinel X project as well. This means you can access the contents of your cache from either end, or clear a blockage.

As well as the water tight o-ring seal design. The threading is a custom square design, resistant to cross-threading, less susceptible to damage from dropping and turns eight turns to open into three turns, through its efficient mechanism.


There are fluted, ergonomic grip areas on both the end and tail caps, and the end cap has a large ring slot which can host a wide range of rings, clips, and lanyards.

The titanium has been stonewashed, it is corrosion resistant, sleek and satin finished, these are some very well machined caches. You should check the range here...

I found that the S4S was very small, too short for a needle and thread but perhaps it would work well as a pill fob, a stash for contact info. The longer and wider models would easily accommodate a lot more, but for me, I have filled mine with a very fine product from Black Phoenix Alchemy Lab's, for when I need to mask my natural scents ...

Friday, August 16, 2013

Review: Storm Rider YAK PFD

I'm really excited about getting my first kayak this weekend (more on that later) and that reminded me that I had not yet covered the Personal Flotation Devices that I tried out when I did a trial of the Aquayak - Snapper PRO. When you're out on the water, a flotation vest is just as crucial part of your loadout as a bump-helmet or your shark-stabbing, line-cutting knife (ok, perhaps that is a stretch).

It's PPE of the most basic kind.

In this case, I was lent a StormRider YAK PFD by the good folks at AquaYak and I wanted to show you what made it an essential part of my time out on the Snapper PRO.

These very solidly constructed vests consists of three components; the two front panels and a back panel. It features open sides with adjustable webbing to ensure a good fit, whilst giving you freedom of movement for paddling and water-borne activity.

The back panel also featured a drying hook, with a built-in nylon D-ring
The webbing attaching the front panels to the back are fixed at the shoulder and at two points on the flanks. Between these three points, the harness is highly adjustable, even down to to my light frame.

It might seem strange that the front of the vest is -not- adjustable, its three Fastex clasps hold the front panels but this in fact provides an important safety aspect. By massing the buoyant material at the front, when in the water, this holds your head up and out, ensuring the best  position for breathing. 


The brightly coloured exterior of the vest allows for easy search and rescue in the event you are lost due to capsizing, or bad weather, but you'll note that the insides are black, an unintentional asset if being less visable is desirable. Both front panels comes fitted with several zipperable pockets. The use of mesh and the water-shedding nylon in the pockets, as with the rest of the construction gave not only a number of ways to store important gear, but also to do so in a quick drying and draining fashion.


I found this very useful, as I dunked myself several times whilst in the kayak.


I was really impressed to note that the zippers were all of noncorroding plastic.

An inner retention lanyard provides an even more secure option for survival, signalling or orientation gear.

I stored my iPhone in its SLXtreme waterproof case, my car keys and the like whilst testing, all held snugly and safely.


I also noted that there was a more subdued OD and coyote-brown version of the vest, which I think will be my personal selection.

I've worn PFD's before, as well as SCUBA Buoyancy Control Device, and I really liked the simplicity, and design of this one.

You put it on, strap it to fit, and can all but forget about it when out and about on the water. In an emergency situation, you want to have the best equipment on hand to protect yourself and others from the environmental hazards you will be facing. A well made, worn and maintained PFD is a must for any kind of action on the water you might be facing.

Wednesday, August 14, 2013

Review: Platatac - SGL 5.56 stacker pouch

I haven't done one of these for a while, and have been feeling remiss, but here is another pouch, my not-so-secret guilty pleasure.

I've been trolling their eBay listings, and found this great item from Platatac. It's well worth your while to have a look at these "factory clearance" listings for a chance to sweep up some unusual, trial or end-of-stock items. This pouch for example, is their SGL 5.56 Stacker, not listed on the new updated website. Collectable, even!

It is clear that the SGL stacker shares lineage with the much loved FUP and Mk1 60rnd pouch. I also noticed that there were, as I've come to expect, some very interesting design features and little extras tucked away.

Made of the rough and tough 1000d Cordura I've come to expect of Platatac accessories, the pouch consists of a long tongue of webbing, sewn into the base of the front of the pouch, which then feeds into itself, over the top of a stiff webbing loop that acts as a base-stop. The tongue travels up into the pouch, over the top, and fixes with a broad band of 4 loop-field strips.

Running from one side to the other, in the middle of the pouch, is a 2" band of elastic, which acts as a built in compression strap, locking contents into the pouch. The band is sewn into the backing panel, and runs freely under the middle two bands of loop tape that make up the closure system on the front of the pouch. This makes the pouch extremely low profile when empty, as the elastic binds it right down.

I was interested to see how the bottom loop of webbing acted to hold contents in, but when combined with the long, wide webbing tongue, it locked in nicely, and didn't give me any worries about storing my iPhone, a notoriously droppable commodity.

Here's one of those little additional features I was talking about. When I first got the pouch, i just dropped the tongue through and flipped it over the top. It worked, both closing out the bottom against the webbing loop, and made a positive lid closure over the top and front.

What I didn't initially notice, till I looked properly, was there was a big wide band of loop-field running about mid-way through the pouch, that allowed you to feed the tongue under it, giving a much more secure connection, ensure that you don't accidentally feed a magazine "behind" the tongue to drop the bottom inconveniently, but also with its loop-field fronting, allows you to back-feed the hook-ended tongue in to make a more "high-speed/low-drag" option for those of you who like that sort of thing, without needing to cut away the webbing.

The backing is standard for a Platatac pouch, with twin sets of PALS/MOLLE loops and press-stud closure tabs, but its also worth noting the built in loop, for extra attachment options.

I was uncertain how this pouch would stack up (so to speak) but was pleasantly surprised. Obviously, its primary purpose is to house 5.56 magazines, and certainly has the length to accommodate quite long options, without the bulk of a full-cupped bottom like the FUP. This does however mean that it is somewhat unsuitable as an accessory pouch, as small items will be at risk of falling out.

 This is a really interesting piece, and it was also very interesting to see how the range has developed.

Stay tuned for more as they come up!

Thursday, August 8, 2013

Review: Fishbones - Fishbone gear ties

Having covered the most excellent Piranha (which was their v2 product, but I got those first), I wanted to give the little sibling a trial before showing them to you, to get a better feel for their utility and differences.

These are the Fishbone gear ties (v1). You can see from the picture here that there are in fact three metals offered 1) 6061 T-6 Aluminum 2) 304 Stainless Steel and 3) Titanium. The aluminium and steel versions share the same exact geometry, where as the titanium is a little more "rounded".

The guys from Fisbones were good enough to send me a few of each to play with, but I've mostly focused on the steel ones. Why three options? well, in their own words:

Aluminum:
  • Resists corrosion
  • High strength to weight ratio
  • Can be anodized in different colors
  • Non-magnetic
  • Nonsparking
  • Light weight


Stainless steel:
  • Resists corrosion
  • Bright appearance
  • Normally non-magnetic
  • Great fatigue and impact resistance
  • Durable

Titanium:
  • High strength to weight ratio
  • More than twice as strong as aluminum
  • Almost half as light a steel
  • Non-magnetic
  • Excellent corrosion resistance

Measuring in at 14mm by50mm (½" x 2") and 3mm (1/8") thick, the Fishbones are smaller and thinner than their bigger siblings, weighing in at 3g  for aluminium and 9g for steel. When subjected to strain testing (by the makers), the aluminium slightly deforms at 36kg (80lbs) and has major bending at 72kg (160lbs) Note: projected total failure is only (135lbs). The stainless steel Fishbone only took a slight bend at 72kg (160lbs) in initial prototyping. Subsequesnt  That's a fairly impressive static load for a gear tie. Obviously, as with the Pirahna, these are not climbing rated, but for tying down gear, rigging tent flys or washing lines, that is heaps. 

As with the Piranha there are numerous ways to tie and apply the Fishbones. I especially like the detail given by Brent and Eldrick in their Kickstarter proposal in their examples of how to use them.


The geometry of the Fishbone lends itself to tie-downs, with a wrap and tuck type locking, using a Prusik-like friction bind on the paracord, and sharing the load between the ribs of the tool.

The eye-hole, and "gill-slot" give solid "head-forwards" ties, whilst the forwards facing pelvic-fin and ventral ribs before the tail fin give you three separate attachment points. On the dorsal side of the Fishbone, there are four shallow notches, and one deep one, all allowing purchase of your cord, and letting it bind tightly in a variety of configurations.

One of the things I really liked about these, are the clean straight lines, which enabled me to rig them to act as a zipper pull without having to worry about snagging, in such a way that I could also quickly detach them and use them to rig a line, or tie a bundle.

The stainless steel versions acted as a nice plumb-bob when rigged correctly, the nose pointing down, in a clean straight line.

I usually have a couple of lengths of 40cm paracord in my pocket, and idly fiddle with these at meetings and on the train, working out new combinations of ties and looking for new uses. Alas I had oped that the tail would fit into the A/C vents on my train, to enable me to latch myself in when there was no hand-hold but no.

I've found the Fishbones to be very handy little gadgets to have on hand, especially when, as often happens, I have had to bundle something up that I know I will need to unbundle shortly and quickly. Blankets, jackets and jumpers. Tactical Baby's favourite woobie and the like.

I think these will make a good addition to my cord and carriage kit, giving me quick-release tie options, and keep all my things snug and squared away without having to worry about knots binding up and keeping me from my fit when I need it. They make great gifts too!

Unlike the Piranha, the Fishbones didn't interlock neatly, so a 'head to head" clasp wouldn't work. No great loss though, there are plenty of other options.

The guys behind these even posted their original concept built to Instructables so you can have a go at making your own low-strength wire prototype version.

Tuesday, August 6, 2013

Home Front: membership


I've had some fun recently finding and joining up with some new organisations, for fun and education, licensing and commeradery.

I've been a member of the Victorian Kendo Renmei since 1998, and by association the Australian Kendo Renmei This has provided coverage under the Weapons Control Acts in Victoria for a number of items in my collection, as well as my practice of kendo and its associated arts.

To supplement that, and on top of my exemption by the Governor in Council as a bona fide collector, I also joined the Victorian Historical Edged Weapons Collectors Guild . I also signed up for my Paintball Marker License, after my run in with customs whilst trying to get parts to build a super cool looking lazer-tagger for the Stargate LARP I am involved in.


Then there are the more fun and exciting memberships. I've been a member of Immanent Threat Solutions Tactical for a couple of years now. They specialise in information, training and equipment to deal with, as the name suggests, Immanent Threats. From knot-work, to lock picking, survival navigation to urban threat assessment, as well as working with several groups of makers to produce some cool kit and reviews. I'm very pleased to be a part of their community, in my small way.

Zombease is a lot like my own writing, but specialising in Zombie Apocalypse scenarios. I really enjoy reading their content, Jake Sepulveda is a great guy, and I have enjoyed getting behind his line, and backing his projects.Try out the "Choose your own adventure" section and see how you go. Read all the guides first, and mentally equip yourself.


Zombie Squad is a philanthropic organisation dedicated to first response and support for ALL disasters, zombie or otherwise. They pride themselves on their mission to "educate the public about the importance of personal preparedness and community service, to increase its readiness to respond to disasters such as earthquakes, floods or zombie outbreaks."
I have been proud to help in their efforts to support the Hurricane Sandy relief drive (2012) and the Oklahoma Tornado relief drive (2013). Like Zombease, they also offer "zombie apocalypse" training and guides, but also apply these lessons to more mundane situations, for the benefit of their communities.

Lastly, and most recently added to my list of "professional associations"  in the field of Apocalypse Survival, is the Zombie Eradication Response Team. Who also offer real-world training for disaster preparedness, from a more martial perspective, that is an "organization that uses the Zombie as a metaphor for any one of numerous natural or man made disasters that have and will occur in our lives." I signed up and got some cool patches from them as well. I look forwards to connecting with other folks from "Squadron Q" (Australia) and maybe see you at an event.


I suppose my Health Informatics Association of Australia and Australian Society for Microbiology could also count ... I certainly keep an eye on the bulletins ...

Monday, August 5, 2013

Review: Mainstay Emergency Food Rations


I've been feeling really remiss as a prepper without a stock of MRE's and other per-packaged survival food. Like a cowboy without a Stetson, or a fisherman without a line. Military style MRE's are not easy to come by in Australia, but I was lucky enough to spot some silvery packets of goodness in the display window whilst visiting Global Gear (who have supplied me with some fun kit in the past).

I did some research online and it seemed that these were the real deal. These are the Mainstay Emergency Food Rations. These high density food bars come in three varieties, in 1200, 2400 or 3600 Calorie packs. Each of the three varieties consist of a vacuum sealed foil sachet, with extensive nutritional information, and contains a block of very solid food.

The 1200 weighs 228g (1/2lbs)and breaks into three measured blocks.

I grabbed a sample in the "Energy Bar/1200" size from Global Gear and opened it up to see what I got.

It's always a good idea to test out something like this, before you commit to perhaps a box full of something awful, but I was pleased to find that the Mainstay bars were quite palatable. A solid, slightly brittle block that for all the world felt and tasted like a coarse, buttery shortbread, with a light lemon flavour and scent. I ate a block of it, and whilst not filling, was certainly a hunger stopper.

Quite palatable, if crumbly, I can see these being a fast and easy way to keep your energy up in a challenging situation, especially if water was available. I was distinctly aware of the gritty texture, much like a very sweet, hard cornbread.

 I found that I left the uneaten portion in its wrapper and came back to it a couple of weeks later, to no noticeable effect. Properly sealed, they are designed to have a 5 year shelf life, but I expect they would still be edible long after this.
 
This ration is marketed as a "complete food" meaning that no other food intake is needed to meet all nutritional requirements in a survival situation.  Having a look at both the ingredients, and the "percent daily values" listing, it is possible to determine that these bars are indeed jam-packed with nutrition, and trace elements. Certainly not something you'd want to LIVE off, but life FROM, for sure.

Based on USCG and SOLAS standards, two blocks suffice to sustain life in "maritime settings" whilst three (a full packet) are recommended for land survival. Given the insights I made in looking at survival nutrition, and the availability of the 2400 calorie Mainstay ration in bulk from SurvivalStorehouse.com, I opted to buy a number of these from , as "get out of trouble" supplies.

I plan to stash some in my car, in my bug-out-bag, for when we go hiking or camping,  and at work, for those times when I just can't get out because of marauding hordes ...

Friday, August 2, 2013

Review: Princeton TEC - Switch MPLS light

I wanted to get a light to mount to my helmet, especially following my experiences with the helmet cams offered as part of the IRL Shooter: Patient Zero zombie experience which was that they came out really dark. Having easy to use illumination is so very useful in any low-light situation, especially if you need your hands free, or just want to light up where you are pointing your head. In front, or down at the ground.

That's where the Princeton TEC Switch MPLS comes in.


At just 17g, and running off 2 2016 Lithium Coin Cell batteries, this is not a heavyweight torch, but rather a very specific light source for specific duties. 

A single tap of the button gives a low light red LED glow, a double tap, the high intensity red LED light and with a two second hold, the
10 Lumen white LED is activated.

IR is also an option, with the right model. I didn't get the IR version.

The long, firm swan-neck allowed me to adjust the beam as I needed, whilst remaining stable and out of the way. The locking mechanism was also very secure, with a twist and multiple click system, which also gave a little bit of adjustment customization.

MICH Helmet and MOLLE mounts came standard with the MPLS, whereas the Picatinny Rail and Helmet Rail system mounts came in a second, accessory pack, be aware what you need!

With a 36 hour runtime, I expect that I will get a lot of use out of mine, not only mounting it to my bump helmet but also attaching it to myself and my kit when I go adventuring. I expect that the darkened obstacles at Tough Mudder and The Stampede will be a great opportunity to use them.  

I really liked having the two red-light settings, with a separate white-light option. Light discipline is something I really appreciate, especially when camping, and really don't enjoy getting a face full of photons because someone has a Dolphin Torch and wants to wave it around.

This unobtrusive, slimline light will get the job done!
Related Posts Plugin for WordPress, Blogger...