Friday, January 13, 2012

Review: DGP Pathopak

I'm going to divert from my usual line of reviews to cover something a bit different. I'm a firm believer in salvage and I hate to see useful resources going to waste. These containers are case in point. The facility I work at receives items shipped internationally and interstate regularly, and due to the sensitive nature of the items, regulations require a certain level of regulation packaging. The items are typically sealed in a small plastic box, wrapped in bubble-wrap and placed in one of these containers, which is shipped in its own stiff cardboard box. The containers are called Pathopaks and they are produced by DGP Group, a division of Intelsius. The thing is, after they arrive at my facility, and the items taken out and processed, the containers, box cardboard and the jar, get tossed into the recycling as waste. This would just not do, because these containers are ACE. We receive them in two sizes, 1L and 2L. Let's start with the 1L container's features.
The blue lidded 1L containers are the rarer of the two kinds, at my facility, I have no idea why, as in my opinion the items shipped are no where near big enough to warrant even that big a container individually, even with copious bubble-wrap. But, that's how it goes. The containers are a high density SPI Resin 5 PP Polypropylene 95kPa pressure vessel, which can be frozen, and stored at 37oC (important to know, in my facility). They are solvent, acid and base resistant and are rated for biological substance containment. The lid has a robust thread, and a silicone o-ring seal and the overall internal size of the 1L container is 88x170mm and they weigh 240g. 
The orange topped containers are the 2L version, which we receive many more of. They are 125x170mm internally and weigh 450g. All the other features are the same, simply scaled up.  Why would I want them? Well, after being emptied, I collect them, and give them all a liberal disinfection with 70% ethanol, which is an effective anti-microbial. I allow them to air dry, and take them home giving them a further dish-washer cleanse and -bam- I have a robust and standardized, sealable storage container.


What I can do with them then is limited only by my imagination. Mostly I use them for foodstuff storage. We do a lot of bulk shopping, living in a large, poly, share house we often have a lot of mouths to feed. Buying in bulk means storing adequately. These containers are ideal for that, being both non-reactive, airtight and "clouded" to reduce light-related spoilage. I keep a couple filled with road-snacks in my car, hobby supplies in some, and even preserved lemons in salt for several years in some.

As I've said, I hate waste. I'm very glad to have been able to save these kinds of containers from simply being recycled as they really match my views on tough, rugged, multipurpose gear. When I started bringing them home I was asked the suspicious but reasonable question "have these had dead people in them?" and the name stuck. I'm very happy with my "dead people jars" for both everyday use and disaster preparedness.

I've even used them to pack rations-kits in.


Thursday, January 12, 2012

Review: 215Gear Ultimate Riggers Belt

I've been wanting a decent, MilSpec belt for some time now. Something I could wear day to day, and not look like too much of a dork with metal grommet-ed webbing everywhere. I frequently carry a number of things on my person, often on my belt. Drink bottles, hammers, axes, phone, small satchels, my coyote tail (no, really). All kinds of things, time to time. I'm very fond of going "hands free", and having a belt dig into my boney hips one too many times led me to do some research. I managed to find something that fit not only my aesthetic visually, but also met my desire for a rugged, dependable and multipurpose item. A Riggers Belt.

Following a link I saw online, I was lead to 215Gear, who's Retention Lanyard I reviewed recently and settled on their "Ultimate Riggers Belt" over the slightly less awesome but still impressive looking "Enhanced" version. Both belts are made from parachute quality webbing, and "7 Class sewn" throughout. The webbing is doubled for most of the belt, and is adjustable via a full width and very long hook-and-loop band which feeds through the male end of the very spiffy anodized aluminium "Cobra Buckle" which has a quick release safety lock, which if I read correctly, has a 9kN rating by itself, with the whole belt rated at 18kN. (NB if you are baffled by what all these load ratings really -mean- have a read of this document, essentially, anything more than 12kN is going to mess your body up, but the belt will hold). That's good enough for me! It should be good enough for anyone who doesn't have a T-800 endoskeleton. 

Apart from the awesome buckle (which I feel the need to add, has confused some testers when trying to undo it), being a Riggers Belt, it features a bunched loop hole for use an an attachment and anchor point for a carabiner for a Retention Lanyard, accessories, or in a pinch, an emergency rappelling/belay point as demonstrated by the awesome team at ITS in this clip. 

The only drawback I have found with this belt is that the buckles are quite wide, and I've had trouble wearing it with some pants with sewn on loops. I -could- detach the male end buckle and feed the belt, reattach it and off I go, but its just been too much effort. Similarly, the belt is too wide for my multitool pouch's belt-loop, so I have to pocket that when I wear this belt. Again, I -could- adjust, just laziness on my part. 

Awesome, awesome piece of gear. I'd stake my life on it. I probably will, soon enough.

Wednesday, January 11, 2012

Review: Crumpler Thirsty Al (xs) pouch


Making my way back to one of the pouches I lug around everywhere, every day, I wanted to show you the Crumpler Thirsty Al (xs) accessory pouch. I was fortunate enough to have won this in a competition Crumpler put on to "send in photos of yourself with your bags" and one day it arrived in my mailbox to my delight. I affix it to my main Messenger Bag and if you look at the photos there, you may see it peeking around the sides. I have it looped to the main belt-strap of that bag where it is both out of the way, accessible and  blends in quite nicely. That's a big plus for me and something that Crumpler does quite well.  It's snug enough to slip the to corner of the strap and wedge against the main bag without disappearing entirely, and whilst the colours are slightly different, the schema fits in very nicely. Perfect for my kind of EDC. I do enjoy the "WTH did that come from?" effect, when I pull something from seemingly thin air.
It follows the same general lines as another pouch of theirs I have, the John Thursday 100 so there was no conceptual difficulty in integrating it into my collection. The construction is the same1000d Cordura outer,  ripstop 300 Codura inner as other Crumpler products, and it shares the John Thursday neoprene "body". Again the happy Kokopelli looking icon graces its front flap.
 
 The attachment system is the same double-hook-and-loop sandwich as well, which makes a surprisingly good connection, and I can't recall any time that it has failed me. It fits around the 50mm webbing used as the main strap of my messenger bag and also through MOLLE loops. As well as the sandwich-flap method, there is also a lanyard loop at the top, which I haven't yet felt the need to use for anything. 
Yet.
 Again, in keeping with the John Thursday / Thirsty Al comparison, behind the hook-and-loop loopy spot of the inside of the front flap there is a "secret" hidey-hole, which in this case, I have filled with a USB thumb-drive, (which you can see just poking out) but could also fit some small change, folded bills, spare keys or camera-cards, amongst the options.As with the John Thursday, the front flap does not quite cover the top of the neoprene sides, leaving the top a little exposed. Something to be aware of, but not a big deal in this case.

I found that the pouch was a little too small to accommodate my iPhone, or current camera, but would be perfect for a lot of the more moderns, slimline cameras or non-iPhone members of the iPod family. It could also fit some more useful preparedness kit, like a small stash of mask, gloves & dressings, compass and firestarters or any number of stow and wait items. I chose to fill mine with a 8m long hank of paracord I happened to have laying around. This fits in neatly (after tying it fast-rope style, with thanks to Craig Guest) and gives me a high density source of good cord pretty much at the flick of a wrist. I'm a firm believer in having rope on hand in the event of a disaster or emergency, and this was a great means to keep some close by, squared-away and discreetly.
Sadly this pouch seems to be discontinued, but I'm very pleased to say that this one looks like it will be in my collection, and in my EDC, for years to come. Rugged, useful, unobtrusive.

Tuesday, January 10, 2012

Wish Lust - Unbreakable Umbrella

Here's something that crossed my screen today that really caught my eye. That's a horrible in-joke for those that know me, as I would rather be wet than use an umbrella in most instances. As a tall person I find that the most contact I tend to have with umbrellas is when less-than-me-sized people in the rain poke me in the face with them. I see them scurrying around in the weather, clutching their portable roofs whilst I stick it out in my long coats and hats or hoods. I see the discarded remnants after Melbourne's squally winds turn them inside out or bend them. I see their bent and broken discarded husks in bins, benches, left under tram train seats. More evidence of their blight on humanity. I mean, you couldn't even hit someone with them without it buckling into an embarrassing cartoonesque silhouette of their face.

That was, until I saw the webpage for the Unbreakable walking-stick umbrella by Real Self-Defense. These things are bad-ass! First up, in one of the test videos a large manly man balances one between two chairs and climbs up, has a bounce on it then opens it up again. That's some Cold Steel level of proof right there ...

Don't just take it from me though, have a look at at this video I found on their site. This is some pretty heavy treatment for something to keep the water off with. A nice steel tip would make for a good walking stick strut, as well as a mess in the face of anyone it were jabbed at I expect.


 The  umbrellas come in three variants, two "Premium" models in traditional crooked or wooden knobbed or the lighter, longer rubber handled "New" variant. For my money, I'd actually choose the straight  "New" version, as its closer to what I am used to wielding in a shinai for kendo. That is, if i were going to be waving it around, or any such crazyness.

Premium #1
Handle: crooked wide, made of ABS (composite). Steel ribs.
Length 35 in/889 mm, open diameter 43 in/1092 mm, weight 1 lb. 13 oz./822 g.


Premium #2
Handle: straight with knob, made of wood. Steel ribs.
Length 33.37 in/847 mm,open diameter 43 in/1092 mm, weight 1 lb. 8.8 oz./703 g.


"New"
Handle: straight, rubber-covered. Fiberglass ribs.
Length 38.5 in/978 mm, open diameter 47 in/1194 mm, weight 1 lb. 8.6 oz./700 g


 The website declares that bashing these umbrellas on things will likely damage the waterproof material that is the umbrellas ultimate purpose, which is sensible enough advice. If I were planning to engage in the regular beating of things with something, I would prefer to use something purpose built to do so, like a bokken or a mallet. That said, when it comes to including something around in my EDC that wont draw a spot of attention, a ruggedized, weaponsised umbrella migh be just the ticket.


Definitely on my wish-lust list, because in Melbourne, as the song says, you can get "four seasons in one day" and I like to be prepared!


Monday, January 9, 2012

Review: AUSCAM Raven pack

A friend of mine who works in some capacity with the Australian Army and found out about my interests in gear and the like. After telling him about the Stargate LRP that I do, and showing off the pictures of us all in kit, let me know that he had some "leftovers" that he could send my way. I'm always keen to see some gear that the troops really get, even though there may be problems with it, as soldiers are renowned for discovering, its designed to be rugged and multipurpose. In his first care-package to me, my friend delivered this huge pack, the Raven Pack, in the Australian DPCU AUSCAM pattern. The first thing I should mention is its size. I'm used to the kind of torso-wide backpacks that you see back-packers at airports carrying. Tall but reasonably narrow, the kind you can see skinny elbows holding on to, hands on chest straps.
 Not this pack. Its shoulder wide on me, when empty and without any of the accessories attached.
From the research I've done, the pack has upwards of an 90L capacity, again, without the accessory packs and has a wide range of internal and external storage capability. Constructed of nylon, canvas and Cordura with drawstrings and Fastex buckled cinch straps. I was surprised at the variety of materials used, it seemed quite a hybrid piece. The top hood Fastex's down, with a drawstring to improve packing, and water proofing. Inside the lid is a zippered pouch, for personal items or documents. There is 50mm canvas webbing attachment points over the lid. down both sides and two strips running horizontally over the back of the pack. The midline of the horizontal 50mm canvas webbing are two large loops, for the straight handle of an entrenching tool.


On either side of the entrenching tool loops and sewn onto the pack body are two utility pouches, each fitted with a drawstring and Fastex strapping. These pouches measure 28cm in length, 10cm in depth and 11cm in width. They could suit a variety of needfuls in a secure and at the ready location regardless of how else the pack is configured. One of the interesting things about this pack is that it seems to be top heavy, but I think there must be a method for packing heavy items lower which is integral to how the Army trains its troopers to pack.


Another interesting feature is the bedroll/sleepingbag pouch that makes up the bottom of the pack. It is composed of and outer layer of heavy Cordura, which opens on the left hand side through a crumplable pouch type opening. The inner layer is a lighter green bag, which closes with a drawstring. This whole assembly is otherwise independent of the storage in the bottom of the pack. Three Fastex clips fasten the bottom section closed, but otherwise "unsealed" by zipper or hook-and-loop. I thought this was very odd, and I'd be delighted to hear from a serviceman as to what the deal with that is. Also inside the bottom storage area is a small, shallow "bucket pocket" against the back wall. I have no idea what this is for.

The top and bottom sections of the inside are seperated by a waterproof zip panel which whn open, would allow large items to be stowed in the pack, utilizing the full available length. When sealed, the top section has two Fastex clipped compression straps, one vertical and one horizontal. This is a great feature and would significantly increase the available space in the pack. There is also a shelf like pocket against the back wall, also with a draw string, adding to the internal storage structure. Lastly there is a long horizontal zipper, leading to some closed cell foam padding.

The shoulder straps are highly adjustable, both centrally, and at the bottom of each armature. There is a sternum strap, which is also configurable as well as a simple nylon webbing hip-belt. A final interesting feature is a removable lumbar bad, hook-and-looped into the padding of the pack, and includes a long black cord. Possible flotation marker? Who knows. There are a couple of openable hook-and-loop flaps that could well be for identification purposes and again, I'd be delighted to hear from someone with experience with this kind of pack to explain these little features.

This is a great, big pack, which I look forwards to taking camping/hiking with, and to load up all my kit and costume for Stargate LRP. I'll cover the accessory packs in a subsequent post. This is already huge ... Much like the pack. Hearts and Bunnies anyone?

Sunday, January 8, 2012

Review: Gerber - Bear Grylls "Ulitimate" Survival Kit

Here is the second of the Gerber "Bear Grylls" branded survival kits that I purchased through Catch of the Day and wanted to share the contents and my thoughts with you. First up, I got a couple of comments from the first Bear Grylls "Basic" kit that I reviewed. I wanted to just say again, that whilst the kinds of antics that Mr Grylls gets up to on his shows might seem to be silly, gross, dangerous, or totally contrived. what he is demonstrating is what you should be -capable- of doing. Sure he has a film crew right beside him, so he doesn't -need- to drink his own pee, or eat his freshly snagged grass snake raw, but he can, and you might need to one day, that's the point. He's made enough of a name that he can put his name to products, and its those products that I want to focus on. When you're wet, hungry and lost, and it's dark, you wont give a damn if you thought the guy looked a tool on TV. Having some good gear stashed in the bottom of your pack will go a long way to improving your situation.

So, with that said, on with the show! This is the "Ultimate" kit. As with the "Basic", it is housed in a ripstop nylon pouch, this time with a whistle fitted to the drawstring. a nice addition. Inside the kit is a resealable plastic bag, containing the rest of the kit.
  • First and foremost, I was impressed to find that it included a Space Blanket; the aluminised plastic shiny mainstay of survival kits everwhere. Not only will it keep you dry, but will keep you warm in very cold environments, offer shade in hot ones and act as a bright signal for rescuers to spot. Brilliant. I haven't had one for years, since moving from Canada in '92 and I've felt its absence.
  • A little LED keyfob gives a easy source of light (there was a trick to it, PULL to light, there is no switch). 
  • A second chunky signalling whistle is always a good addition to a kit, whistles are easier to get a loud, piercing and recognizable noise from than yelling in most instances, I've found. 
  • The addition of a multi-tool, in this case, the Gerber Clutch, adds Needle Nose Pliers, Wire Cutters, Fine Edge Blade, Phillips Screwdriver, Small Flat Driver, Medium Flat Driver, Bottle Opener and Tweezers to your repertoire in one compact package. It comes with a lanyard ring, to secure it and has a snappy response in its mechanism. 
  • A firesteel and striker are as ever, a welcome addition to any survival kit. The striker includes a bottle opener, great for knocking back a cold one after you stumble into an abandoned diner. 
  • Top right in the picture is a wire saw. I LOVE these things, great for cutting branches, broken timber, limbs. I've cleared obstructions and sawn branches for projects with them. Quieter and more precise than a hatchet or machete.
  • Fishing kit, including line, four hooks, split shot and swivels. I've carried some fishing kit in a mint tin for years, without having need for it, but I like to think that its one of those things ... who knows, one day maybe I'll just fancy dropping a line in a pond.
  • More of the extra long starter matches, and a striker, as in the "Basic" kit, a handy addition for when the firesteel is too daunting to use. The cotton ball for kindling is another nice touch.
  • Waxed cotton thread, and a hank of nylon cord are a great inclusion, making a tent from the space blanket, snares, adding leverage to the wire saw. String is always useful. 
  • A Helioscope, signalling mirror is a tremendous piece of kit to have in an emergency kit. Glinting light at a target is a great way to attract attention. Be sure you're doing it on purpose!
  • A sewing kit is a nice touch, even if you don't have to stitch a hole in yourself, mending your clothes or pack can be a great boon in a touch situation.
  • The shiny copper wire is for snares. Hard for little teeth to chew through, setting a snare is a good way to secure yourself a protein boost. 
  • Lastly, there is Bear's handbook notes on the Priorities of Survival. Good campfire reading after a hard day fighting off muties.
I neglected to mention in reviewing the "Basic" that both it and the "Ultimate" also include, on the reverse, hand signalling techniques.

So, all in all, a pretty good stash of gear, and all fitting into a little packet, not much bigger than a thin paperback book. I'm glad I got it, it's going into the bug-out-bag that lives in my car.

Saturday, January 7, 2012

Review: Platatac MEOP Medic Pouch

 A while back I purchased a Khaki Pouch Combo deal from Platatac and I recently had a good occasion to make use of one of its components, the MEOP Medic Pouch and I wanted to share the good times I had with it. This large pouch is just bursting with functionality. Firstly I'm really pleased with having it in khaki, matching my other gear nicely. As with all the Platatac gear, its made from the hardy 1000d Cordura and fitted with MilSpec buckles, zippers and webbing. The MOLLE loops, of which there are 7 rows of 5 columns on the front, and 7 rows of 2 columns along each side. This is a phenomenal amount of real estate for further attachment of pouches externally. Another addition is a loop-side hook-and-loop strip at the top front of the pouch (to which I have attached a "Problem Staying Solved" morale patch from Action Figure Therapy's Army Ranger). The top panel the pouch has two rubber gaskets for hydration tubes (or any other protuberance you may require, I'm thinking cables that audio / mic cables could feed through it).
The back of the pack has two separate rows of three of the PLMRS (Platypus Light Modular Recovery System) MOLLE/PALS attachment system straps, and a set of left and right zippers, for attaching to bigger packs, or to strap two of these pouches together. Another feature is two full sets of dual Fastex clips, top and bottom as well as two sets of buckles for feeding tape or webbing through. One interesting aspect is that the pouch can be folded up on itself, either for empty storage or when loaded, to minimize bulk. 

I had this pouch mounted on my Young Guns belt recently, for a New Years Eve party, which we took Tactical Baby to, and instead of taking her usual baby-bag, I wanted to pouch it all. This is where the MEOP comes in so handy! Not only is it -covered- in MOLLE, its insides are likewise covered in it too. Both the back and the "lip" of the pouch, which zippers all the way down, have a full 7x5 grid of attachment points. The top of the bag also has a double sided strip of hook-and-loop for perhaps holding that hydration system or iThingy cables. However, my New Years loadout for Tactical Baby was this. inside the MEOP, I slung several nappies, bound with some safety-orange paracord I mistakenly bought, below that I also lashed in a packet of baby-wipes, and along side this, changes of clothes, and a rolled up change mat. Along with a plastic bag fed through the MOLLE of the "lip" I had everything I would need in case of poo-nami. 

Everything fit into the pouch, and it even folded, enabling me to cut down on the bulk that would have otherwise dangled downwards off my hip. Access by popping the top two Fastex clips, and a quick unzip was speady, and the pack unfurled beautifully, and smoothly.


Now, baby wrangling may not -seem- like much of an adventure for a rugged and apocalypse ready loadout, but I assure you, if you have ever had a screaming baby who needs a fast nappy change, and you fumble, spilling your cleans and soileds, you can easily translate that to disaster mishaps.  This pouch is modular, versatile and rugged. I braved the uncertain looks of my baby's mother and staked Tactical Baby's wellbeing on it when I loaded it up, and it didn't fail me. I can easily recommend this as a means to secure and transport your needfuls in an orderly fashion, be that a trauma kit, nappy bag or whatever.


Thursday, January 5, 2012

Review: CRKT Stiff K.I.S.S. knife

Here is another piece of steel that I hold dear. Whilst a pocket folder is a great addition to my EDC, sometimes a fixed blade is the best tool for the job. As I've said, I'm strangely attracted to some brands, and tend to stick with them, and this is no exception. This is the (edit) COLUMBIA River Knife & Tool Stiff K.I.S.S. by Ed Halligan. Keeping to the principles of its name, this is a blade that has been engineered to Keep It Super Simple. The blade is made of a single piece of AUS6 steel which is reported to be hardened to Rockwell of between  55-57. It comes with a Zytel sheath and belt adapter.
 The blade features the same tanto-tip and straight blade as the folding version, and the same serration patterns but with a considerably longer blade, following the same elegant lines. The handle is skeletonised and features two lanyard holes midway, and a third in the pommel end. I have added a paracord wrap which gives it some nice body, and a good positive grip. I keep this blade in my car, along with my car "bug-out-bag". It goes camping with me, picnics and hiking. One of the things I especially like about it is how light it is in the hand.

This is no battle knife, it is fleet and slight.
The slim cross section is sufficient to ensure it is able to cut and slice, and the back of it is flat, as with its smaller folding sibling, which gives it an even slighter profile. The blade is stiff, even for its thickness, which I suspect is due to the steel and temper, but I wouldn't want to use it as a pry bar. Best leave that to actual pry-bars, frankly. I have been able to punch holes in cans for drainage however, and the finger notch, and thumb-groves on the spine make for a very sturdy and secure grip, even when wet. There is a nut affixed to the blade around the midline acts as the friction lock to keep the knife firmly in its Zytel sheath, as well as being a good rest point for the thumb during delicate cutting.
The sheath itself is also packed with features, including a selection of lashing points both for cord and a pair of webbing-sized holes as another option. The final attachment option is the steel clip, which can be fitted at either the bottom, for a downwards draw or at the middle, for an upwards draw. I have a length of kendo himo looped through mine. Between this and the belt loop I get a nice secure attachment to a variety of belts, bags and harnesses.

Unfortunately,  CRKT discontinued the Stiff K.I.S.S. a number of years ago, and whilst they are still available online, I am sorry to have heard that. This is a beautiful piece of steel, and as I've said, it comes out to play whenever I go adventuring. Rope, salami, packets, jugs or cybermats, this is a blade not to be left behind.


Review: 215Gear Retention Lanyard-Frog Zero

I've done some pretty interesting and dubiously safe adventuring, mostly climbing up things and places that were not necessarily intended to be reached. Over the years I have put together a reasonable set of gear and kit for doing so, but one thing I've lacked is a dedicated retention lanyard. I've always made do with loops of webbing, lengths of rope and Expresses. I finally found a purpose made piece of kit to include when I venture up high things or perch somewhere I might be inclined not to fall off. This is the Operators Retention Lanyard by 215Gear. 
These guys make some no-nonsense nylon gear, and look to fill some niches that other suppliers tend to glaze over, in comfort, safety and K9 equipment. I especially liked their range of options for fittings, which are all high quality brands which they have fitted to their own well tailored nylon. This particular lanyard is made from 1" MilSpec tubing rated to 4,000lbs (1814kg), heavily constructed with eight, 42 stitch bartacks and is offered with empty loops, or fitted several different combinations of options. For example, I've currently fitted the empty loop end of mine with a 600kg rated Kong carabiner, but also have a higher rated carabiner which i swap out if I know I am likely to be experiencing higher fall risks. The other end has something quite special.


Here's what is on the grabby end; a Kong Frog which is an awesome piece of engineering, giving a 26kN safety rating (equivalent to 5,850 lbs, or 2653kg) to a one-handed attachment system when will lock down on whatever you can reach, even at what would normally be beyond safe carabiner reach. One drawback of the Frog is that the "jaws" are a little narrow and it will not fit over any of the random things I have tried, like my larger carabiners, but it does "bite" my 11mm static line, as well as this rope which I've previously used as a retention lanyard.

I really like this lanyard, and whilst have not had an instance where its full potential was tested, the fact it sits at 17 inches long and stretches to 26 inches means that I can hook myself up, have room to play, and be able to get physical feedback when reaching that limit, AND then give a little bit more slack for either squirming to reach something, ducking out of the way of something, or just pure shock-absorption. All in all, a very satisfying, compact, solid and dependable feeling piece of kit.

Wednesday, January 4, 2012

Review: SAR Eclipse Signal Sytem/Clip (SESS/c)

I thought it was time to review another of the cool products put out by SAR Global Tool as so I bring you this very nifty little survival tool.

This is the SAR Eclipse Signal Sytem (Clip) Bringing back the same amazing reflective 3M SOLAS tape as seen in the MoonGlow but this time mounted to the front of a dog-tag sized steel plate, with a hole centered in the middle, which gives a good sighting point for use as a heliograph. The inner plate is a mirror polished steel dog-tag, also for signalling, in daylight conditions. The third plate is bent to form a tightly binding clip, enabling the unit to be clipped to a belt, MOLLE or to cards and cash as a money-clip.

The bent plate gives enough torsion that the three plates fit tightly together, offering protection and stability in attachment, and the hollow riveting allows it to be fitted to a cord or chain, to make it part of your EDC. It's light, tough and very practical. I look forwards to further testing it out bush and making much more use of it in my adventuring.

SAR Global Tool

Tuesday, January 3, 2012

Home Front: Perservering Preserving

 Food, and the correct storage of food is a major component of medium and long term disaster preparedness, in my opinion, not only from a pure survival point of view, but also from a morale and social well being point of view. Any starving student can tell you that you can live on beans, porridge, rice or ramen, but that it isn't a lot of fun. Same goes with MRE's and other stockpileable staples. I've read through the LDS preparedness manual, and it didn't strike me as setting an exciting table. There are ways and means to not only make long lasting supplies, but make them interesting, and also make good use of the ample times in ways that many modern folks may simply overlook. I've done a fair bit of reading on preservation, and my background in Microbiology has served me well too. There are some basic aspects that are easy to grasp, and apply to almost all food preservation; Sterilize, aseptic technique, reduce water, inhibit growth and inhibit oxygen. By no means an exhaustive list, but a good guide.
Here's how I use these aspects to preserve food, and keep it tasty, for far longer than the base products would last fresh. The tomatoes we grow in our vegi-patches all ripened at once, and faster than we could eat, so in the grand Southern European tradition, I dried them. I used an electric dehydrator with herbs also from the garden after scalding them with boiling water, and packed them in a steam sterilised jar, covering them with oil. Dehydrated, [naturally acidic], inhibited oxygen (the oil), delicious. I also make my own beef (and other meat, although I haven't been allowed to use our rabbits) jerky, which alas, I have none remaining to photograph, but, really, dehydrated meats are an awesome means of preserving them, if not making delicious snacks.

A girlfriend of mine had a lemon tree overburdened with fruit a couple of years ago, and we collected a cooler full. As well as lemon tart, lemon juice and the like, we quartered many of them, packed them with salt and covered this in juice. This salt-lemon juice slurry eventually jellified, and the lemon quarters took up the salt. Again, dehydrated, oxygen inhibited and delicious. A combination of super high salt and acidity inhibits bacterial growth. These will last for years, and make an amazing addition to my cooking.

Similarly, a glut of fruit from my partners family's house gave us the opportunity to try our hand at making quince jam. This was harder, quinces requiring a bit more preparation to being good, but as an experiment we had nothing to lose. Jam is again, a dehydrated, acidic, highly concentrated, (and if made properly, with good aseptic technique) long lasting method at turning a crop of fresh food into a long lasting  food stuff that can improve man simple recipes, add valuable calories and be utilized in a variety of ways.  We've added it to sauces, marinades, on toast and into baking. Jam-making can be laborious, but is well worth the effort, month if not years down the track. Its a skill anyone with thoughts of preparedness should ad to their repertoire.

Salting and sugaring are not always the best ways to preserve all foods though, and pickling is just as ancient, and downright tasty a means to make fresh produce last a long time. A combination of acidic and oxygen depleted environments, as well as good sterilization lets you preserve a variety of foods (eggs from our chookens here, with herbs from the garden, mustard and garlic). Looks horrific, tastes amazing. A layer of olive oil on top acts and a further oxygen barrier. Eggs, cucumbers, cabbage, fish, the range of foods than can be pickled is vast, and it's really easy to do. Just be sure to read up and follow instructions to ensure its all done safely, because as will all preservation, getting food poisoning from it would be terrible!

Which leads me to the last means by which I preserve foods, fermentation. I have a home brewing kit, and a rather large collection of Grolsch swing-top bottles thanks to my beer-drinking friends, and have turned apples, ginger, honey and the like into a variety of bacteria-free, yeast enhanced, safe to drink beverages containing anywhere from a slight tingle to fountainously foaming carbonation. The fact that these may have also been mildly to highly inebriating is merely a side effect, but after a day of converting car tyres to body armour, or fighting off waves of triffids, a relaxing home made foamy drink is a great refresher! 


Monday, January 2, 2012

Review: Barz Optics Sunglass Prescrption Goggles

I've known that I've needed glasses since I was about 15, and have had a variety since then. I've also lived in some very sunny and bright places, like Dubai, Calgary, Melbourne to name a few and I've had to either choose squinting because of glare, or squinting because I'm a touch short sighted. I tried contact lenses a few years back, but reacted badly and came down with conjunctivitis rather badly, and haven't been game since. I'd rather see badly than not at all... They are also inconvenient when it comes to being out and about, occasionally submerged and generally annoying. I eventually decided that what I needed was prescription sunglasses and shopped around.  I looked at several of the brands that one sees professional rugged and bad-ass people wearing, but whilst doing my market research, I came across and Australian company whos products took my fancy.
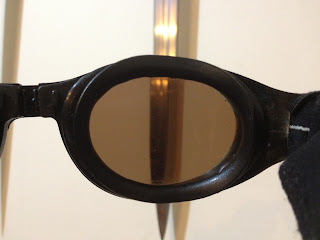
These are my Barz ARFA goggle-sunglasses.
Originally designed for surfers, they are billed as being fit for a variety of extreme sports, watersports, and industrial use. Rather than having arms like traditional sunglasses, they are goggles, with a elastic strap feeding through eyelets and adjusting at each temple. I can't tell you how many times I have come across snapped off arms of glasses, or had my head smacked and lost my regular glasses. No such issue with goggles! Barz offers a range of frame and lens colours, allowing you to customize the finish in quite a combination of ways.
 They also offer several lens filtering options such as polarization, photochromatic and bifocal prescription as well as single focal prescription lenses. I oped for a black frame, amber lenses and prescription polarized lenses and have never looked back! Not only can I now see in the bright outdoors, but with the added bonus of polarisation, I can see things in a whole new light, so to speak. These are my go-to glasses when ever having to do powertool or spray assisted yard work, whether it is whipper-snippering, chainsawing or metal cutting.

The gasket fitting keeps chips and spray out of my eyes so I can keep watching what I am doing. I've also had great use for these whilst doing burning off, as they also greatly reduce the smoke and heat-glare that would otherwise inhibit my ability to see. This was of great concern whilst the Black Saturday bushfires were raging, and I was living in the forested mountains, and on high alert. Recreationally, I've worn these whilst running around the bush, camping and driving around with the windows down to great success. The UV400 treatment of the lenses fills me with confidence.
One very cool feature that I have not yet had the chance to test out is that the eye gaskets can be swapped out from the vented ones seen here, to a solid ring, to give a water-tight swim-goggle seal. The reason I've not done so is that whilst not only are the gaskets but also the nose bridge user-modifiable (three options for the nose) but the gaskets are a very fiddly modification, and I have had a lot of trouble in hot, still conditions with the goggles steaming up, something I'd rather not make worse. The manufacture is very solid, with great life so far on all parts. I sat on them once and broke one nose-bridge but they have survived considerable abuse in my care.


Sunday, January 1, 2012

Happy New Years from Apocalpse Equipped!

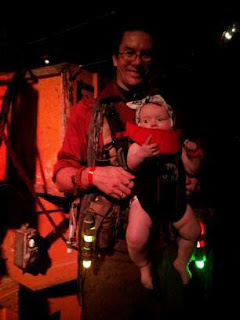
Happy 2012 from us at Apocalypse Equipped. Tactical Baby and I had a good night out, and we blinked and flashed our way through a gig, with bottles stowed in FUP Pouches, and a full complement of changing materials slung on a comfy belt . She wore ear-pads, a Zombie Hunter morale patch by MilSpec Monkey and traveled in her BabyBjorn Active baby-carrier.

She ended up with more lipstick on her than I did, but that's the way it goes when you wear a baby to an Amanda Palmer gig!

Review: Yukon NVMT 3x42 Nightvision & Riflescope kit


I had desperately wanted to get some night-vision gear for years, and saw some listed online, but did some shopping around, and found what appears to have been a better deal, for a more interesting set up. Some of my friends have had NVG, either as givaways with First Person Shooter games, or purchasing scopes from overseas, I was pleased to find via Ozscopes a division of the OzHut which sells a variety of things but most importantly to me included this, a 3x42 night vision monocular and riflescope kit. I tossed and turned about either getting the fully Maritime certified version, of going the only slightly less sealed but modular and rugged Spartan version.

I liked the fact that the basic scope could have both objective and eyepieces, allowing for either 2x, 3x or 4x power and either rifle-scope or binocular style eye-relief. When using the scope I found that with simple adjustment I could have near-to day visibility in my urban environment easily enough, even without the built in IR illumination. Like any magnification device, it needs focus adjustment for different ranges, but its a simple enough. The case is solid and the rubber edgings to give it a good positive grip in the food when damp, as well as offering a bit of padding. Its rated as water resistant, so not for underwater nighttime play, or casual tossing into a pond, but for my needs, its fit for purpose. The built in IR illumination is amazing, at least to my eyes, but be warned, when using in a reflective environment, its very "bright" to the receptors!

The unit is powered with a single CR123A, both the monocle and the illuminator are controlled by press buttons, and have indicator lights that light up for both. I found these to be placed in a slightly awkward position, especially when using it attached to the rifle scope kit. Opening my off-scope eye would dazzle me with the indicator LED. I think I will tape over it for my next outing The rifle scope kit comes with a mounting plate which affixes to a Weaver style rail, along with an integral pressure switch activated laser sight. The combination laser and night vision gave me a real advantage at the last Stargate LRP event, and I've also had fun watching my local wildlife, our bunnies and the like. A real win for my collection.
Related Posts Plugin for WordPress, Blogger...