Friday, May 30, 2014

Review: Platatac prototype hydration carrier

Here is the hydration pack that I have been using for the last few Tough Mudder events I've done. This is an old prototype from Platatac that I picked up on eBay, and combines elements of both their Bravo hydration carrier that I have, and the MEOP Medic Pack both of which I've covered in the past, and are great pieces.

I found that wearing an extra set of straps was redundant when I was wearing a vest anyway on my Tough Mudder and similar adventures, which is why I looked for an alternative to the Bravo, which has served me well in other situations, and on my first Tough Mudder. When I saw this piece come up on eBay, I was thrilled to give it a go. It follows the same kind of design philosophy I've come to expect from Platatac pieces, with a tough 1000d Cordura exterior, and ITW Nexus hardware. It if "faced" with 6 rows of 4 channel PALLS/MOLLE loops, and features a hook-and-loop secured drag handle. Running down the flanks are nylon D-rings, three to a side, allowing shock or paracord to be run through these, to provide attachment points, or compression.

The wide-mouth of the pouch perfectly fits the Source Storm 3L hydration bladders main cap.

The baffled sides of the carrier allow for quite significant volumes to be carrier, without restriction, or perhaps even storage for other items besides a hydration pack. However, this particular piece lack the zipper-access of the Bravo, which means that the only access into or out of the inside is through the main cap.

This actually posed a problem when trying to run my hydration hose through it, and I bit the bullet and melted a channel in the backside to feed it through.

I also had to melt a drainage hole in the bottom, following the previous Tough Mudder, last September.
I found that the carrier filled up with nasty pond water when I took my tumbles, which really added to the weight I was hauling. No such trouble with a small drain hole melted in this time around.

The back of the carrier offers a variety of attachment options; Zippers paired with the MEOP carrier (which allows me to sandwich these two pouches nicely). It also features female Fastex clip ends top and bottom, tri-glide loops for all your clipping and looping needs. Best yet, the back features two sets of three three channel PALS/MOLLE PLMRS (Platypus Light Modular Recovery System) strips. These gave both a rock solid attachment and also load spreading capacity. I barely felt the 3kg that the full bladder weighed,and certainly not the sloshing side-to-side I might have with a pack-type carrier.

This was just a prototype, bridging the gap between the Bravo and the MEOP, but if you want to see the new production version, check out the Platatac Utility Hydration Cover. Looks like the logical next step.

Thursday, May 29, 2014

Wednesday, May 28, 2014

Review: Platatac Punisher 2014 CUS Shirt

Here is one of my favourite go-to shirts for when I have some serious adventuring to do. This is the Platatac Punisher Cool Under Shirts 2014 edition. I got mine in the 3-pack bundle, which means I can shirt-up and stay stink free for days at a time.

The shirts themselves are made from Drytech polyester and are designed to be worn under body armour, as a work-out shirt or whatever close fitting base layer you might need. Ive covered this kind of garment before in the Blackhawk! shirts and the Under Armour shirts. These kinds of materials wick moisture away from the body, helping keep you cool and also quick drying. I certainly gave this a test this year in both the Tough Mudder, and on my recent trip to Fiji.

There are even mesh panels under the arms to help with airflow, which really comes in handy if you are wearing a vest of some kind (be that a plate carrier, LBV or BCD/PFD) especially in a hot and or wet environment.


Decked out with Kryptek patterning printed onto the right sleeve, and fitted with a broad swatch of loop-field on the left, the tan material with subdued ANF for the platypus skull filler make this a cool-guy shirt that does its job. The back is printed with shout-outs to the major lines Platatac works with.

I've put this shirt through some pretty strenuous work; it's my running shirt, my Tough Mudder shirt, I wore it jetski-safariing and snorkeling. I've found it to be light, warm when needed, cool when needed and certainly quick drying.

I really liked having a loop-field to attach items from my ever-growing patch collection.

If you have need of a slick, comfortable and hard-wearing body-hugging shirt, you should totally give the CUS a try. Coyote adventure tested!

Tuesday, May 20, 2014

Review: Source - Storm WXP 3L hydration bladder


Here's a much loved but oft forgotten item in my survival, training and adventuring kit. This is the
Source Storm WXP 3L hydration bladder which has seen some pretty heavy use in the past, and I thought it was fully worth showing the light of day.

Ive covered some hydration systems in the past, such as the the Platypus PIB hydration pack and several hydration bladder carriers, such as the lustful Geigrrig Tactical Guardian (I'd love to get my paws on one of these) the 0.75L version that come in the Tactical Tailor Joey hydration pouch and the backpack style Platatac Bravo pack. This isn't my first Source 3L bladder, as I failed to follow the care-and-cleaning guideline of DO NO USE BOILING WATER ... they melt. Hot enough for your hands is hot enough. More on this later.

The bladder itself is constructed from a very special three layer, coextruded polyethylene construction with a very special low maintenance liner layer. Integrated Grunge-Guard™ antimicrobial surface. This  435 micron thick surface prevents bio-film build up, my being almost glass-smooth, (Source quotes it as being  2000% smoother than standard TPU films, with virtually no difference from glass itself. This reportedly improves the systems self-cleaning function.

The wide opening access at the top opens with a slide closure for easy filling, draining and cleaning. The fold and slide lock gives a strong, airtight seal. A retaining cord ensures clumsy finders don't drop it in the muck, or let it wash downstream. It also means that you can add ice, or powdered drink supplements.

I found all the seams, including those at the tube attachment point to be very strong and well placed to take any tension that the bladder is challenged with, so far.

The drinking tube attaches to be bladder with their propriety QMT™ Quick Mate Technology hose fitting, which offers push button convenience, no leakage, and click-in compatibility with USMC Miox filter system. Sometimes the clip can be a little stiff, but hardly much of an issue for me, as I rarely took these off, except to rinse. However, even at the tube tip the QMT is completely self sealing.

This means that even with a full reservoir you can change tubes, add valves or whatever, without worrying about drips or leaks. Great for fitting a full bladder into a pack that already has a hose run through it. Sometimes hydration tube ports can be a snug fit.

The drinking tube is 94cm (37") long, and contains its own valve built in. Again, no drips or leaks when changing the tip or feeding it through bags and gear. The tube cover both insulates and blocks UV-light.

This helps your water cool and bacteria free from first to last sip. I really noticed this when doing long stretches in the sun with this. the temperature gradient from tube-to reservoir was always delightfully small.


The very cool push/pull Storm Valve isn't a bite-valve, being a pull-open plug like on a sport bottle. It apparently delivers 25% higher flow than bite designs. The integrated valve has a twist-lock which will lock the valve in the "off" position, so you don't have to worry about inadvertent leakage. It is also set at 90 degrees from the tube, which apparently reduces the required tube length (for twisting it around to have kink-free drinking) by 25cm! It also rotates 360 degrees, allowing you to place the valve end on any side of your gear, and have access to it.

It comes with a dirt-shield cover, which is also dummy-corded on, and can be cinched with a dedicated slit, to stop it from dangling and rattling about when not used.


In addition to the Widepac wide opening access at the top, with its hanging slot,  the bladder also has a screw-top opening, which incorporates a carry-yoke. The yoke can be rotated to best suit your carry style, but allows even gloved hands to hold the bladder open for refilling without contaminating the reservoir.

The gasket screws down over the yoke to hold it in place, and is also dummy-corded to the wide-mouthed cap. I have had some troubles with the gasket winding loose, and this impacting on the seal the cap gets, but if its screwed down tight, all should work out well. 

Evacuating all the air from the bladder keeps it very quiet, no canteen-sloshing noise-disipline worries there, and the placement of the tube to the bladder means you pretty much get every drop emptying out, you can even set it to run continuously, using siphoning, to get regular irrigation, or when running detergent through it to clean it. The guys at Platatac recommended throwing it, washed but not dried into the freezer as a decontamination step, which is a far better idea than melting it with overly hot water, I have to say.

This particular bladder has seen me through camping, long haul drives, and three Tough Mudders, and it's going strong! I even inflated it and used it as a flotation aid when diving off one of the "Walk the Plank" high dives on Tough Mudder.

I'd love to try one of the Universal Tube Adapter  attachments, which lets you fill the pack from the drinking valve, from taps or bottles, without having to take it off your pack or out of a pack.

Thursday, May 15, 2014

Shout out Review: PowerTravellers - Power Gorilla

Kevin Martin over at BreachBangClear has done a cool piece on a hefty ruggedized power-pack for charging his devices out in the field, for extended times.

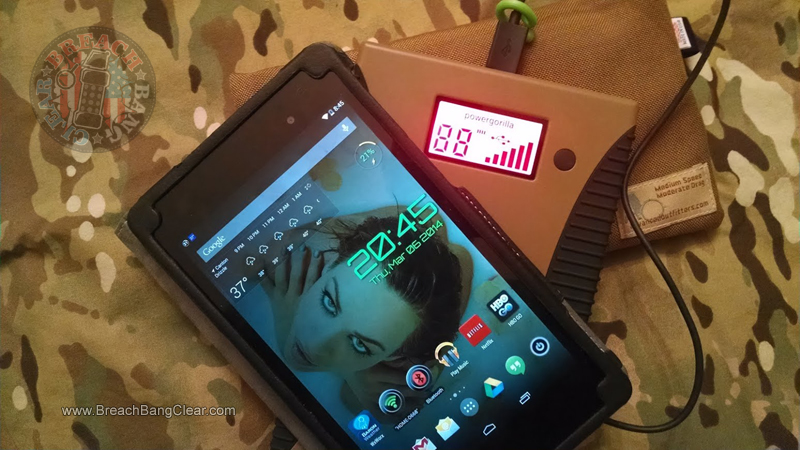
Here's the link to his take on the PowerTravellers - Power Gorilla. This tablet sized battery boasts 20,000 mAh of charge, and you can see that Kevin put it through its paces in some pretty rough conditions.

I've covered a couple of power-generation devices in past, the thermoelectric Tellurex-tPod1, and a wish lust BioLight campstove to generate power, solar systems like those found on the SLXtreme iPhone case and the other small solar systems I have tried
but as yet haven't really covered how to STORE that power, other than in those built-in devices. Worth checking out Kevin's findings, for sure!


Tuesday, May 13, 2014

Events: Tough Mudder #4 March 2014


I did my fourth Tough Mudder in March, which earned me both a green (x2) and a PINK (x3-6) Mudder headband.

It was also my first TM solo, whereas before I'd run it with teams of work-mates, or friends, this time I just tackled it on my own, along with the other 20,000 or so people who did it this time around. It was a slightly overcast and chilly day, and I was very glad that I had set myself up with my gear with this in mind.

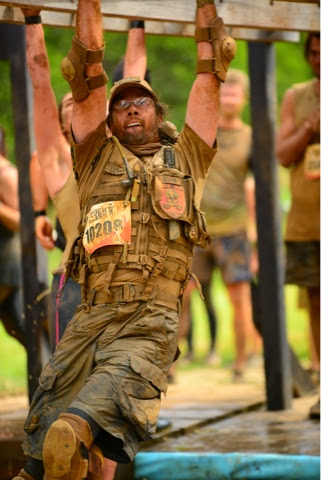
This time around, as I had done previously, I geared up in all my "Zombie Control Officer" get-up, some for show, some for practical reasons. The core of my outfit was again the
FirstSpear OAGRE tactical vest which I've worn to all but my first of these adventure runs. This vest has given me both a platform to attach my accessories, but also provided me with a modicum of abrasion resistance, not to mention keeping my shorts on during some of the hairier moments, with its built in belt-attachment loops.

I mounted a set of Platatac twin 40mm pouches to my left side, which I filled with energy bars. On my right side, I mounted a Platatac SR25 pouch for another energy bar, a magnet to switch on and off my Contour GPS camera which has trouble in its waterproof case (see below). I would have also kept my spare battery for the Contour in there too, in a double-ziplocked baggie, as I've done in past, but alas, I couldn't find the damn thing till the week after the event, stuck in the bottom of a cable-jar.

On top of the vest I wore the same Platatac admin pouch as I had previously, with a cyalume stick, permanent marker and a small laminated map of the course. I tracked my progress, marked off obstacles and marked times as I went. I also lucked a large LARP foam fighting knife behind it, for photo-ops and in case any of my fellow competitors wanted to "go zombie" at me. No one did, haha. My loss. Wearing my Z.E.R.T. membership shield, call sign (Q3199) I got a lot of nods from the other costumed participants.

Also on my chest rig, I wore the UVPaqlite for power-fee solar dark-space navigation, and on my shoulder, opposite the ITW-Nexus Picatinny mount for the Contour, my PrincetonTEC Switch MPLS-light, which alas didn't survive the course, and judging from the few photos I found, looks like it came off at least in the first third of the course. Makes me sad, but I guess I'm in the market for a new helmet light...

I wore a Platatac Punisher-2014 CUS shirt under the OAGRE, which kept me cool but not cold, dried quickly and chafing free for all 23km of course.I clipped my bib number to my MOLLE with plastic side-opening ALICE clips.

I wore running skins under my TripleAughtDesign Amphibious Shorts which cut down on abrasions even further, and kept me a little warmer when the wind hit us. They also helped keep my BlackHawk! kneepads on and in place, and again, without the bleeding hamstring regions I've had previously. Skins are definitely an endurance asset. This time around I also opted to wear my BlackHawk! elbow pads too, which cut down on my elbow gravel-rash immensely. A little cumbersome, and made getting hauled up by helping hands a little more challenging, but so worth it. Between the skins, the knee and elbow pads you could hardly tell I'd done the course (apart from the usual behind-the-thigh bruises) just a day or two after.

I had a Source 3L WXP storm bladder on my back again, in an early strapless version of the Platatac Bravo hydration system, which was PALS/MOLLE locked on tight to the OAGRE vest.

This time I also wore my Paleo- Barefoots ANTERA paws with the neoprene inserts, the PAWS dots made a heap of difference, giving me all the grip I needed on events like "Twinkle Toes", which was a wet-beam crossing, and running up the quarter pipe of Everest. I also wore the Paleo-Barefoots BAMANOS paws, giving them their first big outing for me. Unfortunately, in their current form, without a lining, they chewed up my hands quite a lot.

I've passed on feedback to Jörg of GoSt Barefoots, and the roughness I felt when wearing them, especially on the hang-by-your-hands obstacles like the "just the tip" vertical wall-crawl, the "Funky Monkey" monkey-bars and "Leap of Faith" (jump off a platform, over water and climb up a dangling cargo-net, my favourite obstacle of the course.)

I completed the course around 45 minutes faster than my previous times, which included an extra kilometer of "Legionnaire" veteran course, and four extra obstacles. The Powerade / energy bar combination meant that I didn't stop running for water or snacks the entire time. My map was a great morale boost, as well as helping me keep my orienteering awareness up.

These events are a great hobby for me, they test my body, determination and gear.


Here's a shot of me fiddling with my camera, when in its case I need to use a magnet to switch it on and off, which isn't always easily done. Especially when all caked in mud.


I only managed to get a couple of clips from this Tough Mudder, because of problems with the switch. Don't mind the muddy banter ....


I had a really good time, signed up for the next Melbourne event on the day, and made it home in time for dinner.
Related Posts Plugin for WordPress, Blogger...