Showing posts with label camping. Show all posts

Tuesday, July 24, 2018

Review: EverFire fire brick

When it comes to fires, we have many traditional options available from: gas, charcoal, heat beads, and wood. Apart from gas, lighting a fire can be tricky and time consuming.  I like to use off-cuts and dead-fall whenever possible, and heat-beads to cook on, and reclaimed timber as firewood.  In getting a fire going, the use of everyday firelighters although cheap, sometimes produce fumes or smoke that isn't pleasant. Also you can only use them once.

 I believe I have located something that is a cheap, cost effective, eco-friendly alternative. A clean burning reusable firelighter combined with methylated spirits that burns odorless and can be used again and again. These are the EverFire fire-starting system. They can not only used as a fire lighter, you can use them to cook a meal with no other fuel source. Just place them on a solid non-flammeable surface light them up and place your pan right on top.

The EverFire bricks are made from a 100% natural mineral which is used in various industries and it's totally environmentally friendly.

The bricks are soaked in a liquid accelerant and lit. The creators recommend methylated spirits or ethanol as it is clean burning, with no fumes or smoke emitted while burning. Otherwise you may use any accelerant of your choice, but always be cautious and store in container of choice in a safe location out of the reach of children. Watch their accelerant tests.

The bricks are then lit with match or lighter and the fuel burns. Burn time for metho is normally 10-12 minutes. When cooking only with EverFire firelighters by placing the pot or pan directly onto the firelighters you can increase the burn time to around 17-20 minutes.

  I've found by the firelighters' third use it will give the longest burn time. Burning itself in and having its "pores" burnt clean of the manufacturing process I believe.

After many uses the firelighters will eventually break down back into their natural form. All you need to do is crumble them up and place in your garden as it is very good for your soil and plants.

After their full burn time, and after 15-20 minutes cooling-down, it can be returned to a fuel bath and recharged. The big ones use between 50-70ml per charge. The small ones between 25-50ml. If you remove the firelighter from the fire and put out with a damp cloth, you will use less than a complete burn. Cooling the bricks reduces the thermal shock they experience when dropping into fuel, thus reducing the risk of cracking and becoming less effective. That said the makers suggest hat even cracked they will function effectively.

I found that a single EverFire brick, soaked with methylated spirits was not only hot enough and long lasting a burn enough to send my Fire Box stove red hot but also boil enough water to make two cups of tea and toast some mini-hot-dogs, as well as starting a fire to make lunch on.

For the purposes of domestic fireplace use, its possible to leave the bricks in the fire until it's died and then retrieve them for recharging, to no ill effect. In some scenarios if it is easy to remove, you can do so. This will increase the overall life of the bricks. In closed fires like Coonaras, or other enclosed indoor fires, you can ease he retrieval process by starting the fire with the firelighters towards the front of the fire. After about 15-20 minutes of fire-starting, just remover firelighter and place somewhere safe to cool.

Once cold return to storage container and recharge for next time. The creators suggest they will last for 30+ fire before they are at risk of cracking and crumbling, but this may vary with use. They seem pretty hardy to me and if treated gently, I can't imagine them just falling apart.


A question came up about dousing the EverFire bricks, should the need arise, and what happens if they get wet or are submerged/dropped in water? smothering with damp cloth should be sufficient to extinguish a metho fueled brick, but if it comes to pass that a brick is submerged in water, thy will absorb it, reducing its effectiveness. However correction this is as simple as returning the brick to it's recharging station and soaking it in fuel. Letting it soak for about 30 minutes. Remove the brick, light it and let it burn out, repeat this process a couple of times and the EverFire brick will steam off any absorbed water will be as good as new again.

In all Webers, fire pits, BBQs, Spits, open fires, or anywhere you need to light wood, heat beads, charcoal, or even to use by themselves to cook or create a heat source. As well as a heat source and limited light source, they can be used as a mosquito repellent by adding a few drops of citronella oil to the metho it is fueled by. Multi-function is huge selling point in my books.

The EverFire brick can be cut and trimmed by hacksaw cutting, should the need arise. The bricks themselves are surprisingly light, even when soaked. Jeff the creator suggested pre-soaking the bricks in metho and then bagging them individually before putting into a tub for transport. A small bottle of fuel can be brought along for on the fly recharges but three pre-primed bricks gives a lot of burn-time ready to go. I did so on a recent hiking trip and we had hotdogs and tea on a windy bench and minimal weight addition. The standard sized bricks weigh only 100g but the larger jumbo bricks weigh 250g and both absorb more fuel and burn longer. Three individually bagged bricks, and a lighter fit nicely in a take-away tub, and seal in any fuel vapors nicely.

EverFire sells their blocks in three sets:

Combo 3: 500g containing 2 large bricks and 1 standard brick. Also a handy storage container for the firelighters.

Standard 5: 500g containing 5 standard bricks. Also a handy storage container for the firelighters.

Jumbo 5: 1250g containing 5 large bricks. Also a handy storage container for the firelighters.


I found these to be easy to use, kid and pack-safe, light and handy fire starters as well as a novel stand alone fire source. Methylated spirits are a cheep, safe and easy to manage fuel. My thanks to Jeff for the free sample pack. I can see these becoming a staple of my camping and backyard firepit kit.

Monday, May 14, 2018

Home Front: "pocalypse stew"


Having a hot meal is a simple way to both bolster morale but also provide much needed nutrition and energy, especially in adverse conditions. Being able to reliably produce a meal can be as good as magic in the field. I had the chance to do so at a recent post-apocalyptic Live action role playing camping trip, whee we had to set up themed camp with a deadline, and a pot-luck dinner had been planned. There was a total-fire ban in place so no campfires were allowed, but portable gas burners were allowed if supervised. I had brought along my SOLIDteknics AUS-ION Noni pot and some apocalypse themed austere ingredients.


2 x cans corned 340g Hamper Corned beef
1 x can 822g Edgell potato tiny taters
2X McDonalds tomato sauce
2x instant noodle sachets bumbu & fried onions

The corned beef cans come with a key to open them by twisting the top off. The Tiny Taters can didn't have an easy open option, however, I had my trusty p-51 opener and made quick work of the can. I up-ended the cans of corned beef, which had the texture and appearance of cat-food and set it to sizzling. when the fat had rendered, I poured in the whole can of tiny taters, water and all (waste not, want not) and then stirred it through. This made for a very wet stew so I was glad I had the noodle sachets to add. in they went and then the McDonalds / KFC ketsup. (I save everyone of these I get for just this reason.)


After a little cooking down, I served it up into the mugs and mess-tins of my compatriots and we had cooked, adult meal to go with the tear-aparts and dips we had combined. It was quite salty (the noodle-bumbu is mostly salt) but palatable and by the next day, there was only half scoop worth at the bottom of the pot.
Not a pretty meal by a long shot, but it was fast, (taking less than 10 minuted from pile of ingredients to edible food in mugs).

Different spice and sauce mixes could change the palatability if available but could even be skipped entirely. Canned corned beef has an approximate shelf life of 2-5 years but who knows how long it could last and be safe to eat? Certainly worth considering if outfitting that cabin-in-the-woods or bunker. I certainly keep a couple of cans in my bug-out food crate and you should to!

Some additional variants that would make improvements to an otherwise very plain meal. A handful of rice, or oats would give additional body, as would dry beans or split peas. Some jerky or even fresh meat scraps would be additional and offer a delightful surprise in some mouthfuls. Bear in mind to soften beans, rice and jerky additional cooking time (and water) will be required. As well as the Bumbu powder sachets saved from ramen noodles, I also save the sauce and oil sachets which can add flavour and body to just about any meal. Remember that fats and oils are an important dietary requirement and energy rich as well as carrying flavours. They also aid in the cooking process if you fry things, so keeping some in your supply is multifunctional.

Thursday, April 12, 2018

Review: Yaasa Studios - Infinity Blanket

Long enough to cover a Tactical Coyote
Being cold is awful. I'd rather be too hot than too cold any day.   Fortunately we have the technology to battle the chill. I'm a big fan of curling up in the corner of a couch in a hoodie and wrapped in a woobie. Some of my favourite blankets have been the Go-Anywhere by Tribe Provisions which have pride of place in my car as picnic blankets and car-trip bundling as well as my go-to camping blanket.  I was excited to see a Kickstarter come up with a new blanket project in the form of the Infinity Blanket by Yaasa Studios.

Soft enough to bundle a Tactical Baby
 The chief selling points of the Infinity Blanket are its size, reported at  2.0m x 1.5m (80" x 60") and the material from which it is woven. a 72% organic cotton and 28% Celliant blend. Celliant is high tech fabric. Reported as a revolutionary, patented technology that recycles the body's natural energy (heat) into infrared (IR) light that is emitted back into the body's tissue.

Infrared is widely recognized for having positive effects on the body. The use of Celliant® fibers converts the body’s natural energy (heat) into infrared (IR) light and emits it into the body’s muscles. They propose that over 60% of your consumed energy is lost simply through heat escaping your body. and that rather than simply trapping your body heat like a space blanket might, Celliant® turns that wasted energy into infrared light. The result is a responsive textile clinically tested (in one paid study) to benefit the human body, utilizing a blend of minerals and proprietary ingredients embedded into the fiber’s core.

The Infinity Blanket blends Celliant® material with organic cotton to create a fabric that recycles and emits infrared light. On average, (it has been estimated) your body emits 100 watts of energy in a given moment. The Infinity Blanket is a unique way of taking advantage of that energy! This supposedly increases blood flow, energy, strength, endurance, and decreases recovery time after an active day, supporting a more restful night's sleep.

Drapes as a cloak
Magic fiber! I can't comment much on it's clinical properties, but it was enticing enough that I wanted to check it out. What I can comment on is that it is very soft, and comfortable. It breathes nicely and is quite water resistant. Upon ariving (too late to be the Giftmas present I had hoped it to be, the struggle and gamble of being a Kickstarter backer) I noted its lightness at only 1kg (2.2lbs) and with an overall density of 320 gsm, and how well it packed down. For some reason I had expected the blanket the blanket to be looped, like an Infinity scarf. It is not. A simple edged rectangle, with rounded corners. I have a lot of polar fleece throws which have come to be a winter and camping standard and the Infinity Blanket blows them all away as far as comfort goes.
Wraps like a burrito to use as a sleeping-bag
Hemmed with an internal blanket stitch, the two-tone grey and cream material is thick and buoyant feeling without feeling "fluffy". The pile is quite dense and uniform feeling, almost felt-like.

The colour tones are relaxed and subdued, and very reminiscent of the old grey woolen Army blankets but without the smell or scratchiness. It is sufficiently heavy to not blow off in a breeze and maintains a nice drape without being heavy (at 1 kg vs the wool Army blankets 2kg) to sleep under. It's also very comforting to snuggle under when feeling a little under the weather. Be it cold or hangover riddled. Tactical Baby is very fond of it and that's generally good enough for me. Good thing I got two! when folded longways twice and rolled up it makes for a very hikeable bundle, especially when bundled with bedroll straps. I' m going to have a go at making some leather straps myself but till then , dual slip-knotted looped string will do.
Rolls into a tight bundle for easy packing

The Infinity blanket has a nice drape to it as well, and will form a solid shelter with just a ridgeline line and corner pegs. I'm considering sewing loops into the corners and midpoints, much like those found on the original woobie, the classic Poncho Liner to serve as peg anchors to make an impromptu pup-tent. The dense cloth is very good at blocking light and would make an excellent sun-shelter.

The Infinity Blanket is manufactured with green practices in Europe and uses certified organic cotton. Up to 12 plastic water bottles are recycled in the production of each blanket. This makes it an environmentally responsible product and should give you that warm feeling of righteousness.

Stretches to make  pretty decent shelter


Whether you're an athlete looking for a tissue oxygenation recovery trick, a wasteland survivor bunkering down for the night, or simply someone who's looking to improve sleep; The Yaasa Studios Infinity Blanket might well be perfect for you. I really like mine and it goes into an overnight outing pack-list these days.

Lastly a post-production note from Yaasa Studios themselves. They noticed an issue with the weave and wanted to explain to backers,this kind of openness from a vendor is very reassuring.


It has been brought to our attention that some of your blankets were too short compared to the dimensions (80" x 60".) intended. We took immediate action and reviewed this with our manufacturer in Germany.

During our investigation into the cause of the shorter dimensions, we discovered that it occurred in the raising and stretching process. The weft yarn (this is the yarn woven in the width of the throw, and the length of the travel size) Celliant fiber contracted more than expected. This resulted in the blanket coming in slightly under the specified width, or length.

Due to this being such a unique new fabric, the factory technicians are still familiarizing themselves with its behavior. We want to assure all backers that we used the material as specified and marketed in our campaign for all of the blankets, and you were not by any means shorted on the Celliant material. This issue lies in the tensile properties of this new fabric, and while this resulted in shorter dimensions of the blanket, you will still experience the same benefits from the blanket.

Despite our earlier prototype run, this eventuality was unforeseen until we had completed a full production run. As this dimensional issue was not our intention, we appreciate all of our backers for your feedback and bringing this to light to always ensure quality control. We truly apologize for this inconsistency and hope that the quality and benefits you receive from the blanket outweigh the shorter dimensions.

Monday, November 13, 2017

Review: Kogalla solar bank

I love my portable batteries. mostly because I love my power-hungry iDevices and not only go to a lot of long meetings, but also occasionally camping trips and other away-from-the wall outings! Having portable power not only extends my mobile browsing and picture snapping abilities, but also makes me a hero when someone else is trying the same and didn't think to prepare.

However, even battery packs like the hefty Limefuel Limeade with its 18000mah
are only as good as their capacity. Once dry, they're done, which is why I am also really keen on alternate power sources , especially in the event of a long term power outage. My favorite power source is solar, being free, non polluting and very sustainable.

I also love it when two great flavours like this mix, such as in the Kogalla solar storage bank. The SSB2210 Solar Storage Bank is a high-energy, ultra-slim power bank matched to a high-efficiency foldable solar panel housed in rugged, waterproof fabric body.

Unfolding exposes four solar panels each roughly the size of the iPad Air 22cm (8")x 13cm (5") x 3.5cm (1 1/4") compared to (24 cm (9.4") (h) 16.5 cm (6.67") (w) 7.5 cm (0.30") (d)) and when fully unfolded it stretches out to an overall 61cm (24") when fully deployed the SSB2210 offers a huge 22 W capture capacity s worth of panels which allows for fast charging times in full sunlight.  Matching the panels to the power bank allows for energy harvesting even in low-sun conditions. 920g (2lbs) n not bad at all, considering both the panels AND battery in one.

Not unfolding the panels limits the capacity but reduces the footprint required. given that the four panels fold nicely and will constantia a bit to allow it to stand up whilst exposing more panels to the sun. This is also important when it comes to getting a good angle to the sun.

Maximum possible solar generation at your location is possible by angling the panels to the angle of the latitude at which you are located. In Melbourne, that would be 38°. You would ideally want to angle your panels at a greater tilt for maximum exposure to the low winter sun. 
The general rule of thumb is that panels angled at the latitude angle, plus 15°, is best to maximise winter sun exposure. Obviously placing the panel in the line of the sunlight is the other part of this equation. Direct sunlight is best but even dappled or overcast  sunlight will generate power, slowly trickle changing the on-board battery. 

The 10,000 mAh power bank provides long battery life between charges. The power bank can also be charged through a micro-USB power input for charging during no-sun conditions. from a wall socket tor other alternate power source like

Dual high-current USB power ports (up to 12 W) lets you power lights, accessories, or fast-charge devices. The unit folds into a compact, ultra-portable kit that includes a zippered pouch for accessories. The kit also includes a flexible-neck USB light, micro-USB cable, and lightning cable. For the charging of all kinds of devices. I especially like charging my USB chargeable flashlights and phone in a modern "make hay whilst the sun shines" situation. I also charge up my other batteries for the same reasons.

I've found that I can charge either an iPad or an iPhone but not both simultaneously, now, doing some research i find that the  An iPhone charger delivers 5 Watts (5 volts at 1000 mA) and the Retina iPad mini charger delivers 10 watts (5.1 volts at 2100 mA). so its not unreasonable to see that 5W + 10W is more than the 12 W output of the  SSB2210. Bearing that in mind, just like the Apollo 13 Mission Control team, do the math and know how much draw your gear is going to make on your batteries. Matching the panels to the power bank allows for energy harvesting even in low-sun conditions, but they can only do so much. Luckily I also have a dedicated iPhone solar charger...

Another neat feature of the SSB2210 is the fabric eyelets sewn into the middle of the unit and the four corners. These loops allow the solar panels to be lashed down into optimum position or onto something either for stability or portability. I lashed it to the side of my rain-fly one day, and also to the back of my hiking pack, such that my daylight hike would serve double duty of also charging batteries on the bounce.

I used four mounting points to fix it to my pack here, but left the bottom panels free-hanging.
 I knew I would need to be mindful of the panels when I shucked my pack, but it wasn't any drama at all on an hour long hike.

I generally keep this unit folded up and in the hydration bladder pocket of my day to day pack, ready to charge up my devices on the go, or to pull out and make myself a hero during long meetings.

 I can highly recommend it, especially as an off-grid power source in a sunny environment to keep your vital gadgets alive. I would couple it with other power generation and storage items such as the Beacon or the like. Diversify and empower yourself!

Also check out sites like Solar Calculator to optimize your solar experience!


Wednesday, November 1, 2017

Home Front: camp cooking staples

I took a solo camping trip a few weeks ago and in doing so got to try out some camp cooking without he worry of the fussy or more gourmet members of my household that I might have otherwise needed to cater for. Wanting to keep it simple and easy to pack I pre-packed some of my food, using the Dead Person Jar Pathopak's. My primary pre-packed meal I set up was porridge. I raided the baking shelves and made up a jar of rolled oats (for quick cooking) to which I added a handful of currants, almond slices and crystallized ginger. I also packed a jar of powdered milk and sugar for both my cups of tea and to add to my porridge. They worked out great. I used a cup of this mix, and made it up with a cup of boiling water, before adding a spoonful of my milk-sugar mix. Delicious, sustaining and warming on a cold damp morning.
My other campfire staple is chilli. This may provoke disputes among aficionados, some of whom insist that the word "chili" applies only to the basic dish, without beans and tomatoes but when i camp, I take cans of baked beans, chopped tomatoes and pre-mixed sachets of seasoning. A couple of onions in my cooler bag, and some frozen diced pork, this time. If I'd been camping longer I might have taken cured, dried sausage or salami as my meat component. Diced the onions and braised it in my cast iron pot over the coals, then the same for the pork. Seasoning went in next before adding the two cans of tomato and the three cans of baked beans. and some slow cooking with the lid on to reduce it all. I ate mine out of my Optimus-Terra solo cook set mug and shared my meal with a couple of friends who came up to join me in the evening. Five cans, one packet of frozen meat, a couple of seasoning sachets and two onions. Pretty simple. Not too heavy for a drive-in camp, and probably not that bad for a hike-in either, especially if those cans were shared around a little. We had plenty to eat with heavily seasoned leftovers I ate next next day too. After serving I added a dash of water, put he lid back on and put it back over the fire to heat up again to a low roil to kill off any germs introduced during serving up.
Porridge and beans make two excellent staples when camping, but some other items can find their way into your larder easily enough. Things that add both variety and value. Eggs. Eggs are great, self contained, long lasting and generally not requiring of refrigeration. In an austere setting, if you find yourself in an egg-glut, there are a number of traditional methods for preserving the quality of eggs. Packing in salt, wheat bran or cool clean ash. Eggs packed in box and buried in ash are reported as remaining fresh after 8 months in 80% of cases. Not only does it give the eggs shock and crush protection but having leftover wood-ash at a camping trip once you've eaten your food is no drama, just dump it into your fire pit and off you go. That said, cardboard egg cartons make good fire starters. When I pack eggs, its usually because I plan to make pancakes and then pack them in my flour mix, again, in a sealable jar. They stay safe, insulated and ready or when i'm ready to cook.

Not so much cooking as snacking, I also like to take hard cheese, like a block of Parmesan and salami  or slab of salt cured meat like Prosciutto. They keep well un-refrigerated and are a very tasty addition to an al fresco snack-plate after a hike or as an addition to most meals.

Friday, October 27, 2017

Review: Ikea - Grundtal S hooks


Here is  a piece of Swedish low-speed low-drag gear that  I like to throw into my camping gear that adds a bunch of utility for very little cost or weight.

This is the Ikea Grundtal S hook from their  kitchen range.

Formed from rectangular bar stock stainless steel, these come in two sizes:  11cm(4 3/8") and 7cm (2 3/4") and comes in sets of 5.

The set of 5 11cm hooks weigh 200g or 40g each. These hooks were originally intended to hang pots and pans from a rack in a kitchen, but  I have found they can serve a lot of number of helpful purposes around camp.

Analogous to kitchen use, I hang just washed pots an pans out to dry with them, as well as hooking through bags of food to hang them off the ground, because no one likes ants and dirt in their oatmeal!

I also used them to hang my mosquito-repelling citronella burner so it doesn't fall over and start a bushfire. One of my favorite uses is to add a sturdy hanging hook or my cook-fire. I also pack  length of light chain  to set up over my tripod to make a sturdy cooking spot. Especially important when I cook with a cast-iron pot which I do a fair bit when I camp. A tin billy for hot tea and coffee doesn't tax the Grundtal S hooks one bit, but on the other side, I don't need to worry about it giving way and dousing my fire. The trick is to ensure the hook is the right size for the chain links.

By putting two tripods with draped chain and Grundtal hooks on either side of the fire  I have gotten very good as a spit-roasted leg of ham, especially good 
over Easter, to fend off the hippies.

One last thing I like to do with the Grundtal S hooks are to hang up my personal kit. You can usually get away with draping kit over a branch but sometimes the perfect branch doesn't present itself next to your selected squat. That's where an S-hook comes into play, drape it over and hook your gear up! keeping it up off he ground gives items like a battle belt time to air out but also keeps it out of the dirt mud and bugs.
Keeping gear out of the mud and dry will improve hygiene and morale as well as extended the lifespan of both the gear and you on your adventure.   The same goes for clothes. Pants off for a shower? Sling them from a hook to keep it off the dirt,  you'll get fewer spiders and bugs that way.

If you're planning to catch prep and smoke game to make your own jerky or smoked salmon or what have you,  you might want to consider the spiked butchers hooks to pierce and hang your meat. Not as good for hanging gear  directly (use belt loops and such, obviously) but the principle is mostly the same.

Happy hiking!


Thursday, September 21, 2017

Home Front: storm's a commin'

I'm really proud of this post, which I'd delayed publishing for logistical reasons, but found out had been picked up by 5.11 TACTICAL, as a "Breach-Bang-Clear Senior Staff Contributor" , which I am doubly proud of! So, without further ado, here's my take on being ready to be smacked with several mega-storms one after another.

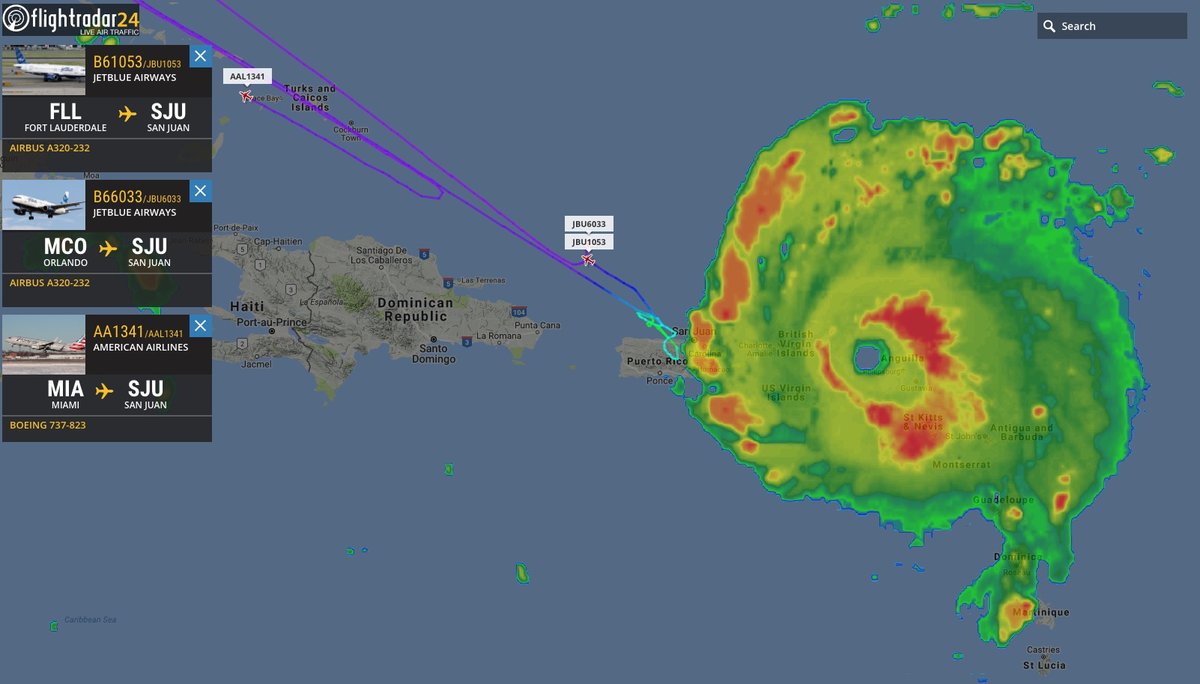
Recent meteorological events in my old hometown of Houston, and the subsequent humanitarian concerns that came with the destructive flooding being experienced in the lowlands of Houston, have all gotten me thinking. Irma GERD is hitting Florida and the Caribbean, and... Well piloted, Captain, Delta DL302!


I've had the good fortune never to have had to evacuate an area, though my family's rapid departure from Dubai on December 31, 1990, some three weeks before one of the grandest fireworks shows in history happened just over the horizon in Iraq, was close. I've also had the need to be ready to go, when I lived in the forested Dandinong ranges following the black Saturday fires of 2012. However, frequent moves and travel while growing up equipped me with a certain mindset. Pack light, take only what you can carry, and carefully choose what valuables you really need. When things took a turn for the worse for me emotionally at the end of my marriage, I packed bags, loaded essentials in my car and was out of there that same evening. Better for everyone in the end. I was lucky that some good friends of mine had a spare room and the open hearts to let me crash with them for a couple of months so I could get my life in order. I'm deeply indebted to the Moffits and will be for some time.

I'd hope that if I lived in a disaster-prone area I'd be ready whenever hurricane, cyclone, tornado or volcano season rolled around, and not only would I have a bugout destination but also a route and plan. However, nature gives not one damn for me or my plans, nor (I suspect) for yours. It's up to you and me to rescue ourselves.


The Houston floods have shown that freak events can essentially turn a modern metropolitan city off, and reduce it to third world status. Without wanting to go into the politics of civil engineering and infrastructure shortfalls, I think it's fair to say that while some of what was happened in Houston or New Orleans could have been mitigated, nature will find a way. So what can we do about it? I think the answer to that is threefold:


1) Threat assessments;
2) Risk mitigation & planning; and
3) Practice.

1) Threat assessment.

Where I live several state and federal agencies exist to deal with this kind of thing. The SES (State Emergency Service) and CFA (Country Fire Authority) have great resources available to determine whether certain areas are at risk from fire or flooding, and can deal with those threats. Victoria has occasional very mild earthquakes, nothing to brag about. We do occasionally get heavy storms pushing up from the Antarctic but again, pretty mild compared to the North Sea gales or Atlantic hurricanes. We're well too far south for any tropical action, unlike our Queensland bretheren. We do get some big winds and heavy rains occasionally though, so in the Hills (to call the Dandinong ranges mountains is generous) power is often cut due to tree-falls. A caved-in roof during a winter storm is never a good thing, nor are washed out roads. In the lowlands that water has to go somewhere, and we are pretty lucky in that current and former governments have maintained infrastructure to deal with it. However. Knowing is the first step.

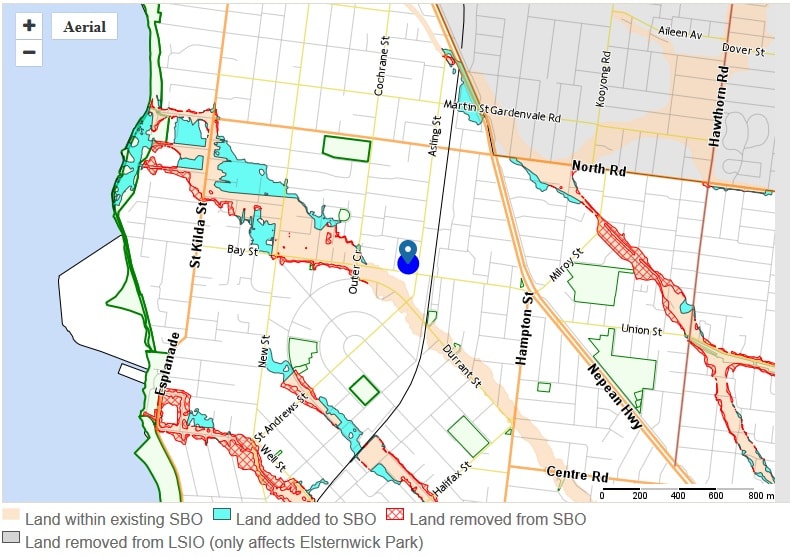
Melbourne Water is proposing to update existing planning controls for land in Bayside that's susceptible to flooding. The controls, called the Special Building Overlay (SBO) and Land Subject to Inundation Overlay (LSIO), aim to ensure that land covered by the overlays is developed in a way which reduces the potential for flooding and minimises the risk of flood damage to property. Since the planning controls were introduced in the early 2000s, Melbourne Water has developed better mapping and more accurate flood modeling. As a result, the SBO boundaries are being updated and the LSIO removed from the Bayside Planning Scheme.

The changes to the boundaries of the SBO mean that some properties will be within the overlay boundaries for the first time, some properties will no longer be covered, and other partially-included properties may have more or less of their land covered by the overlay.


For properties within the SBO boundaries, a planning permit is required to construct a building, carry out works and subdivide land. This enables drainage and flooding issues to be addressed early in the development process by, for example, raising building floor levels. It also ensures that flood waters are not obstructed or diverted by new development, causing an increased problem for existing development.


2) Risk mitigation & planning.

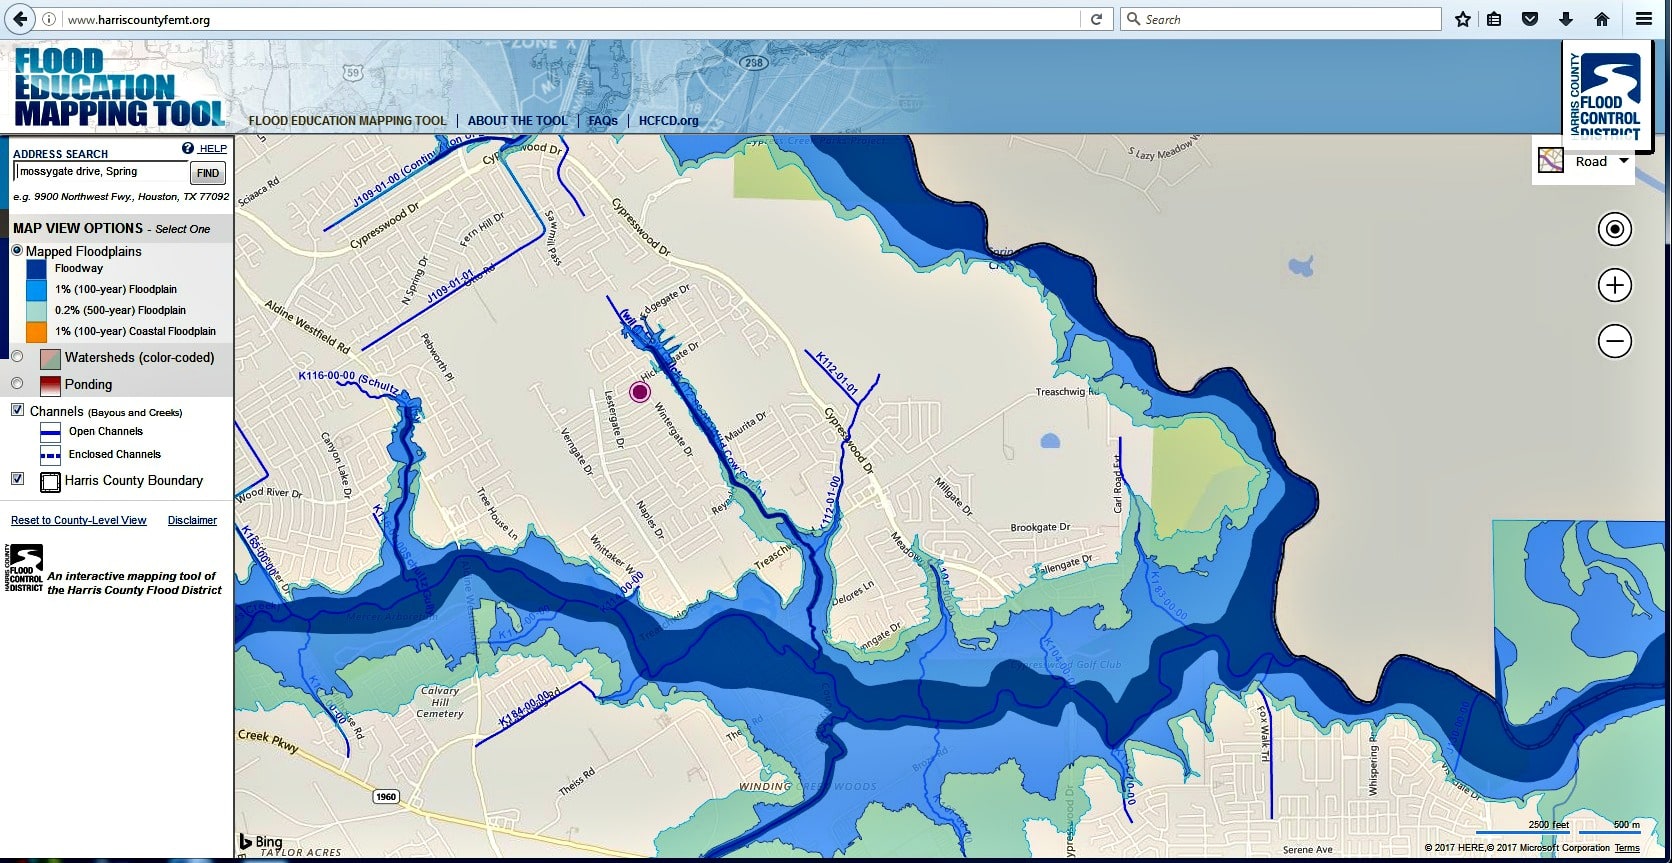
What are my big threats to house, home and family? Well, my ex-wife and our 9-year old daughter live in the Dandinongs, in the midst of very tall trees in the temperate rainforest. There is a summertime fire risk mitigated by maintenance of the grounds to remove deadfall and reduce fuel sources, plus they have an evacuation plan and use the CFA fire-risk scale system as a guide and routinely "get off the mountain" in times of high risk. In winter they face storms and damage from runoff. Frequent power outages are a hassle, especially as the water to the house is via an electric pump from a rainwater tank. Landslides are a potential risk but more substantial is the risk of a tree falling on the house. Aggressive tree felling is not much of a solution given the local ordinances. When I collect and return our daughter, I'm mindful of the risk of roads being cut by treefall and associated downed power lines or washed out roads, but day to day it's not much of an issue. In the case of my own home, having checked the floodplain maps of the Melbourne Water Board, I can see we're just outside a predicted 100-year flood area. One end of our street is not though, so I'm going to err on the side of "Yep, we'd flood."

Where I live is fairly suburban so I don't have to worry about bushfires come summer, but we're not far from the beach, just above sea level, so a hefty storm surge could potentially reach us. I don't worry about a tidal wave as the Port Phillip Bay is shallow and protects us from the Bass Straight, so anything big enough to cause a tsunami would bring its own special dooms. Knowing that, if a big flood event was coming, or even imminent, our best bet would be to pack up and bug out. The house, being old and rickety, couldn't be trusted to withstand even a knee-deep flood, let alone the hip, head or street sign deep waters as in Houston.


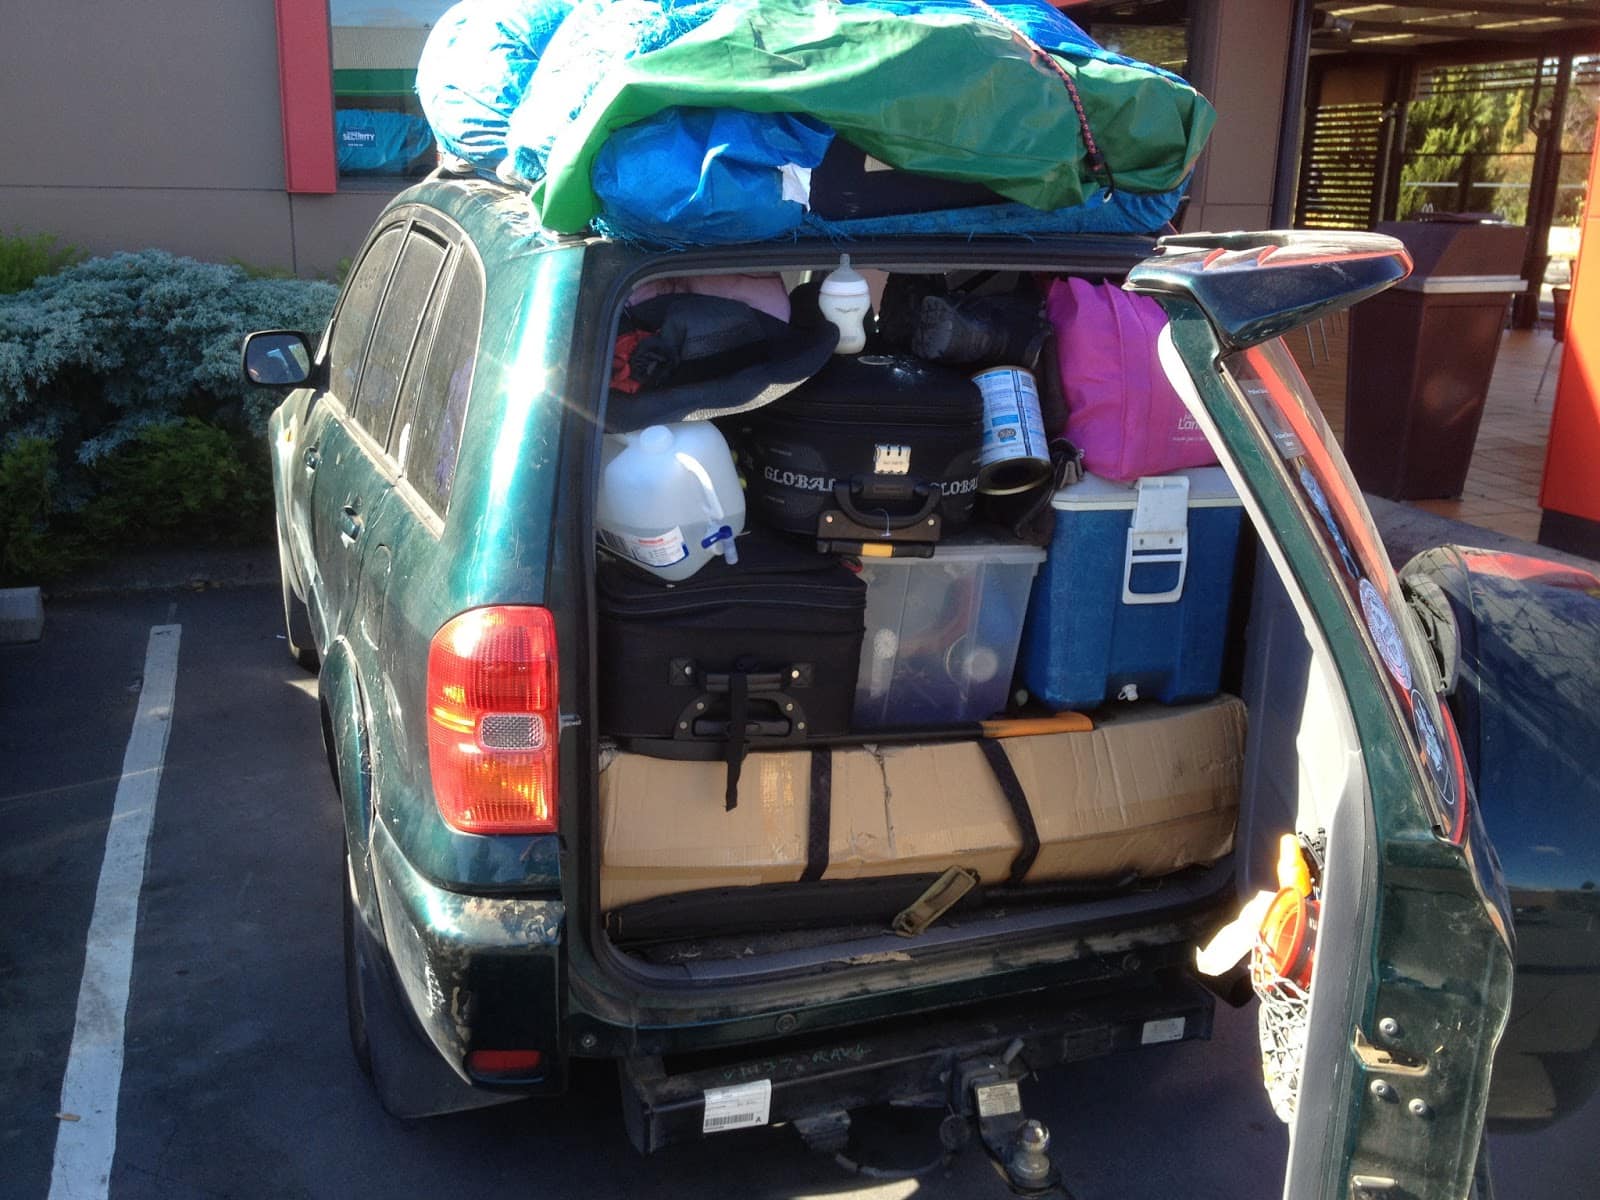
The question then becomes "what to pack?" Assuming the house would be a write off and most of our possessions would get trashed it might be tempting to try to take everything, but that's just impractical. A moving van would be needed and would take a day or two to load up anyway. Alternately, in a "do it NOW" situation, the decisions become easier. Only the most valuable and irreplaceable things would go, as well as things needed to get us through the disaster. Photo albums, back-up HDD's and some heirloom antiques are a good start, along with some important legal documents: deeds, birth certificates, divorce papers and the like. Clothes and day to day essentials like toiletries and medications are no different from any vacation packing and need to be weather appropriate. We'd be bugging out in my Toyota RAV4, not much of a bug-out vehicle but comfortable even crammed full of family and gear when we go on our camping holidays, so we have an idea how to pack it. This brings me to one of my bug-out or camping packing tricks.


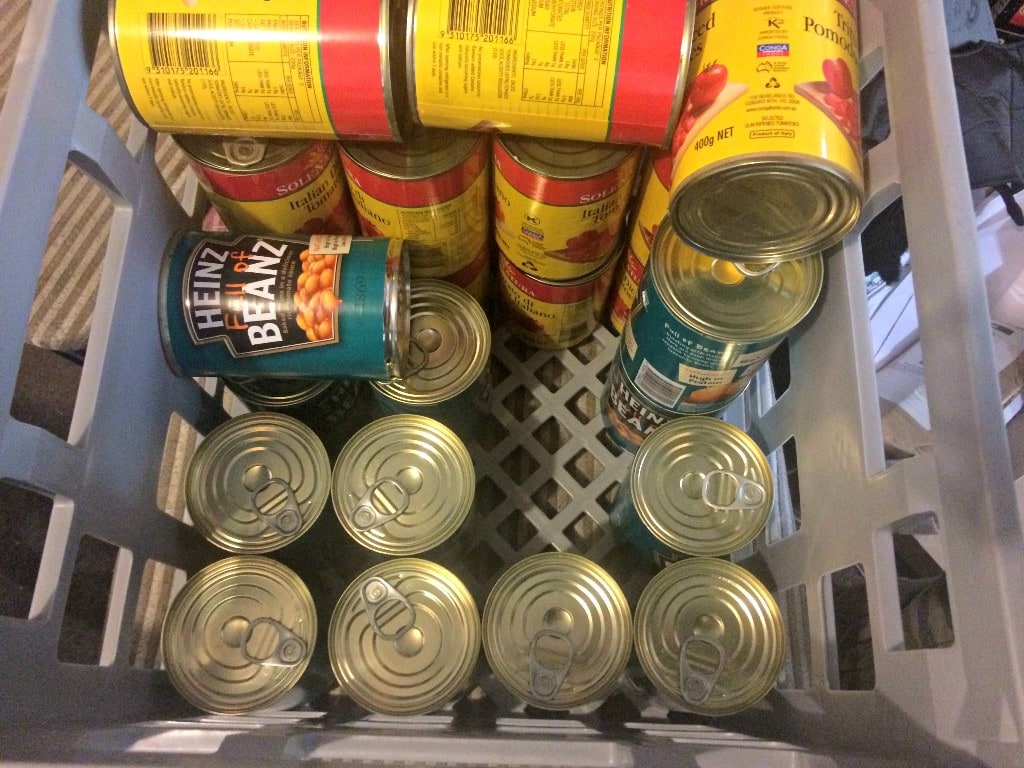
Tactical Milk Crates. These seemingly ubiquitous, stackable, skletonised plastic boxes, designed to carry sixteen 2L jugs of milk, are often repurposed as student household furniture and storage. The modularity of these makes them good for packing anything small enough to fit. They'll hold 42 regular 420g-sized cans. That makes for 17kg of beans and diced tomato, in one big water-insoluble brick. That's a lot of meals. Two people could carry it fairly easily between them.


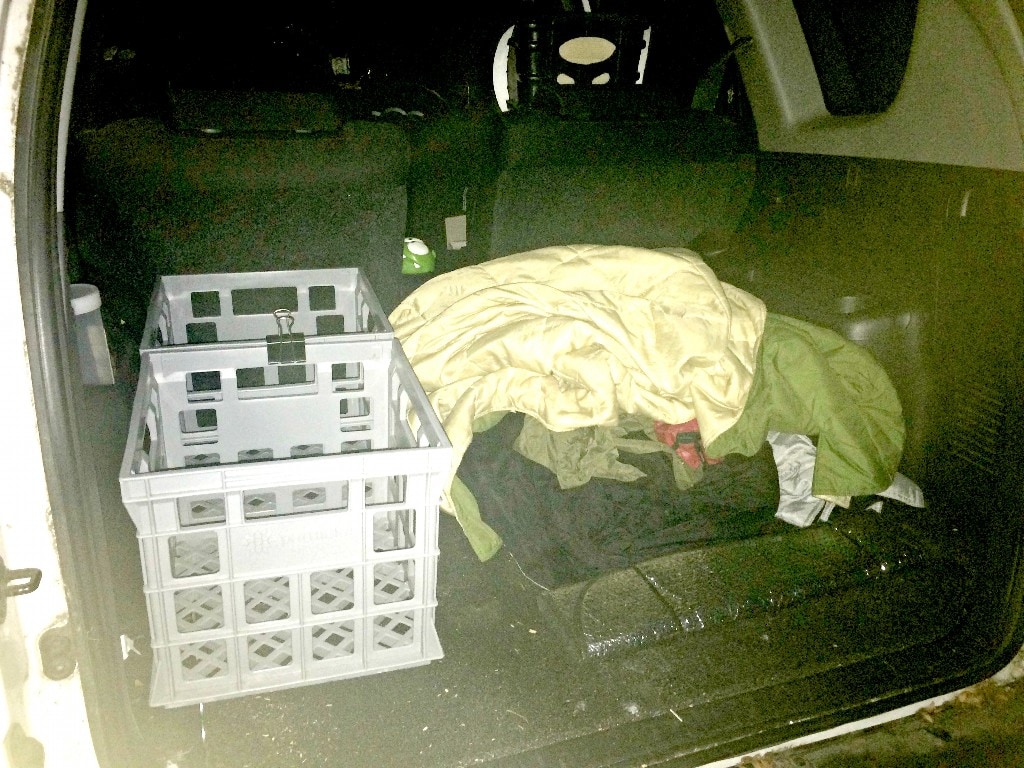
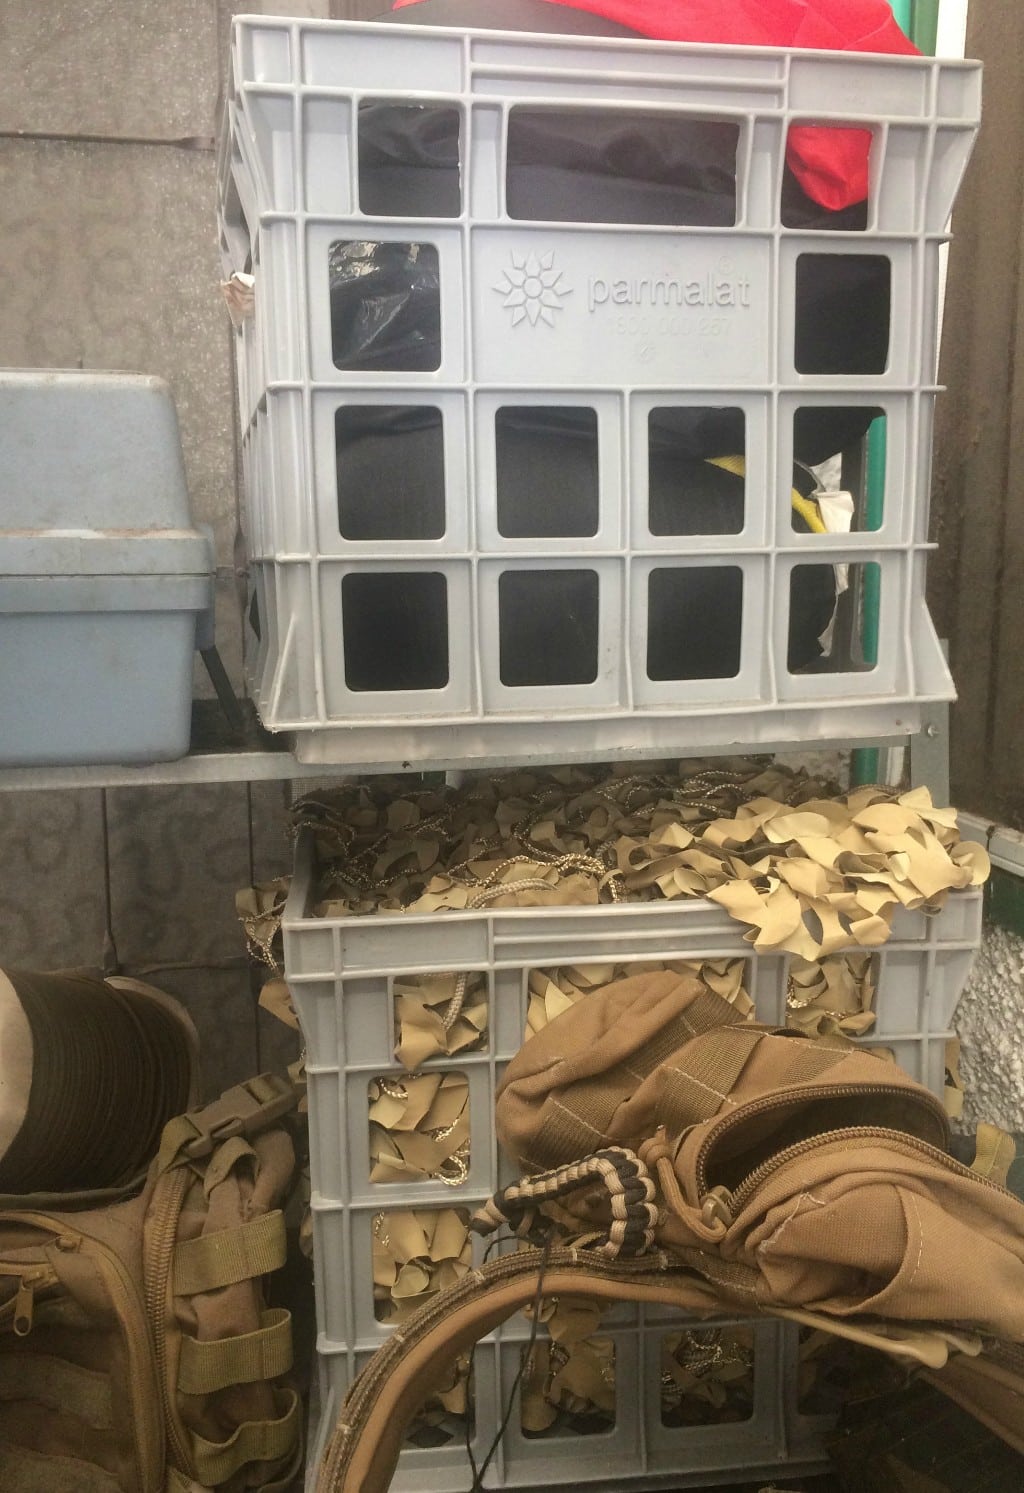
I also pack my camping gear in them: hammocks, lanterns, propane store and fuel canisters, pots and even pans. I have one for sleeping bags, one for power generation technology and one for "household" camp-accessories. Coupling this with our big-assed tent and camp bed, I'd say I could bug out in relative style with my whole family using about six milk crates of gear. The boot of my car can fit none to twelve crates with relative ease, so that leaves us with, let's say, three to six crates worth of refugee loot we can pack and go with, less if we pack extra food and water .


Given those numbers, each member of our four-person family gets about one crate of space as their allowance. Extra space can get stuffed full of blankets and jackets, filling all those gaps and pockets with padding and the like. One thing to note is that milk crates, being skeletonised, are not even remotely waterproof. Lining them or wrapping them with heavy duty trashbags should do the trick, and includes some trashbags in your gear by default.


As an addition to our bugout plan for floods, we have my two-person kayak. Having a non-wading means to cross waterways is key. We have maritime-rated flotation vests for everyone in the family, especially the kids, plus helmets, be they bump or bike helmets (remember: expanded foam floats). Rope and climbing harnesses don't go astray either, and I figure I have enough rigging gear to set up a rope bridge over any river narrow enough to sling one across. Take a page from the SES floodwater guidelines: "Never drive ride or walk through floodwater - if it's flooded, forget it."

Have a go-to destination in mind, maybe more than one, and plan out different routes, in case of traffic snarls, cut roads or bridges or obstacles to your egress. Keep your vehicle fueled and fit for travel. Stock up on packable food. A couple of bricks of cans at your local big-box produce store per trip will put you in good stead.


Bear in mind that in most cases the milk crates yo use stacked behind a grocery store are not abandoned but remain the property of the milk company. That's why I suggest them as as evacuation expedient solution. Should the situation arise getting it done is key. There are commercial options for packing gear, look into those if your budget allows.
http://modernfarmer.com/2013/08/illegal-use-milk-crates-anything-besides-milk/

3. Practice

Evacuations are not easy things; they're panicked, rushed and anxious times. Much like in combat, fine motor skills will be affected, rational thought will be interfered with. Kids will cry. Things will be left behind. Organize your bug-out kit early and have it sorted and ready to go. The more you can do early, the better off you'll be under the pressure of "time to go!" Remember, it's going to be harder if it's night, or storming and wet, more so again if the water is already at your ankles or the embers are falling.


There's no harm in doing dry runs either, especially if you can get the whole household in on it. Packing for a camping trip is a great opportunity to do so, with the payoff of the trip itself and "let's get on the way quickly" as incentive. This needn't be a "duck and cover" air-raid drill with stopwatch and sirens but instead some trial runs, from a dead stop to a "half the gear is already packed." I'll let you gauge how long it will realistically take you to be on your way, with the barest of essentials from when you decide that your position is no longer tenable and it's time to make a move. Make tasty meals from your stashed bug-out meal ingredients to get a handle on what you can do to keep morale up whilst on the go.

Lastly, have plan for your pets. Take them with you, or set them free to fend for themselves, whatever your conscience allows.


Be safe out there, and be prepared.

Tuesday, July 4, 2017

Review: Tensile style Skytent


I love tents and I love hammocks, and I've expressed a desire for one of the Tentsile aerial tents for a long time, but they are quite expensive. Not wanting to miss out forever, I kept an eye out and checked out AliExpress, where real things go to be replicated. For Giftmas I bought myself the one-person equivalent. I always feel a bit bad buying knock-offs but at the very least, its getting the very innovative concept out there.


So, given my ongoing stroke recovery and my work situation, we haven't ben able to go away camping, so I hadn't been able to tryout my aerial tent. Australia Day came around and we were invited to BBQ in a park, sounded like the perfect opportunity to try it out. I took some extra webbing strapping, in case we had trouble finding tree's to sling it on, but as it turned out the picnic table we picked was close to three gum trees. I unrolled the skytent from its stuff-sack bag and took stock.


The contents included the triangular base, made from webbing reinforced ripstop with a low (70D) Cordura number and (high quality silicon coating to give it a waterproof index of 2000-3000 mm) the base, which is about 4m a side, had built in reinforced eyelets for the two sets of shock-cord threaded anodised aluminium alloy poles and a light, waterproofed (to 1500-2000 mm)fly sheet to connect to.

It also came with three sets of 6m (19') loop-ended webbing, and shackles to for it to the base. At one end a ratcheting system for increasing the tension was supplied.
The base triangle comes with a breathable B3 bug-screen net with twin zippers. Built into the "roof" are two sleeves to feed the poles through to keep the roof in place and add stability when setting it up and to drape the fly over.


Once set up, which took a bit of doing (pro-tip; set the tent part up on the ground in the middle of your space, then string your straps. I rigged my straps with a truckers hitch. Getting partial tension on the tent to set it at a good height was just matter of sliding the webbing up to the right height, one tree at a time and tightening the truckers hitches once they were even. PRO-TIP 2: get the three corners as evenly high as possible. this will stop you sliding "downhill" on the slick ripstop nylon.

Once set up, the remaining slack can be eaten up with the ratchet, but this takes some doing. I'm glad we weren't setting it up in the rain. Once fully tensioned which it really needs to be, we put the fly on, which  had nylon hook hardware and shock-cords. The 240D fly has a single up-and-down zipper which coupled with the wide door in the flyscreen, makes a nicely framed entry/exit and window when pegged back. with its attached toggles.

The interior is spacious, the 4m sided equilateral triangle provide  almost 7m². of floorspace, with 1.2m (the almost 4') of loft, with its quite steep sides, there is  a lot of real-estate.

The wide webbing reinforcements throughout the base distribute weight nicely. I'm 192cm (6'4") and weigh 90kg (200lbs).  Laying right down the middle, legs splayed to the bottom corners, I was very comfortably supported.

This skytent is rated to carry 400kg (880lbs) and the heavy-duty ratchets buckles have a staggering 2.5 ton minimum breaking strength. Even so, the makers recommend only stringing it at a maximum 1.2m / 4' from the ground. As a good rule of thumb, you shouldn't set a hammock up from higher than you would want to fall from. Or climb into.

The supporting poles that give the skytent its vertical structure are seated in these washer equipped eyelets, and with the shaped ends of the poles, they seat securely and remain in place even with the rambunctious efforts of Tactical Baby. The seams are all also all double stitched. The whole tent is well finished.  I had had worries about the quality, given it was a knock-off, but it's been well made and put together.

All packed down, the tent weighs3.0kg or so, including the included webbing and the ratchet. and packs down into a stuff sack measuring 50cm x 20cm x 20cm. It's not too bulky nor heavy and would make an excellent addition to a backpack for a camping trip.

Internally as I've said it is spacious, but good set-up is key. if any one point of the triangle is higher or lower than the others the effect is a slow and steady slide to the lowest point.

I took it camping off to a full-emersion live action roleplaying weekend, "After The Fall" .
So I found myself three trees and set myself up. As with most tents, second time was much quicker and easier, and i'd had my lessons learned from my first attempt so it was pretty quick.  I even slung a second hammock along side, for lounging in when I was in my full tyre-armour kit. TO somewhat disguise the bright green of my tent and its fly sheet  I draped the whole thing in some scrim. One thing I didn't want was anyone tripping and falling onto me as I slept, so I put it a little higher than previously.
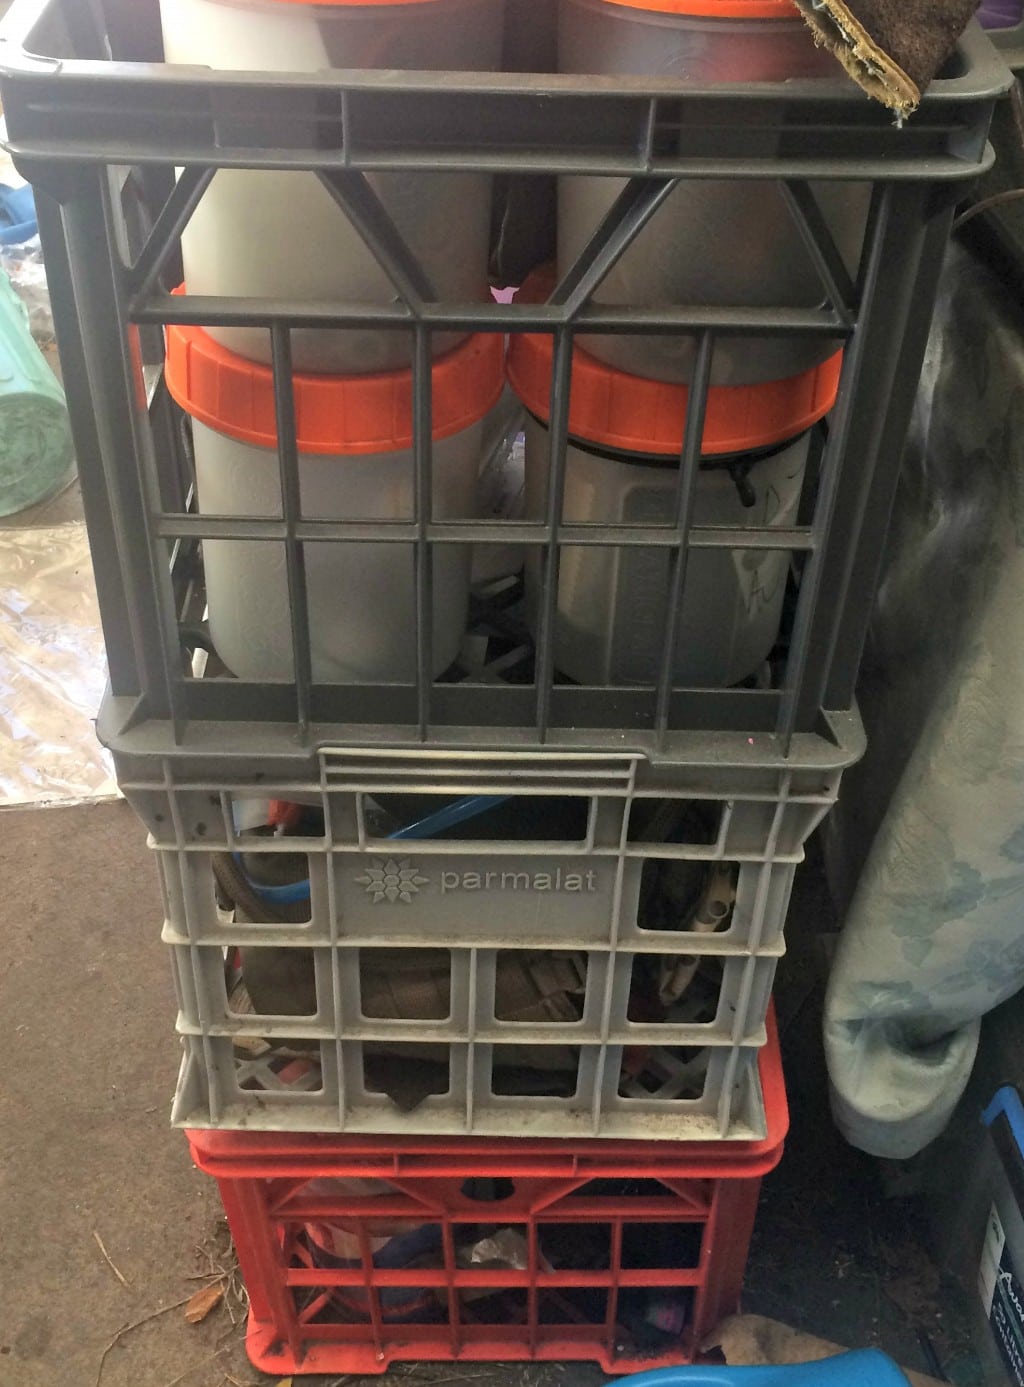
So high in fact I needed to step up onto one of my tactical milk-crates that I pack my camping gear into. I also stowed my kit under the hammock, off to one side from the Skytent, in case I did have a fall.

Inside at one of the three apexes was a pocket system which worked quite nicely with a jumper stuffed in it as a pillow. I used the zipper as an attachment point for my night-light as there weren't any internal loop hangers.


All in all I am both impressed by and happy with my SkyTent, and would heartily recommend you al lgo check out the original design at TENTSILE - Stingray

After an afternoons romping by Tactical Baby, and perhaps more roughhousing than was necessary, one of the poles has been warped and now adds an uneven curve to the dome, but no real issue there.  Certainly no fault in manufacture. I've managed to straighten it out a little but eventually  I might either replace it or run it through a pipe bender in reverse.

The Skytent handled nicely when occupied by two. even if one was little and bouncy and the other big and lumpy. Alas, I haven't tried it with two adults, but they are rated for it.
I put  a yoga mat in it when I camped, just as insulation, it was plenty comfortable to lay in in warm weather but any breeze below will chill you right down. Setting up an under-quilt like those made by the Go-Outfitters would work  a treat, but you'd need a triangular one.   


One thing I found was that the fly lifted and flapped about a bit, so I lashed it down underneath with some handy paracord.


All in all and excellent product and not just a gimmicky concept. all the benefits of a hammock and tent combined.

Pro-tip #3: set your doorway at chest height if you-re expecting friends to pop by. Nicer conversations for everyone when you can be eye-to-eye.


Related Posts Plugin for WordPress, Blogger...