Wednesday, March 21, 2018

Review: Combat Australia - ghillie suit


Getting kitted up!
For the last four years I have attended an annually held post-apocalyptic  Live Action Roleplay event called “After the Fall”, the first iteration “Event Zero” I wrote about here:
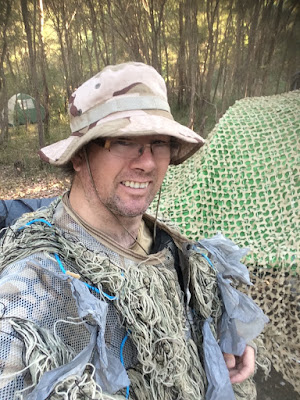
In the first iteration I played a gung-ho soldier type who met his end being hacked apart by Steel Legion ravagers after a NERF-gun malfunction and failure to adequately transition to CQB weapons. In subsequent games, I signed up with the Junkers; a culty bunch of wasteland scavengers, scrapping by on the edge of the town of Sanctuary. The new persona I developed was the of “Trashman”  a somewhat deranged human scarecrow. Central to this character was the philosophy of “you can’t kill what you can’t find” and central to this was my new costume. Regular cammies wouldn't do so I opted for a modified suit of Desert Camo Ghillie. 

Pushing some food in before heading back into the bushes
Which I “junked-up” to keep in theme. I got my Ghillie from  Combat Australia who had this to say of them:

Why is a Ghillie camo suit so much better than just the standard issue AUSCAM uniform for concealment and camouflage?

The uniform that the Australian Military current used is called the DPCU, which stands for Disruptive Pattern Camouflage Uniform. It is a general purpose uniform designed to disrupt the visibility of a soldier from 300 metres and beyond. It is obviously not designed to be the perfect blending colors for all terrain including urban, bush and deserts. The Ghillie (or in Australian military its more commonly known as a Yowie suit although that is changing over time) is designed to go beyond this and actually hide the soldier.

Get your cover on, Trashman
The Gillie Suit has the ability to conceal the soldier which is not only far more effective at 300 metres but is very effective at close range distances. For instance, 50-100 metres and in some cases -point blank. It achieves this in several ways. Firstly the colors are designed specifically for the Australian bush and therefore are far more effective given that no consideration has to be made for urban or desert warfare. The colors are based on the woodlands American design but are slightly lighter to best cope with the Australian bush, which are muted shades due to the drier climate.

 I adorned my suit with “trash” in the form of blue bailing twine from hay-bales and curb-side rubbish bundles, and strips of shredded plastic shopping bags, which I tied to the twine or directly to the burlap strands.  I also took to tying on any piece of litter I found dropped in the scout park we based the game in.   

I fully acknowledge that doing so took way from the “natural muted colours” the suits provided but it lent to the “human detritus” characterization I was going for and I kept a close eye on the kinds of rubbish you see in abandoned lots, under railway siding bushes and the like, as  I was intending to lay in ditches and under bushes a lot. A touch of social engineering was in play here: the litter-blindness people get when having fun. “don’t look at me, I’m work …”

Combat Australia go on to say this of their Ghillie suits: The 5 S's of Cam and Concealment

In military speak the cam and concealment come under the 5 S’s...
One windblown clump of trash or a whole TrashMAN?
·         Surroundings:

Have the cam and concealment lesson this consideration comes under the title of surroundings?

I made a habit of moving  through the tree lines as often as possible, avoiding open fields and roads.  The offered me plenty of duck and cover options  and also kept me in the shade out of the hot sun.

·         Shape:

Shape refers to the soldier being spotted due to the symmetry of his body eg. straight arms, legs, head and also the symmetry or shape of the troop movement being the soldiers in a group or formation. Ghillie suits work towards disguising this by disrupting the straight lines of a human body and disrupting the pattern of soldiers in formation together so they more closely resemble vegetation.

why are all the photos of Bigfoot off center or blurry?
I walked hunched and bow legged, I tucked my arms and kept my stubby  NERF launcher in Classic Low Ready

·         Shine:

Another important consideration is Shine, obviously the DPCU has some success in alleviating this concern but the 3 dimensional nature of the suit is far more effective and pretty much eliminates this concern completely. Wearing the Ghillie/Yowie suit answers this concern comprehensively.

I draped the included weapon drape scarf of the suit over and around my NERF launcher, leaving its action free my attached scope accessible. Pulling the mesh down over my face obscured vision a little but greatly masked my shiny skin and glasses

·         Shadow:

Shadow is another concern especially when trying to be concealed from air drones. Although the soldier’s body is almost impossible for the drones to spot, the shadow can be very obvious at certain times of the day. The Ghillie/Yowie suit again assists in this regard by breaking up the obvious shadow of a man much like it distorts the shape, making the shadows more closely resemble the natural vegetation.

In the most recent event “ Buyers Regret” we were informed there was a drone in play.  I never saw it, but shadows can give you away on the ground too.  I was especially careful with this at night as the site had street lamps  along its roads which cast long shadows. Any moving shadows were a dead giveaway.

·         Silhouette:

These points are also very similar to the issue of silhouette as again it distorts the obvious outline of a soldier silhouetted against the backdrop of distant light sources.

Photobombing a mutant Wastelander. never knew
As with “Shape” and “Shadow”. I kept to behind the tree line when moving and aimed to lurk behind or in copses of trees rather than on roads or plains. Its amazing how often people will walk right around  a corner and not “slice the pie”  in an outdoor setting. Squatting by a stump or leaning up against a tree “thinking tree thoughts” I was often bypassed or ignored. Once people realised I was “out there” this became a running joke, with people talking to bushes and denying being alone because “Trashman is here too”.  The number of people who blissfully unawares put their back to what was essentially a murder-hobo was astounding.

There are many advantages to wearing a ghillie camoflauge suit kit over a conventional flat colored uniform. One of the considerations to be made when wearing a Ghillie or Yowie suit are that it is always going to be hotter inside the suit than wearing a standard camouflage uniform. This is obviously the case as the material is thicker by its very nature and works somewhat like a fur coat. This concern is alleviated as much as possible by the design and construction of the suit.
Junker with a Trashman shadow
The inside lining is made of sweat mesh which allows air to flow through as much as possible. The strands and individual meaning they are not “clumps” of cloth than can more effectively retain body heat. These strands are similar to single strands of what we call in Australia “hessian” although other parts of the world including the US and the UK more commonly refer to this material as “burlap”.
Shift change at the Town gates brings Trashman out of the bushes
Please note that although there are some fire resistant qualities to this material it is still highly flammable and should be kept some distance from open flames. Other considerations are that it is obviously heavier than just wearing a uniform (by about 1.5kg) and gathers weight as vegetation gets stuck to it. Retaining vegetation is an intentional characteristic as its optimal to have natural and realistic local vegetation working in conjunction with the suit but will add to its weight as it retains stick and twigs and leaves.
Trashman attending wounded after a mass casualty IED attack, spot him?  
I found that my ankles, knees and elbows picked up the most detritus and that around the ankle hems the burlap fibbers fluffed up and collected the most  vegetation. This had a bonus effect of brushing away some of my tracks as I walked, dragging in the dirt as I stalked.

The third consideration is that fact that the suit will make more noise than a standard uniform as it by its very nature displace more vegetation around the soldier when in the prone position or when in the standing position against vegetation in that mater. The suit is most effective when hiding in one place for longer periods of time rather than running. It is best suited therefore to stalking.

Popping up from cover to provide more menacing overwatch, remained unobserved
When  I took picket for my Faction or provided overwatch on one of many “babysitting” runs I did on valuable assets,  I would find an off-track spot and sit, or lay and gather handfuls of local detritus and toss it over myself to better blend in and add to my ” I’m meant to be here“ aura. Walking slowly through the bush and being mindfull of twigs and the like was important as the added bulk of the suit (including height). I snagged on lots of things over the weekend and learned a good distance to keep and how to move  quieter as the event drew on. Part of the discipline was to keep he suit on the whole time. I donned it after getting up and only doffed it for bed.

In the Australian Army there are quite a few regiments where possessing a Yowie suit is required. To my knowledge this very day there is not an issued Ghillie suit, this is intentional so that the soldier becomes capable of constructing his own which in turn, makes more effective camouflage.

 I found that the press-stud  jacket closure was probably  a touch weak ,but with an over-belt it stayed on even when snagged ,and even over my post-apocalyptic tire armor a button or toggle or two would fix that… Also the drawstring pants was only barely sufficient to keep the pants on and in place, especially when crawling through brush belt loops would assist as would a bracer-system which I could rig, for next time.

Paint me like one of your French piles of trash, Jack.
All this said, I got spotted by a lot of people too. Wearing a ghillie suit does not make you invisible but standing behind a bush thick enough to stop a NERF dart doesn't make you bulletproof either.   Bushcraft beats gear any day. Trashman the "Tasty Tree" avoided cannibal ambush for another year. Watch out when you drop that butt and where you pee or when you check under your chair you might see Trashman hiding under there, eating your bees!

Professionally watermarked photos courtesy of The Professional  Hobbyist on Patreon here and on Facebook here.

Friday, March 16, 2018

lJ posts - reflections on the past.


So, back in the day, in the late 2000's I had a LiveJournal into which the first iterations of this blog came to pass.

A couple of important things were journaled there in my beginnings of documenting preparation things:
1) my EDC and BUG-OUT bag kits:
2) Black Saturday 2008/09 fire season:

my 2007 EDC loadout: Compare with my 2012 version posted here:

Someone asked me recently if there was anything I didn't have on
me, and I thought I'd post the list I made afterwards. Not quite a
Bug-Out-Bag, but at any given time, this is what I carry around with me.

That's before I even pack things into my bag . . .

Green Crumpler satchel
-sharpening tools (diamond stones) x3
-Alan keys (full set)
-packaged survival kit-in-a-can
-cable ties (180x4.5mm) x20 or so
-waiters friend
-metal chopsticks
-9" section of aluminium arrow shaft (my metal straw)
-titanium splade
- 90cm wire saw
-essential oils
-personal grooming stuff (toothpaste, floss, toothbrush, tissues,
hairbrush)
-needles and thread
-first aid kit (overstocked from Hospital supplies, lube, condoms (you NEVER know))

Under-vest-Harness
-Barz prescription polarised goggles
-wallet (safety pins and needle&thread)
-work ID
-USB memory sticks x2
-Folding C.R.K.T. K.I.S.S. 3"
-LED flashlight
-pen
-iPod
-PDA
-aluminium accessory carabineer
-all elastic hair ties
-keys on big steel carabineer
-mobile phone
-20m nylon cord

Belt
-BuckTool multitool (with attached HD magnet)
-rope kasari fundo (String of Doom)


Zombie edition EDC (Nov. 8th, 2007)

So, apart from what I usually lug around (and again, not
including my lunches, kendo gear twice a week, books, external 300Gb
hard drives, or the odd 14" cast iron camping hot-plate on occasion),
here is my theoretical end-of-civilization bug-out-kit.

Its very similar to the kind of gear I lug about when I got to BIF
weekends, so I know what I can manage, but there I do it in period-ish
style. The boar spear is a bit overkill, but, well, that's so me
isn't it? For non-supernatural disasters, I'd probably leave the spear
in the car. . . hahaha

Green Crumpler satchel
-sharpening tools (diamond stones) x3
-Alan keys (full set)
-packaged survival kit-in-a-can
-cable ties (180x4.5mm) x20 or so
-waiters friend
-metal chopsticks
-9" section of aluminium arrow shaft (my metal straw)
-titanium splade
- 90cm wire saw
-essential oils
-personal grooming stuff (toothpaste, floss, toothbrush, tissues,
hairbrush)
-needles and thread
-first aid kit (overstocked from Hospital supplies, lube, condoms (you
NEVER know))
-Fluid resistant surgical masks
-food supplement bars ~380Cal/100g
-30m 11mm static line
-Petzl Ascension, Shunt, figure 8
-Hydration pack
-short bolt cutters

Camping hip bag
-20m 5mm dynamic line
-
carabineer
 -camouflage waterproof hooded poncho
-tricks + traps kit
-20 4" nails
-mini gas stove + bottle
-battery free induction flashlight
-Swedish Army fire steel
-collapsible bowl/sink
-lensatic compass
-LED head lamp
-enamel mug
-CRKT Stiff KISS knife (l.hip)

Under-vest-Harness
-Barz prescription polarised goggles
-wallet (safety pins and needle&thread)
-work ID
-USB memory sticks x2
-Folding C.R.K.T. K.I.S.S. 3"
-LED flashlight
-pen
-iPod
-PDA
-aluminium accessory carabineer
-all elastic hair ties
-keys on big steel carabineer
-mobile phone
-20m nylon cord

Belt
-BuckTool multitool (with attached HD magnet)
-rope kasari fundo (String of Doom)

Ontario 30" Blackwind sword (l.hip)
Fiskars 23.5" splitting axe (r.shoulder)
Arcteryx climbing harness
Dainese body armour+2nd back plate
Leather work gloves (over)
Latex examination gloves (under)
Armoured shorts (street hockey)
Shin + knee armour (street hockey)
HiTech GP boots
Cold Steel boar spear


2008 Fire Prep


Sunset, Friday night, from Belgrave shops. The Sun looked like a cherry, and i could look right at it without blinking.


I've fought fires before, and know what it is like to get embers and ash in your eyes, nose and mouth, the length keeps it out of ears, and the back of my neck. I have practice wearing head-dresses, they are very comfortable.


suede doesn't ignite easily, and is easily made damp, the goggles are polarised and i have tended fires with them and they are really good at smoke and ember protection, and the 9 LED light is, well, brilliant.

wearing this, i can protect my head from radiant heat, and ember attack for any expose to the fires i may get. Better prepared is better better protected.


 Belgrave Fires
  fires all downgraded to "safe" still, going to be vigilant


We are on the other side of the valley, and the wind is going the other way. No smoke, no embers. Elvis the water bomber and a couple of Huey's have been back and forth for the last hour, but they have stopped.

We are standing by to put our fire plan into action if needs be.

Gutters are stopped up and water-filled, buckets and mops ready.
My PPE is ready, the car is fueled we are going to gather the essentials and have them ready, just in case.
My neighbors are on their deck's talking loudly on their phones and laughing. I am not planning to leave just yet.


FiresFeb. 8th, 2009 at 7:04 PM

66 dead, 700 homes, 2 towns -gone-, not damaged,

GONE

we're fine, its rained overnight and today, which has made everything extra damp, which is great

details of the scope of the disaster here:

in the advent of fire, my family will evacuate at first sign, and i will stay and defend the house. i have several contingency plans, and have witnessed bushfire and grass-fires before.

a locally living buddy has selflessly volunteered to come and help me, if needs be, he's "just down the hill" and its always good policy to "dive-with-a-buddy"

just so you all know, and before you tell me off . . .
i have been told, in no uncertain terms, that i am not to "be a hero" and die for my home. i can live with that, i have a lot to live for.

Tuesday, March 13, 2018

hat-tricks!


Just the Tip: Hat Tricks

Hats. Pretty ubiquitous. Be it the classic Stetson of the cowboy, the sand, maroon or green beret of the bad-ass snake-eaters (colours depending on your nationality), the Akubra with corks and/or crocodile teeth of the Aussie bushman, or the perfectly curved and patch bedecked ball cap (or patrol cap) of the seasoned operator. These are often underutilized pieces of kit.


So, hats! They're not just head coverings and eye shields. Read all about it here on Breach Bang Clear


Tuesday, February 20, 2018

Review: sKey


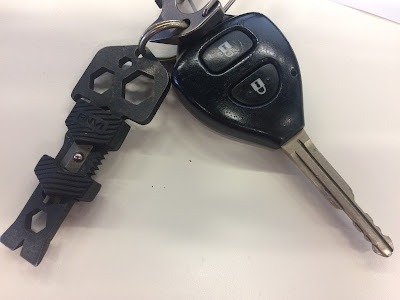
It's no secret that I am a big fan of keychain tools. I've covered dozens over the years, and there are a number secreted away within my EDC, much to the chagrin of airport security and delight of random "I broke my widget" people of the workplace and dinner party alike.
I keep an eye on the Kickstarter "tools" posts and cool-tool sites alike. The SKey is neat little tool that is jam packed with features. This is the new and improved version, in titanium. Yay Titanium. From top to bottom: a Key ring hole.
A very fine hole, just wide enough to feed a split-ring through. Wrench holes. I got the Metric system version which was 4mm, 8mm and 10mm sized holes, the Imperial system version has 14/4" and 5/16" openings. Bottle Opener. what pocket tool would be complete with out the generally supplanted bottle-cap opener. I usually drink screw-caped drinks, but its always good to be the hero and pop a budddies beer-bottle when they've a need. Saw-blade. A set of 13 straight-cut teeth with no fleam this make for a limited rip-saw action, but it'll do in a pinch where you need to saw rather than cut or chop.

Two-head screw bit: secured in the center of the tool in a gap cut into through the center is 1/4" tool bit, with a flat head driver at one end and a chunky Phillips head at the other. The supplied bit is 32mm long, so swapping it out with your own bits of comparable length should be possible. New silicone band: From heir last campaign's version feedback, they learned that it was very hard to keep the bit in place by manufacturing precision alone. The bit is either too tight or too loose. So they developed the new silicone band to keep the bit secure, the band doesn't get in the way while opening bottle or other functions.

Its easy to slip off to make full use of the saw as needed and the bit pops right out. Screw driver hole: Paired with our two-head screw bit, Skey can be used as screw driver with this 1/4" socket. The bit has a ball-bearing detente to keep it in positive fitting and the sKey body adds quite a bit of torque. Box opener: They "pointy end" of the sKey can be used as box opener and works like a charm. The broad chisel end not only acts as a scraper, and a flathead screw-driver, as well as turning the entire tool into a functional, if small, pry-bar. Wire peeler: in the middle of the Skey box-opener end is a notch designed to work as a wire stripper is quite handy for simple electrical device repairing. The deep, sharp sided notch is perfect for stripping quite fine wires.

It's a handy tool and is cutting edge free, keeping it out of the grabby hands of most Eagle-eyed airport security guards.


https://www.kickstarter.com/projects/35126180/skey-key-shaped-titanium-multi-tool-now-in-black

Monday, February 19, 2018

Review: L10 flashlight

I love flashlights and always like having extras on hand, following the "two is one and one is none" philosophy. pocket and palm sized lights are even better, as they can fit into small packages, and be used in variety of settings. I especially like small lights that I can throw, drop behind a bookshelf or wedge into a crack to illuminate a workspace. I have a collection of these as part of my EDC, including the previously covered bullet-02-smallest-edc Lumintop Tool AAA Jenyx UV and an as-yet unreviewed Four Sevens Bolt action penlight

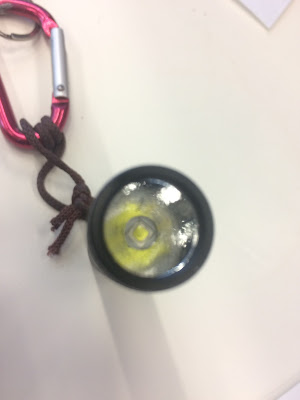
This particular addition is the L10 Twisty from L3-Illumination Lumintop. It is a lightweight(at just 20g (0.7oz) without battery flashlight, featuring a Cree XP-G2 9R5) LED with lifespan of 50,000 hours and it takes a single 1.5V AA battery (ni-mh, alkaline). It's reported that rechargable high-performance 14500 batteries are not recommended because they heat up quickly.

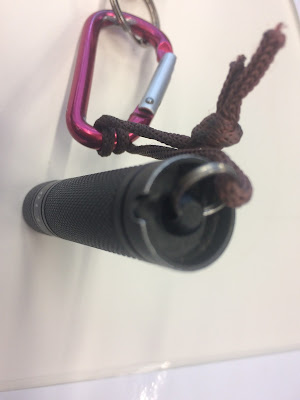
Constructed from durable aircraft-grade aluminum with a Type III hard-anodized anti-abrasive finish to house the toughened double ultra-clear glass lens it is waterproofed to IPX-8 Standard. It measures just 79mm(length)x17.1mm(dia) for a very convenient pocket addition. I have mine attached via the end-cap lanyard hole to a short cord and thus attached to a house-key. Ease of entry for those dark night returns.

The L10 is activated by a twist switch set into the body of the light around the 2/5 mark of the body. Twisting the head of the L10 engages the first of four modes of action. The four modes activated by turn and re-return the head of output are as follows: Firefly (0.09lumens brightness with 147 hours duration); Low (3 lumens, 30hrs ); Medium (30 lumens); High (120 lumens, 1.5hrs duration) (when tested with Ni-mh battery with actual capacity 2500mAh).

It features a stable current regulated circuit, providing stable brightness throughout use. Unlike many flashlights of this type, it has no mode memory, always starts on lowest mode. Just tighten and loosen the head to switch between modes. Its flat base, and lanyard cutaways allows the light to be placed on its end to move into its practical candle mode.

The head end comes right off by unscrewing to replace the battery which is something you need to bear in mind when switching modes and also using the light in wet situations. It has a rubber- o-ring to seal it but once over-unscrewed the head can just fall right off, exposing your internals, dropping your battery and shutting of the light all in one annoying "ker-plunk".

All in all the L10 makes a very useful little light, great for those "i dropped my "X"-in the foot-well of the car", "where's the damn key-hole" and "what's under the couch?" moments in which a larger more powerful light would be overkill. Solidly made, functional and convenient, the L10 is welcome addition to my janitor-grade bundle of keys.

Thursday, February 8, 2018

Review: ZU Grunt

ZU Bladeworx Australia

I'm a sucker for a well made blade, and it's always hard to turn down an opportunity to add to my collection. I've been a fan of the ZU Blaadeworx knives or a long time and was already a proud owner of their Mekanix which lives in my IPad bag and goes most places with me as part of my EDC loadout. A friend loaned me his FFSK to review and it was sweet piece too. I've been lucky enough to follow along in the ZU Nation facebook group which is where other ZU owners congregate. This is where newreleases are announced and the pre-orders are advertised.

As the ZU Bladeworx business case revolves around small batches of blades being made and selling-out almost before production beginning, the best way to lay hands on a new one is to monitor the upcoming releases. So, when I saw the Grunt coming up, I thought I'd splurge a little and put my deposit down for a pre-release. A few weeks later and some production shots later, the "round 2" payment came due, and I started getting excited.

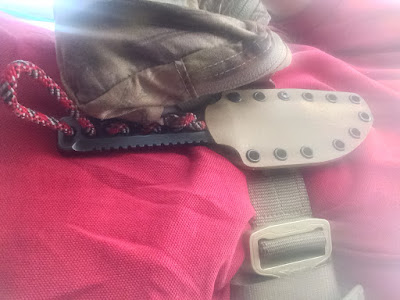
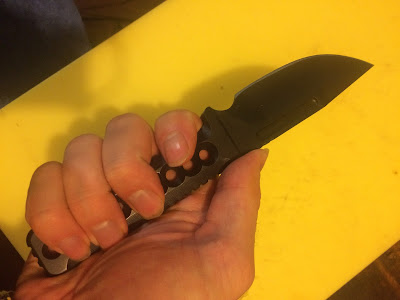
Once I had it in my hot little hands I was immediately impressed with its heft. At 220g (7 3/4 oz) it fits nicely into the niche the MSM-KA-BAR MSM-001 makes, size wise, whilst being a little less aggressively built. Sometimes you can have too much knife. The Grunt's skeletonised handle reduces the overall weight but maintains a lively balance and also allows for a variety of cord-wrapping options. The finger grips were not unlike those in the Mekanik, which were nicely finished so as not to tear up the naked hand.
The lines of the knife are very simple, almost plain, but that lives up to the Grunt name of the blade. Another similarity to the Mekanik is the grove running down the flat face of the blade on either side. This reduces the weight and would ad stiffness, on a longer blade, something the Grunt is in no danger of needing. its 6.5mm blade thickness is not playing around. This isn't a scalpel, its a pig-sticker. Like all ZU Bladeworx blades, it ships with wicked keen edge. Milled from high grade tool steel Cryodur 2379
 [D2] and then black nitride treated, after hardening to a Rockwell of 58-59HRC. these are hard-wearing blades.
I'm not one to abuse my knives, and save from an occasional battoning I see a a knife like this as a cutting, slicing and chopping tool. If you need a pry-bar, or a hammer, get one! That said, once I mounted the Grunt to my hiking and adventure "battle-belt" with its supplied updated Blade Tech Tek Lok spring-loaded locking belt fitting. I've used the older Tek Lok and this was a marked improvement, nicely paired with the knife and its kydex sheath.  It was so comfortable I went out shopping a couple of times with it on my belt not even realising. I managed not to land in any legal trouble, but thankfully no one at the hardware store cared I was sporting a hefty fixed-blade on my hip. That is actually a good point. for all its mass, he Grunt is not a large knife. It's a sensible size for sensible jobs. I take it camping and frequently do some camp-craft with it. not only food-prep but whittling and kindling making, I've also used it for crafting pot hooks and fire-tending sticks.

The blade features jimping on the spine and a notch forwards of the guard to allow the user to choke up the grip for fine work.

Here's a little bit about ZU Bladeworx, because  I think they're a really  interesting company with some important and relative contacts: They are an Australian owned an based manufacturer of Close Quarters Combat equipment and are a trusted manufacturer to the Australian Army. They have an ADF issued Roman Vendor Number.
They work closely with Australian CQC experts including Paul Cale and Ray Floro, both who are internationally renowned hand to hand combat experts. Paul and Ray are both CQC subject matter experts to our own Aussie Army and foreign allied armies.
Their products are either made in Western Sydney, NSW or North Brisbane, Queensland. All our products are legal under NSW and Queensland state weapons laws for civilian ownership. "Legitimate reason for carriage" is an important phrase. 
Most of their knives are limited edition and include the following;

There is an active collector community with a brisk buy/sell/trade philosophy in case you particularly want to get in on the action.

These are a solid, no frills, hardy blade, good for hard use as well as delicate and fine tasks. Deliberately engineered and superbly finished, these striking blades are both a collectors delight and a prepper's mainstay.


Wednesday, February 7, 2018

Review: Jimmy and Chappie


Sometimes, you really just need the right tool for the job, especially if that job involves bashing things or breaking things. Sometimes it's a pesky padlock you lost the combination for and can't manage to shim open. Sometimes it s a pallet of wood you're recycling and need to cut the rusted nails out of. There are lots of different reasons having a set of bolt-cutters or a small crow-bar for. I'll leave the glorious details up to your imagination. Importantly, sometimes these jobs are called for away from your workshop or bunker. Which is when smaller, portable versions are called for. that's when tools like my "Jimmy" and "Chappy" come into play. I have a full-sized set of bolt-cutters (seen sheathed in my SORD 870 Back Scabbard here) and a collection of pry bars big and small all the way up to a whopping huge 1650mm Cyclone fencing post Eagle bar.

So the addition of a short, 18" Plumb wrecking bar which I've nicknamed "Jimmy" after one of the traditional names for a crow-bar, to go along with the seriously beat up and battle-worn "Chappie" bolt cutter. Both tools I rescued from a nana-garage sale a while back. Why "Chappie" you may ask? Because "Chappie can no do crimes".

 Jimmy is a 18" Wrecking Bar made by Plum, and features a goose-neck at one end and an angled chisel end at the other end. This allows you to pull, pry and straighten, with the angled chisel end good for prying and lifting, the goose-neck end is slotted for pulling nails. The length of the bar is hexagonal in cross-section, making it possible to attach a shifter or a wrench to it to for extra torque, should you really need to pop something open. Constructed from forged high carbon steel, Jimmy and bars like Jimmy can and have taken a beating. Hammered between planks of a pallet ,and stomped on to pop a plank up, even used as an impromptu hammer utilizing the flat face of one of those hexed-sides to drive home tacks or loose nails. I've found the 18" Jimmy offers more than adequate leverage for the tasks I've put it to.


Jimmy has a very hefty weight to it, thanks to its forged carbon-steel construction, which is a boon, but not too much of a burden to carry around in a pack or in the back of a vehicle. I've experimented with carriage options on both my battle-belt and LBE vests too, but am not yet satisfied with both secure, quiet and accessible options. Ideally I'd like to be able to reach back and whip it out to pry a door or pop a zombie in the head, one handed, but if it's in bag or on my back, I'd have to get a buddy to help me out. Not getting hung up on things is also important, especially in a search and rescue or salvage situation and I will end up with a "Medium speed, acceptable drag" option in the end.

Chappie has had a much harder life and bears the scars of years of neglect and abuse. His cutting hammers are dinged and chipped from ill-use, there is rust and crud worked into his recesses and workings. The rubber of his handles is cracked and broken of in many spots, bare metal showing through, and there is a post-fulcrum adjustable nut and post that act to limit over-bite on the cutting hammers. The nut needed a little WD40 and a wrench to loosen but once loose, It was possible to adjust the limiter to allow a better cutting action from Chappie with his compound hinges. The damaged hammers are hardened so are really difficult to repair, resistant to filing as they are. I have been able to do few minor cuts with Chappie, clipping exposed nails in salvaged timber and cutting chain links for home maintenance jobs, but the damage is inconvenient.


Bolt Cutters typically have long handles and short blades, with compound hinges to maximize leverage and cutting force. They can yield upwards of 20 kilonewtons (4,500 lbf) of cutting force for a 250 newtons (56 lbf) force on the handles. Given this, I feel I'm missing out on prime cutting power with the chips and dings in Chappie's teeth. An upgrade to a first-hand cutter may be in order. That said, by adjusting the post-fulcrum nut and having a go at the worst of the deformations to make it workable, but I suspect it would require power tools and re-tempering to get it back to prime condition.

As with Jimmy, Chappie's small size makes it very portable and easily stowed in a pack, back pocket or in a suitable pouch. Being able to quickly and quietly cut chain, cut chain link fences or locks could be very useful in a disaster situation, where search and rescue or salvage might be hampered by bigger, heavier tools.


Again, don't be doing Crimes!

But. Have the right tools available to you you to do what needs to be done. Practice and get to know the limitations and abilities of your tools, and practice caring them to get a good setup in place.
Related Posts Plugin for WordPress, Blogger...