Showing posts with label cooking. Show all posts

Monday, March 25, 2019

Home-Font: campfire Chocolate cake oranges

cooking examples (source unknown)
I like camping, mostly for the campfire cooking options. There's a certain magic to smoking woodfire and sizzling cast-iron leading to a picnic style al fresco dinner. I do a mean pot of chili and a spit-roasted ham is favorite. However for the sweeter-toothed amoungst us a dessert option presents a potential problem. There is a trick to getting foil -wrapped potatoes done evenly and not overly charcoaled, but if you can mange that, you might want to give this a try: Chocolate cake! Be the envy of all your neighbors and blow the "smores" people away.

It is possible to cook chocolate cake in cast-iron dutch oven, they have a habit of sticking and burning quite easily. A number of years ago I stumbled upon the idea of baking cake in the hollowed out shells of oranges. They are delicious and easy!

What you need: a sachet of instant chocolate cake mix (needn't be anything fancy)
cooking examples (source unknown)
components required for the cake mix (typically: eggs, oil)
aluminium foil (for wrapping)
bag of oranges (I prefer Valencia over naval)

1) cut the tops off the oranges, retain.
2) gut the oranges, Jack-o'lantern pumpkin style, retain.
3) remove extra pith bits from the pulp. Macerate pulp with a folk.
4) mix chocolate cake mix, substituting water/milk for macerated orange.
5) fill empty orange shells 3/4 with chocolate mix.
6) cap oranges with retained tops.
campfire cooked by the author
7) cover with foil

8) place in coals
9) let cook for 25-30 minutes, turn 2-3 times.

The rind and pith of the orange will protect the cake and steam it from the edges, whilst cooking the cake will "pop up" the cap, be careful not to rotate the cooking oranges so they open into the fire.

The end result should be a delightfully moist, orange skin oil infused chocolate cake in a warm cup you can hold in your hand and eat with a spoon! After stripping the foil away, the empty orange shell can just go into the fire.

Chocolate cake! That's nutrition
So, from very simple and quite portable ingredients you can make a delicious and uplifting dessert. Oranges keep well and are an excellent camping fruit, chocolate cake mix is light and packs easily. Thicker skinned and pith'd varieties work better for this method, as they act as sturdier and more ablative cook-pots.

You could also try cooking other things in orange cups, different cake, or a duck stew to finish off in oranges for a "duck a l'orange" type effect on the trail.

Monday, July 30, 2018

Review: Firebox stove


I'm a notoriously difficult present recipient, mostly because I like eclectic and specialized kit and often get my own. When my birthday rolled around this year I was in the fortunate position to have made a list of cool things that I had not yet acquired. One such item was the flat packing and portable fire place system called a Fire Box Stove. This is the Gen2 5" Folding Firebox Campfire Stove which is a multi-purpose super tool for fire.Thanks Basse and Barry!

It's a multi-fuel cook stove designed to be able to utilize wood and other fuels found in nature, solid fuel tablets, alcohol burners, iso-butane gas burners, gel fuels (such as Sterno), wood pellets or charcoal briquettes. I haven't yet tried it but i'd think pine cones would work nicely in it, as would shredded or twisted cardboard.


The folding Firebox's large size and its sturdy construction makes it reportedly stable enough for a large dutch oven yet it can be used with cookware as small as a camping cup. BE sure to set it up on stable flat ground to avoid spilling your pot of 'pocalypse stew ... The Folding Firebox Stove is also easy to set up. It's four hinged sides effortlessly opens into position, the internal fire base folds down to lock it into its approximate box shape and the accessory fire sticks and ash-tray slot into place as desired. When it's time to go it folds flat, clips together and slips into its own handy leather case ready to slide into your pack, cleanly and easily.

Constructed of Stainless Steel, it stands 19cm(7.5") tall, 12.7cm(5.0") across when set up and all told weighs 907g 92 lbs). Folded it lays a mere 0.95cm (0.375") thick. The hinges are well enclosed longways loops of rolled steel and steel pins. I found the hinges to be smooth and whilst not stiff, to be firm enough that the walls did not flop around when setting it up.
When the internal base is deployed , it braces the walls and fits it securely. Even after use, the hinges moves smoothly. The ash tray was a bit fiddly to fit but it has a right way and a wrong way, as its not square and neither is the stove. (It's a trapezoid.) The fire sticks either slots through the walls of the stove to offer coal support or into notches in the top to provide stable cook surface.
A perforated grill plate can also be fitted into the top of the stove in place of the fire sticks. This allows food to be directly cooked on the fire, without need of pot or pan but also makes good cooking platform for a pot or pan.

As well as the perforated sides which give good aeration and wind shielding a fold down lip at the top of one side gives when more heat and burn control. Fuel can be fed in through this gap or through the larger holes in the base of the walls. Short sticks, twigs even straw can be fed in though these side slots without having to remove cooking items from the heat. The relativity small size of the stove means that only a small volume of fuel can be loaded in at any one time so no big logs for long slow nighttime burns and it will require constant feeding. The Firestick posts made good fire tending tools and allowed me to lift and shift components such as flaps and the grill plate without burning myself.

The modular design of the FireBox means that a variety of fuel can be used, in a variety of amounts and applied to a variety of cooking methods. My only complaints with the design are that some of the tolerances are very tight, such as the holding pegs of the grill plate which can be; fiddly to seat and popped loose under heat.

A fire chimney isn't new to my firemaking kit. Astute readers may recall the CampMaid charcoal chimney fire starting system I covered. In principle the two are every similar but the Firebox is purpose built as a stove, whereas the CampMaid chimney is designed as a BBQ starter.

With its multiple cooking configurations, useful accessories and collapsible design, the Firebox leverages its lightweight design and sturdy materials it can use virtually any size cookware and make use of some pretty marginal fuel sources to not only cook food, boil water to make safe but it also functions as a portable campfire.

It's small, not for for burning logs but it certainly beats trying to clear a dry spot for a fire after a rain, and preparing a fire pit, or leaving one improperly quenched. The Fire box, being so well vented, burns very completely leaving only fine ash if left to burn out.

As a backyard stove, it was excellent, and meant I could set up a small fire in a controlled way to burn off scraps and have some fun with my little one Tactical Baby, and teach her good fire behavior in a controlled space. In a wilderness setting it might be wise to set it up with some wind shelter, as the perforated sides and base let embers fall through and it would be irresponsible to spread fire, also it shelters the fire and ensures an even burn essential for cooking.


I used my EverFire brick firestarters to both get it going and to do some initial cooking and it worked really well with those. The Firesticks allowed me to tailor the burn height and positioning. With these to maximize their effectiveness.

I noted a little warping of the grill plate after its first use, and some thermal discoloration of the steel from where the stainless steel reached sufficient temperatures. Not that this was a surprise or is a problem but good to remember.

Its a little too big to fit in a cargo pocket,  but small enough to fit in the front pouch of almost any daypack i'd want to take on the trail with me.

I look forwards to collecting the accessories and trying out my lightweight camp cooking skills.


with an Everfire brick as fuel. supported by Firesticks

Off cuts and woodwork scraps kindled by the EverFire brick

time for a nice mug of tea!


Baby wieners toasted and consumed! Vacation fun!


Non-sqaure base plate folds to holds it rigid
A single methylated spirit charged EverFire brick gets it red hot


Heat your tea, cook your dinner, warm your hands!


Tuesday, July 24, 2018

Review: EverFire fire brick

When it comes to fires, we have many traditional options available from: gas, charcoal, heat beads, and wood. Apart from gas, lighting a fire can be tricky and time consuming.  I like to use off-cuts and dead-fall whenever possible, and heat-beads to cook on, and reclaimed timber as firewood.  In getting a fire going, the use of everyday firelighters although cheap, sometimes produce fumes or smoke that isn't pleasant. Also you can only use them once.

 I believe I have located something that is a cheap, cost effective, eco-friendly alternative. A clean burning reusable firelighter combined with methylated spirits that burns odorless and can be used again and again. These are the EverFire fire-starting system. They can not only used as a fire lighter, you can use them to cook a meal with no other fuel source. Just place them on a solid non-flammeable surface light them up and place your pan right on top.

The EverFire bricks are made from a 100% natural mineral which is used in various industries and it's totally environmentally friendly.

The bricks are soaked in a liquid accelerant and lit. The creators recommend methylated spirits or ethanol as it is clean burning, with no fumes or smoke emitted while burning. Otherwise you may use any accelerant of your choice, but always be cautious and store in container of choice in a safe location out of the reach of children. Watch their accelerant tests.

The bricks are then lit with match or lighter and the fuel burns. Burn time for metho is normally 10-12 minutes. When cooking only with EverFire firelighters by placing the pot or pan directly onto the firelighters you can increase the burn time to around 17-20 minutes.

  I've found by the firelighters' third use it will give the longest burn time. Burning itself in and having its "pores" burnt clean of the manufacturing process I believe.

After many uses the firelighters will eventually break down back into their natural form. All you need to do is crumble them up and place in your garden as it is very good for your soil and plants.

After their full burn time, and after 15-20 minutes cooling-down, it can be returned to a fuel bath and recharged. The big ones use between 50-70ml per charge. The small ones between 25-50ml. If you remove the firelighter from the fire and put out with a damp cloth, you will use less than a complete burn. Cooling the bricks reduces the thermal shock they experience when dropping into fuel, thus reducing the risk of cracking and becoming less effective. That said the makers suggest hat even cracked they will function effectively.

I found that a single EverFire brick, soaked with methylated spirits was not only hot enough and long lasting a burn enough to send my Fire Box stove red hot but also boil enough water to make two cups of tea and toast some mini-hot-dogs, as well as starting a fire to make lunch on.

For the purposes of domestic fireplace use, its possible to leave the bricks in the fire until it's died and then retrieve them for recharging, to no ill effect. In some scenarios if it is easy to remove, you can do so. This will increase the overall life of the bricks. In closed fires like Coonaras, or other enclosed indoor fires, you can ease he retrieval process by starting the fire with the firelighters towards the front of the fire. After about 15-20 minutes of fire-starting, just remover firelighter and place somewhere safe to cool.

Once cold return to storage container and recharge for next time. The creators suggest they will last for 30+ fire before they are at risk of cracking and crumbling, but this may vary with use. They seem pretty hardy to me and if treated gently, I can't imagine them just falling apart.


A question came up about dousing the EverFire bricks, should the need arise, and what happens if they get wet or are submerged/dropped in water? smothering with damp cloth should be sufficient to extinguish a metho fueled brick, but if it comes to pass that a brick is submerged in water, thy will absorb it, reducing its effectiveness. However correction this is as simple as returning the brick to it's recharging station and soaking it in fuel. Letting it soak for about 30 minutes. Remove the brick, light it and let it burn out, repeat this process a couple of times and the EverFire brick will steam off any absorbed water will be as good as new again.

In all Webers, fire pits, BBQs, Spits, open fires, or anywhere you need to light wood, heat beads, charcoal, or even to use by themselves to cook or create a heat source. As well as a heat source and limited light source, they can be used as a mosquito repellent by adding a few drops of citronella oil to the metho it is fueled by. Multi-function is huge selling point in my books.

The EverFire brick can be cut and trimmed by hacksaw cutting, should the need arise. The bricks themselves are surprisingly light, even when soaked. Jeff the creator suggested pre-soaking the bricks in metho and then bagging them individually before putting into a tub for transport. A small bottle of fuel can be brought along for on the fly recharges but three pre-primed bricks gives a lot of burn-time ready to go. I did so on a recent hiking trip and we had hotdogs and tea on a windy bench and minimal weight addition. The standard sized bricks weigh only 100g but the larger jumbo bricks weigh 250g and both absorb more fuel and burn longer. Three individually bagged bricks, and a lighter fit nicely in a take-away tub, and seal in any fuel vapors nicely.

EverFire sells their blocks in three sets:

Combo 3: 500g containing 2 large bricks and 1 standard brick. Also a handy storage container for the firelighters.

Standard 5: 500g containing 5 standard bricks. Also a handy storage container for the firelighters.

Jumbo 5: 1250g containing 5 large bricks. Also a handy storage container for the firelighters.


I found these to be easy to use, kid and pack-safe, light and handy fire starters as well as a novel stand alone fire source. Methylated spirits are a cheep, safe and easy to manage fuel. My thanks to Jeff for the free sample pack. I can see these becoming a staple of my camping and backyard firepit kit.

Monday, May 14, 2018

Home Front: "pocalypse stew"


Having a hot meal is a simple way to both bolster morale but also provide much needed nutrition and energy, especially in adverse conditions. Being able to reliably produce a meal can be as good as magic in the field. I had the chance to do so at a recent post-apocalyptic Live action role playing camping trip, whee we had to set up themed camp with a deadline, and a pot-luck dinner had been planned. There was a total-fire ban in place so no campfires were allowed, but portable gas burners were allowed if supervised. I had brought along my SOLIDteknics AUS-ION Noni pot and some apocalypse themed austere ingredients.


2 x cans corned 340g Hamper Corned beef
1 x can 822g Edgell potato tiny taters
2X McDonalds tomato sauce
2x instant noodle sachets bumbu & fried onions

The corned beef cans come with a key to open them by twisting the top off. The Tiny Taters can didn't have an easy open option, however, I had my trusty p-51 opener and made quick work of the can. I up-ended the cans of corned beef, which had the texture and appearance of cat-food and set it to sizzling. when the fat had rendered, I poured in the whole can of tiny taters, water and all (waste not, want not) and then stirred it through. This made for a very wet stew so I was glad I had the noodle sachets to add. in they went and then the McDonalds / KFC ketsup. (I save everyone of these I get for just this reason.)


After a little cooking down, I served it up into the mugs and mess-tins of my compatriots and we had cooked, adult meal to go with the tear-aparts and dips we had combined. It was quite salty (the noodle-bumbu is mostly salt) but palatable and by the next day, there was only half scoop worth at the bottom of the pot.
Not a pretty meal by a long shot, but it was fast, (taking less than 10 minuted from pile of ingredients to edible food in mugs).

Different spice and sauce mixes could change the palatability if available but could even be skipped entirely. Canned corned beef has an approximate shelf life of 2-5 years but who knows how long it could last and be safe to eat? Certainly worth considering if outfitting that cabin-in-the-woods or bunker. I certainly keep a couple of cans in my bug-out food crate and you should to!

Some additional variants that would make improvements to an otherwise very plain meal. A handful of rice, or oats would give additional body, as would dry beans or split peas. Some jerky or even fresh meat scraps would be additional and offer a delightful surprise in some mouthfuls. Bear in mind to soften beans, rice and jerky additional cooking time (and water) will be required. As well as the Bumbu powder sachets saved from ramen noodles, I also save the sauce and oil sachets which can add flavour and body to just about any meal. Remember that fats and oils are an important dietary requirement and energy rich as well as carrying flavours. They also aid in the cooking process if you fry things, so keeping some in your supply is multifunctional.

Wednesday, December 20, 2017

Review: Light'n'Go bonfire log

Its log, its log, its heavy hard, it's wood, not new from Blamo.

Here's an interesting product from Light'n'go
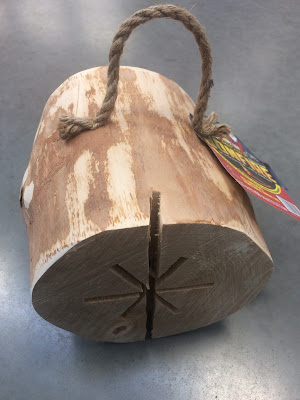
that I saw whilst visiting my local Bunnings for  gardening supplies and tools. Bear with me. This is  a weird one. What I saw was a round of a log, 1/4Cu foot / 7.1L /  430 cu cm in size, with  length of sisal rope bolted on as a carry handle. It has a series of radial cuts in the log through its center and along is flat end surfaces in order to make combustible surfaces.

The Bonfire Log is new, unique, and the "most extraordinary innovation in firewood of our time". Put it virtually anywhere and create a beautiful bonfire with one match. No chemicals, just pure kiln dried beautiful white birch, with a paperboard firestarter, with its patent pending design, delivers a great fire and an instant good time. Bonfire Logs can be enjoyed in a fire pit, chimnea, or fireplace, indoors or out. Light'n'Go suggest you can take them camping, cook marshmallows or hotdogs on a stick, or drop a frying pan on the log for eggs.
 It's year round instant entertainment, never easier or cooler.

The cuts are crude chainsaw plunges and could be easily replicated by any skilled operator and the concept of the Swedish or Finnish fire log   is widely known. Take a log, and use a saw to cut at least 3/4 of the way down the length of the log. Adding kindling to these cuts allows a fire to be lit inside the log, which both allows the fire to burn surrounded by fuel but also shelters the fire and insulates it. the cuts allow air into the fire from it base as well as the sides, ensuring  good steady burn. The raised base allows the fire to be lit on wet, or snowy ground, and if both ends are properly flat, the top can be used as a cooktop, where a grill could be placed, or a pan placed.

This could even be enhanced with  the addition of a purpose  built grill-top such as the Sportes MITI grill.

Back to the Light'n'Go log: It is reported to be suited to both indoor and outdoor fireplaces. apparently it can be successfully lit with just 1 match and then would burn for more than 1.5 hours while the bonfire jumbo log burns for about 2.5 hours.

Lacking accelerants, the all-natural, fire-log, being kiln dried birch, lights with one match, burns 2.5 hours produces a large halo, a clean flame, and a charming aroma.

The Light'n'Go log is  a commercial product you can pick up at a hardware store, but you could make your own easily enough if you have dried seasoned logs and you're a deft hand with a chainsaw. However, if the plunges or cross cuts seem a little too much, a similar effect could be achieved by simply splitting the log with an axe four ways, and binding it with a length of wire to hold it together in much the same way as the Sportes MITI grill.

 I have a couple of logs in my fire woodpile that are flat ended and will see about cross-cutting one with a hand saw to give this a try myself but as an eyes-on, it looks like the Light'n'Go bonfire log is a very simple, easy to use and effective looking product. but its nothing you couldn't do yourself, given skills and simple materials. ust like baking bread or sewing pants. Before you scoff at its simplicity and redundancy, consider the utility and convenience. Time not spent setting up a good fire is time spent securing your site, food prep, setting camp and doing vital gear and personal maintenance. 

Wednesday, November 1, 2017

Home Front: camp cooking staples

I took a solo camping trip a few weeks ago and in doing so got to try out some camp cooking without he worry of the fussy or more gourmet members of my household that I might have otherwise needed to cater for. Wanting to keep it simple and easy to pack I pre-packed some of my food, using the Dead Person Jar Pathopak's. My primary pre-packed meal I set up was porridge. I raided the baking shelves and made up a jar of rolled oats (for quick cooking) to which I added a handful of currants, almond slices and crystallized ginger. I also packed a jar of powdered milk and sugar for both my cups of tea and to add to my porridge. They worked out great. I used a cup of this mix, and made it up with a cup of boiling water, before adding a spoonful of my milk-sugar mix. Delicious, sustaining and warming on a cold damp morning.
My other campfire staple is chilli. This may provoke disputes among aficionados, some of whom insist that the word "chili" applies only to the basic dish, without beans and tomatoes but when i camp, I take cans of baked beans, chopped tomatoes and pre-mixed sachets of seasoning. A couple of onions in my cooler bag, and some frozen diced pork, this time. If I'd been camping longer I might have taken cured, dried sausage or salami as my meat component. Diced the onions and braised it in my cast iron pot over the coals, then the same for the pork. Seasoning went in next before adding the two cans of tomato and the three cans of baked beans. and some slow cooking with the lid on to reduce it all. I ate mine out of my Optimus-Terra solo cook set mug and shared my meal with a couple of friends who came up to join me in the evening. Five cans, one packet of frozen meat, a couple of seasoning sachets and two onions. Pretty simple. Not too heavy for a drive-in camp, and probably not that bad for a hike-in either, especially if those cans were shared around a little. We had plenty to eat with heavily seasoned leftovers I ate next next day too. After serving I added a dash of water, put he lid back on and put it back over the fire to heat up again to a low roil to kill off any germs introduced during serving up.
Porridge and beans make two excellent staples when camping, but some other items can find their way into your larder easily enough. Things that add both variety and value. Eggs. Eggs are great, self contained, long lasting and generally not requiring of refrigeration. In an austere setting, if you find yourself in an egg-glut, there are a number of traditional methods for preserving the quality of eggs. Packing in salt, wheat bran or cool clean ash. Eggs packed in box and buried in ash are reported as remaining fresh after 8 months in 80% of cases. Not only does it give the eggs shock and crush protection but having leftover wood-ash at a camping trip once you've eaten your food is no drama, just dump it into your fire pit and off you go. That said, cardboard egg cartons make good fire starters. When I pack eggs, its usually because I plan to make pancakes and then pack them in my flour mix, again, in a sealable jar. They stay safe, insulated and ready or when i'm ready to cook.

Not so much cooking as snacking, I also like to take hard cheese, like a block of Parmesan and salami  or slab of salt cured meat like Prosciutto. They keep well un-refrigerated and are a very tasty addition to an al fresco snack-plate after a hike or as an addition to most meals.

Wednesday, September 27, 2017

Heads up!: Zu Bladeworx Warmonger Releaase for Pre-Order

Zu Bladeworx Warmonger Available for Pre-Order

First published on Breach Bang Clear here:

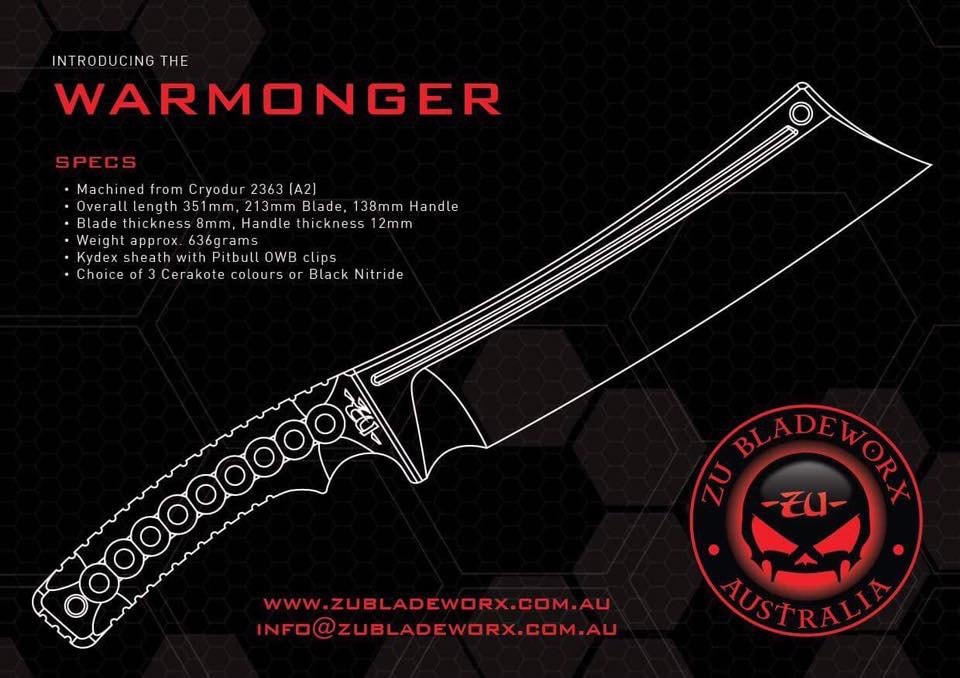
One of my favorite bladesmith companies, ZU Bladeworx in New South Wales, Australia, is accepting orders for their newest bladed weapon: The Warmonger. Note that I didn't say "tool." I might sometimes use euphemisms when it comes to blades, but this is a weapon.

Apparently styled after the Imperial Chinese dadao knife, this hungry-looking cleaver will, I have no doubt, ship to you straight-razor sharp and ready to cut things in half. I fully expect the single piece construction that typifies ZU Bladeworx blades. That style, which has scales or embellishment, lends itself perfectly to cord-wrapping and multiple attachment options with the well-made Kydex sheathes and mounting hardware they offer, as well as  a number of finishes to suit your MOS.

If the name sounds familiar, you might recall them from this FFSK review.

So are cleavers tools or weapons? I chat with people about this often. Fundamentally it is the human brain that is the ultimate weapon; a knife, gun, or axe is just an inanimate object until the human brain gives it intent.
Some tools have been designed with a primary purpose aimed at combat. Some knives are clearly tools that could be used as weapons if intent was there. I know it grates on me when I watch Forged in Fire and they call EVERY knife a weapon.
As I mentioned to a ZU Nation member the other day, I like to design functional, legal and collectable weapons. Not necessarily for carrying or self defense, but to collect, like coins or watches. I call them weapons not to be a hero, but because I like industrial, futuristic versions of medieval and martial arts weapons.
I was at the cutting-edge knives display at the Sydney Show and was eyeing off some kiku and nemoto knives, very tactical-looking and scary to non-knife people. A guy next to me said, "What would you want that for? It is useless as a tool."
I told him it would be for my collection. What is the use in collecting cheap shit? May as well collect good stuff, or why collect at all. Would I carry a Spectre? No. I don't carry any knives to be honest. Do I play with them at home? All the time. Every knife we make is a functional tool, and an efficient weapon in the right hands.
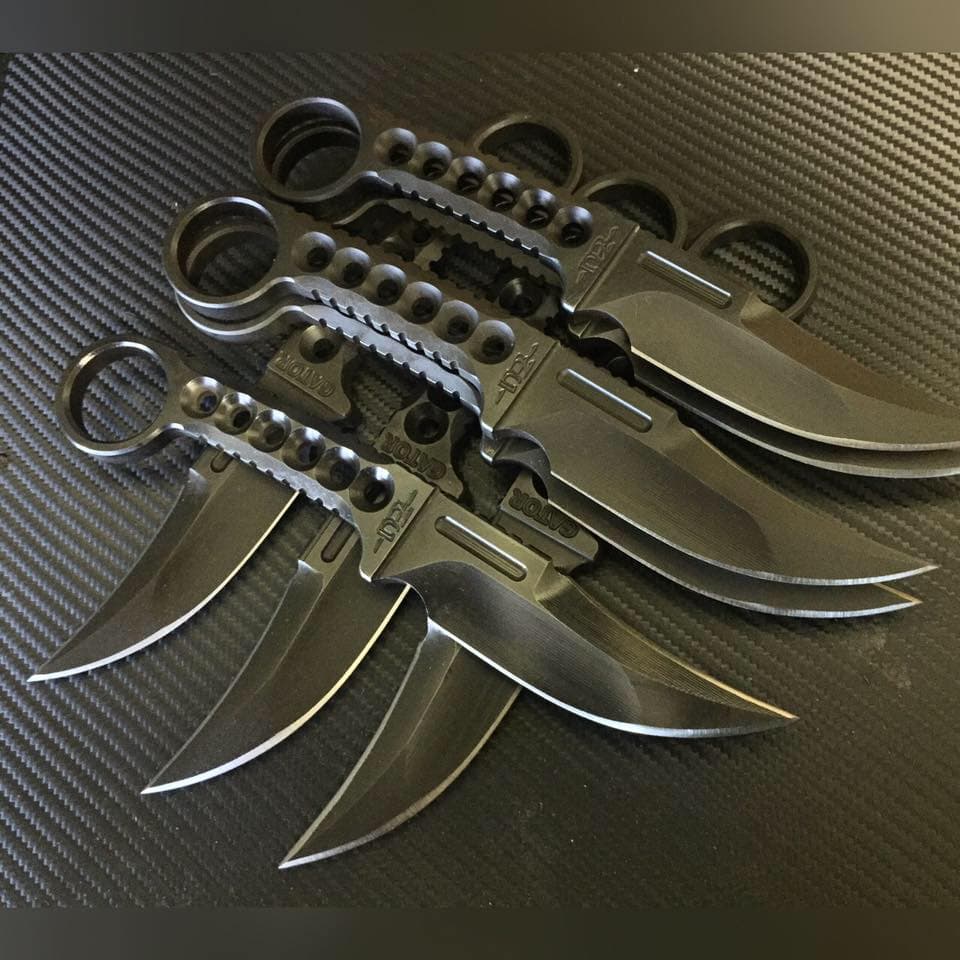
Recently released and rapidly all-sold-out Omega weapons.
Warmonger preorder opened the 15th of September. Reapers opened July 1 so that makes it mid September for shipping. Machining on the Warmongers began September 15 so that seems like a good day to open the preorder. That way the Reapers and Spectres will be almost ready to ship out. Wave 2 Reapers will ship within days of Wave 1. I am actually trying to get these out a little earlier.
ZU Nation price will be $429 plus post for knife and kydex. Attachments extra.
Installment plan as follows;
1) $200 - (plus you can add attachments if you want them)
2) $229 plus post (about $20) due four weeks later
I've done one of these pre-releases and am extremely happy with my Grunt. It's a decent system and  I trust the folks at ZU Bladeworx to deliver.
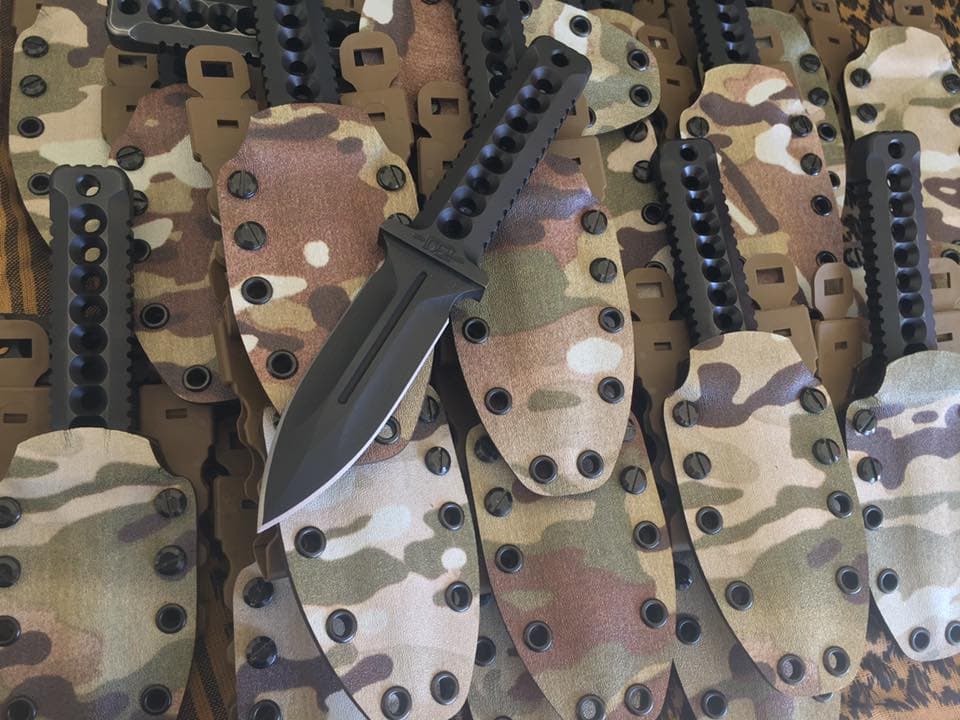
Here is a batch of their also-sold-out Reaper weapons, commissioned by the ADF. This lot destined for the soon-to-deply 1RAR.
Happy Hunting, lads!

Late update from Matt of ZU:
"So more details on the Warmonger, subject to change but pretty sure it is right.
100 piece run, I can't see us doing a second wave.
Base blade with kydex is $495 (ZU Nation members get a coupon to take off $66 to make it $429 like I promised). This includes tufftride finish and black kydex (no attachments). Coupon will only work on wave 1 (in the unlikely event we so a second wave).
2 part installment. The coupon will work on installment 1.
Postage is $20 (3kg exp bag with sign sticker)
Options:
Cerakote one colour - add $25
Apocolypse Cerakote (red or bronze) add $75
Tek Lok - add $25"

Monday, May 15, 2017

Review: CampMaid's Charcoal Chimney

I love cooking, and I love fire. cooking outdoors is always so satisfying, especially when done over fire. BBQ's a re primal, an whilst LPG or propane is fast and convenient, its not quite the same. However. getting a fire going takes time and effort and can be fiddly and messy, not to mention frustrating if you're running to a schedule.

I came across a tool to assist In the starting of briquette bbq's on Kickstarter, and thought it would be a good investment. Camp Maid make a variety of camp-fire cooking tools, mostly focusing on cast-iron Dutch oven type cooking tools, but their Kickstarter project for a collapsible charcoal chimney caught my eye.


CampMaid's Charcoal Chimney is a unique twist on the traditional concept to quickly heat charcoal for outdoor cooking! The twist being that the sides of the chimney are hinged so it folds flat for storage and packing. Designed to fit inside the lid of a 12" Dutch oven to keep all your sooty-gear together!

The principle is pretty simple. Up to 45 briquettes at a time are loaded into the top of the chimney, onto the fold-down grill that creates an air-space under the coals for you r kindling or solid-fire-starter cubes. I typically use the fire-Cone starter and kerosene from the big old tank on our property (a hold over from the redundant oil-heating system the house was built with. Once lit, the Quickly heats charcoal in about 7-10 minutes and you're ready to grill.


A handle on the side assists with placement and emptying once its hot and ready to go. The handle is supposed to be heat-safe. However, id recommend wearing gloves. and take care. my handle melted and caught on fire! Once the plastic sloughed off and burned away, it was fine but be aware.


Both the body of the chimney and the handle fold flat for easy of storage, though I found once fired, it took some manipulation to get it fully flat. The inner grill needs to be folded up but the inside of the chimney has space for it.


Also it can be used as a hobo stove. with the internal grill down, pretty much any solid combustible fuel can be placed in its burn chamber, and the rigid sides act as a base for a pan or pot, or even to hold the skewers for your rat-on-a-stick. For camping, tailgating, scouting, backyard, beach, survival the CampMaid Charcoal Chimney makes for a simple, dependable, portable fire pit you can leave in the trunk of the car.

So, it's a simple enough piece of kit, is small enough to slip down the back of a backpack (when cool, and maybe even rinsed off). It not only gives you a contained fire-pit, and a chimney for rapid charcoal lighting.


The fact that the handle melted and caught on fire was a bit distressing, but it's loss has been inconsequential to its ongoing use. One thing to note is hat they do rust, especially after firing. This has made the hinges a bit stiff, but a dose of WD40 should fix that. I've thought of painting the whole thin with a fire-tolerant paint but its probably unnecessary. I might cut some notches into the upper lip to give my skewers some purchase but again, not essential by any means.


Related Posts Plugin for WordPress, Blogger...