Friday, January 13, 2023

Review : Aerial A1 suspended tent

Its no secret that I'm a fan of hammocks and if I had my way I'd never sleep on the ground, but the inevitable sag can lead to a banana shaped sleep which some can't abide.
 Options like the fabulous and fun Tensile tents provide a flat space but need three anchor points, and more traditional hammock systems like the Sierra Madre Nube are comfortable but don't resolve the sag issue. A very exciting and innovative option is the Aerial A1 by Opeongo which I backed on Kickstarter. After the usual development and manufacturing delays, I was delighted by the end product. 

The principle of  the A1 is to form a semi-rigid cot, by stretching the four corners taut via a pair of webbing loops that are strung around appropriate supports, tree trunks or beams. This forms the base ontop of which the tent component is built. Each short end is held rigid with the inclusion of a spreader bar.
A single 7000 series aluminium pole with spreader-bar held in place with clever clasps suspend the internal mesh body and give it near vertical side-walls. The base features a bath-tub bottom and is made of 210 Denier, ripstop nylon (PU 4000) and the mesh walls features full size zippered openings on both sides.

The main feature that allows the A1 to achieve its exceptional comfort and stability is the unique, slackline inspired, suspension system. By wrapping high tensile webbing straps around a tree and pulling them back from both sides of the trunk the A1 is able to achieve a four point connection system. Using this four point system, along with tension and two spreader bars at the head and feet of the base it is able to create a sturdy, flat platform that feels similar to a high quality cot. The webbing suspension (PES (Polyester) rated to  14kN /1450 kg (3200Lbs)) also provides spring like a mattress that helps absorb movement without being tippy or bouncy. 

This flat sleeping surface provides the ability to sleep in any position, back, side or even on your front.The secret to the suspension tension is the buckle system. The AustriAlpine are rated to  15kn / 1528kg (3370lbs) and are made from ultra lightweight alloy. The system works by having a simple self-locking dual-buckle at one end's corners. This lets you set up one of the webbing straps  (6m (19'8") or 8m (26'3")) straps at one end, as a static length. The dynamic end features a pair of off-set buckles. 
This enables you to take advantage of the RollerCam fitting to tension the whole system up. To do so simply feed the webbing through the first off-set buckle on the A1 and then back to the Rollercam returning back to the second off-set buckle on the A1. This simple system 3:1 purchase creates a 4:1 mechanical advantage which is more than sufficient to create a nice taut, flat surface. Each of the webbing straps has a boldly embroidered + mark in its center to assist on centering the straps which was a nice touch. 
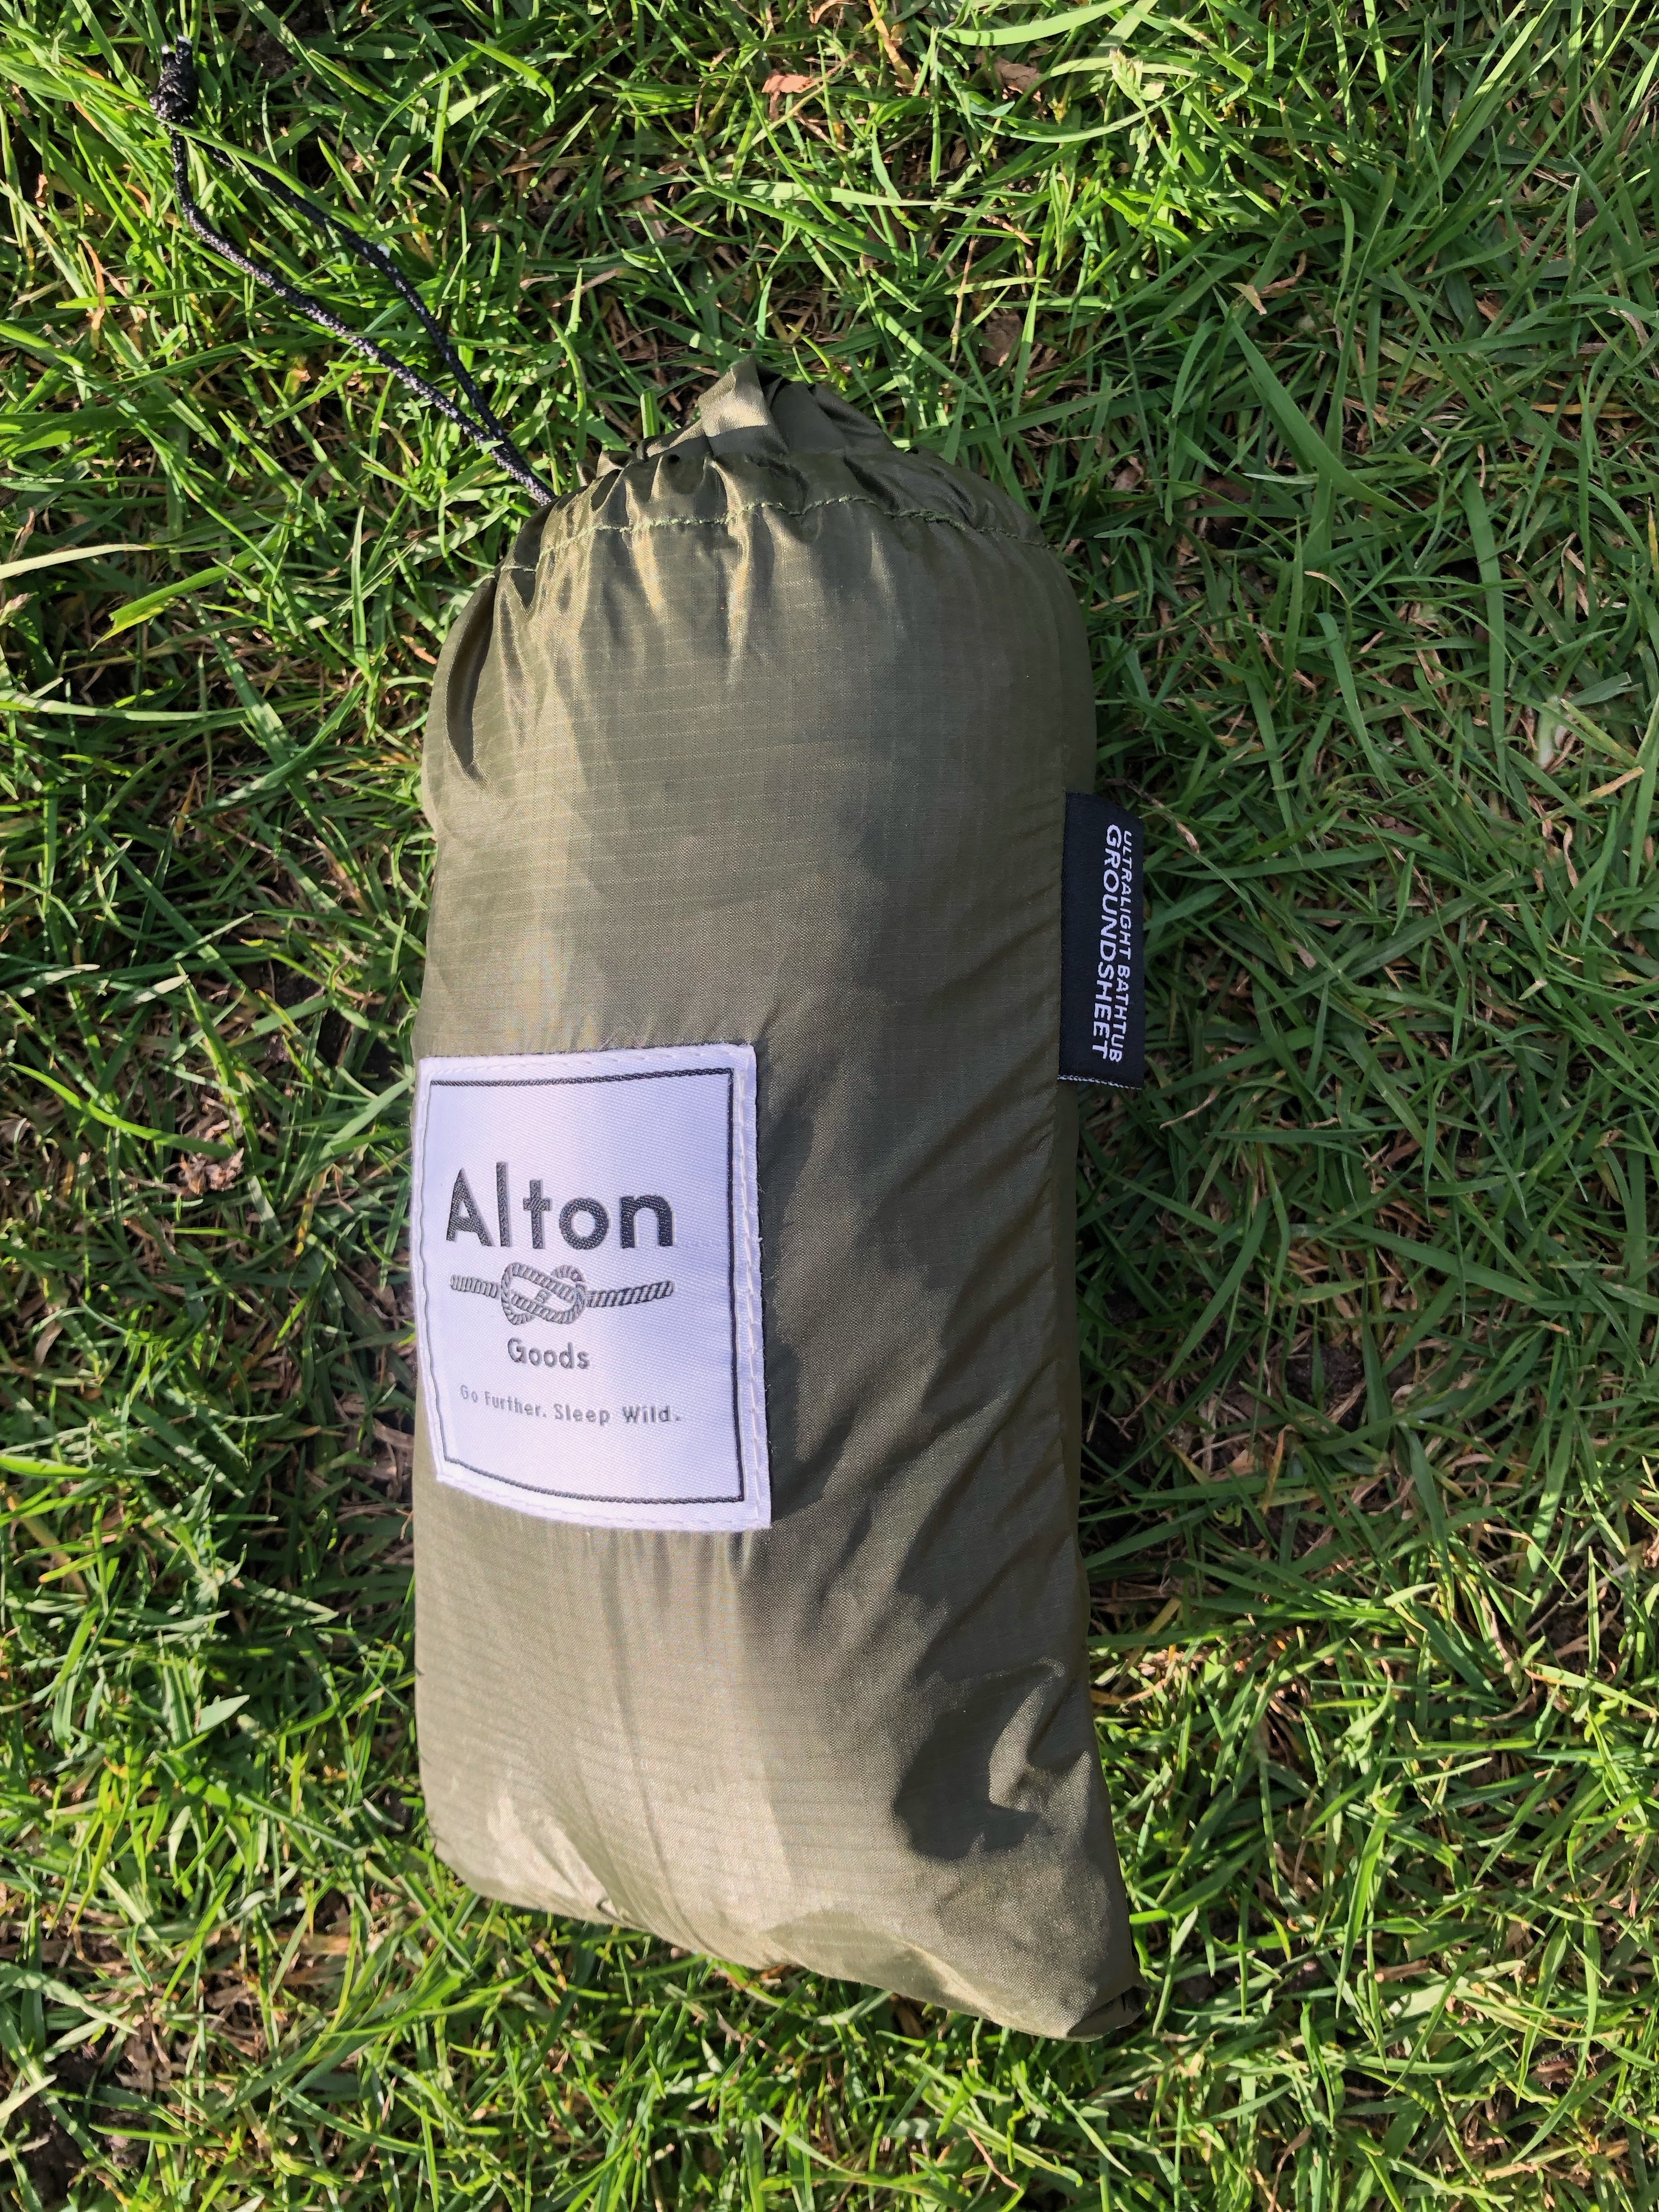
The removable fly is lightweight, durable, made from a  premium 40 Denier nylon and has a 1500mm hydrostatic head waterproof rating. 

The fly is completely separated from the internal mesh body by the spreader bar and main ridgepole, which  prevents condensation build up, promotes good airflow and prevents contact weeping.  
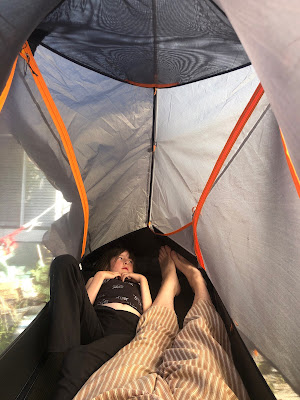
The base has  a footprint of 203cm x 69cm / (80” x 27”), which is plenty big enough for me to stretch out on, even when Tactical Baby joins me. It is also no coincidence that the footprint matches a large Therm-a-Rest® mattress, which would be great insulation, let alone padding, but I found the cot-like finish very comfortable on its own. The fly open on either side or can be stretched open to form 17” vestibules. guy-lines and Y-shaped stakes are included to stake out the vestibule. The clever design of the A1 also allows for it to be used as an on-ground tent, with four Shepherd Hook stakes to stake out each corner. Its peak height is 90cm (35”), which is plenty high enough to sit up in.
Inside the tent there are three well placed pockets to hold all your needfuls. Two medium size pockets on either end and one 'sky" pocket in the ceiling that is the perfect place for putting your head lamp to light up the tent at night, or an iPad to watch a movie. None of these pockets are heavy duty, and the outside attachment points work better for hanging a bottle, or your boots but for glasses, a flashlight or devices, they work perfectly. 


The system as a whole, packed down measures  67cm x 13cm (28” x 5”) in its slingable stuff case and weighs 2.70kg (5lbs 15oz) for the full system, or cut down to 2.45kg / (5lbs 6oz) for a slung trail set, or 1.86kg (4lbs 1oz) for a ground-based set up. Leaving out the stakes, straps and roller-cams cuts weight, crucial when ounces mean pounds. 
 This shelter is very easy to set up and only takes about 6 minutes. (once you get the suspension buckles sorted out. )The A1 makers state it will be stable on trees with a diameter as small as 5”, though they recommend using healthy trees with a 7” - 25” trunk. I set it up on painted 5"x5" beams with no trouble. The standard webbing provided allows the tent to be set up between two trees spaced 10’ - 25’ feet apart. For trees spaced 10’ - 16’ apart the webbing will completely encircle the tree for maximum hold. I recommend using the long webbing lengths at the Roller-cam side, for maximum cinching length. 


The A1 has a suspended capacity of 200kg (440lbs) so you probably wouldn't store your gear in there with you, but OpeonGo offer an under-slung gear hammock to keep up to 27kg (60lbs) of things off the ground, yet easy to reach (it doubles as a vestibule ground mat in the un-suspended set-up). They also recommend not setting the A1 up any higher than waist high, for ease of entry and safety. A good rule of thumb is never to sling a hammock higher than you're willing to fall. The 5" high tub walls of the base provide a good support in the event of leaning or rollovers in the night. I've found it to be very stable, even in high winds and with the fly staked/ pegged down, very rain resistant. 

The Aerial A1 can also  be pared with the A1 Underquilt to provide maximum warmth for winter camping.

This is a great system, light, comfortable and versatile. I'd highly recommend them to anyone looking for an off-ground option. Outstanding design and top notch engineering.


Monday, January 9, 2023

Review: gear crates

I reorganized my camping/ bug-out gear recently, utilizing some pack-flat crates I salvaged from a big-name supermarket, dumpster, which use them for shipping fresh produce.  When expanded the crates measure 38cm x 58.5cm x 25.5cm (15" x 23" x 10"). When not in use they fold flat to the same footprint but only an inch thick. They are stack-able and light, with good drainage, in case of spills or exposure. Carry handles built into both the long and short ends for ease of transport. 

I find that the wider footprint allow for greater versatility than that offered by the humble Tactical Milk Crate. Whilst I still use Tactical Crates for a number of storage and organisational purposes, these four pre-packed crates form the core of my camping/ bug-out gear. I'll go through what i keep in them each, though many of the items I've previously covered. 
1) sleep systems
2) shelter systems
3) cooking systems
4) emergency systems


Crate One: sleep systems

Sleep systems: 
This crate starts off with a couple of hammock systems, both with ridgelines and bug nets, but without a tarp over-layer. one is the very fine 
Go!-outfitters-hammock and the second is the very capable One-Wind zippable which I've yet to review fully. 

I also have a pair of old style Aurora Wanderer sleeping bags which are rated to 0oC and zip together to form a double sleeping bag for cozy couple sleeping or extra room. 

In lieu of a pillow I have the very comfortable, snuggly wearable go! outfitters stratus hood-hammock-pillow. Also in this crate I have a folded up plasaticised fabric shower curtain to act as an impromptu rain fly or ground sheet, good for keeping kit and kith dry and warm. That red-capped bottle is a liquid fire gel that belonged in crate three.


Shelter systems:
This is a mix of tarps, straps and hammock systems.

Crate two: shelter systems
The multi-function Treelo system which can function as tarp, hammock or ground sheet. 

Another component item is the Sierra Madre Pares hammock that couples with the Nube shelter system to make a fairly complete shelter right there. In addition the Nube Winter barrier system adds a windbreak option for that system for additional warmth retention ( it's in the fourth crate).

Adding to the number of beds available Eagles Nest Outfitters hammock which makes a nice addition for very little space or weight needed.

There's also a very simple wish.com flyscreen equipped hammock, to add further bedding option. 

Crate two :shelter systems


There's also a couple of the very handy Go! Outfitters Landing pads which can act as personal rain-shelter, for you or your gear, as well as a ground-sheet under your hammock to help keep from dragging crud into your hammock.

The grey and blue sack is the Gobi Gear SegSac which is an internally segmented stuff sack, I have loaded up with webbing straps, cordage and all kinds of tarp or hammock slinging.

Included in this crate is my beloved  Boker+ Tomahook for all the right camp-making reasons, and the all important and often overlooked entrenching tool. This is an old Australian Army issued one I found in a park and restored. I especially like the pick end, for help in hard terrain. 

I could reorganize the two crates to pair up systems together but they pack nicely this way.

Cooking and fire systems

Cooking and Fire systems:
In my fire-crate are a number of items for both fire and lighting as well as some cookware. 

First up is the thermo-electric power-generating PowerPot which couples high tech power generation with cooking potential. 

Following up is the BioLite thermo-electric stove which does double duty as a fan-driven stove for good clean combustion as well as a power source for charging batteries or driving devices.

Also included are a selection of skillets and cast iron pans, and enamelware plates, bowls and mugs, for obvious reasons. There is also a nesting mess kit of mug and bowl. I have a Caribee folding butane burner and a bottle of butane for fuel. A collection of candles: pillar, tea-light and long burning votive-in-a-can. These can act as illumination, fuel or fire-lighters 

Matches, a cutting board, tongs and wooden spoon just make sense, as does another little hatchet for kindling and fire-needs.
Crate three: cooking and fire systems
As well a couple of space blankets for good measure, I have a couple of repurposed tin cans with wire loop handles for additional cooking / water boiling or candle-holders. 

Emergency Systems:
A bit of a misnomer perhaps as this is a catch-all crate, but it does contain some just-in-case items. 

First up is the Go! Outfitters Apex which is a tarp to pair with the hammock in the Sleep crate. It'd work well on its own or paired with another hammock just as well. It's design with a built in ridge-line makes it a quick-deploy shelter system that covers a wide area.

The Nubé Floor is an accessory that provides the ability to set up the Nubé as a ground shelter, without trees, but not with the hammock, obviously. The Nubé Winter Barrier acts as a weather barrier, cutting wind, rain and snow and can be set up both at ground or suspended as part of a tarp/hammock system. 

emergency systems


Next up in the emergency crate is the Sea to Summit kitchen sink which does double duty as washing up sink and portable bucket. Coupled with this is the just jiggle it siphon hose which can be used to get water out of hard to reach places, or even fuel if needs be. 

I also have a small air mattress, a microfiber towel and another small ground mat. bundles of paracord, a spool of fishing line and more webbing, as well as a couple of hammock accessories for gear storage. I also have a space blanket emergency shelter kit which features a triangular tube of space blanket mylar and a set of ridgelines and pegs for a complete in-a-pinch shelter system.

I also have a wind-up flashlight and multi function wind-up emergency radio, which has a siren, flashing lights as well as an AM/FM radio for emergency updates. it also has a headphone jack for sound discipline or power conservation. It also has a USB input for all your podcast needs. A generic First Aid kit rounds off the crate.

Crate four: emergency systems

These crates are far from complete or final, but they act as a quick go-to system that I can grab and go with, forming a core of items needed for a camping expedition or emergency get-away.  I typically supplement it with Tactical Crates filled with canned goods and other consumables, as well as other bulkier items like tents, cots and the like. Some items also get put to use and need to be remembered. 
My entrenching tool is currently in service in our vegetable garden.

Sunday, January 1, 2023

Review: Alton Goods bathtub groundsheet

 Sometimes its the little things that can turn a good experience into a great one, or an bearable one into a bearable one. Like turning cold and wet into warm and dry. One such item is the Alton Goods bathtub groundsheet. I'm normally a fan of hammock sleeping to keep me off the ground, but its not always an option or practical. Having a lightweight, waterproof groundsheet can offer you the protection from wet ground, mud and sticks, to provide a comfortable and pleasant platform to set up on. Or a dry spot to have a stretch-out on damp grass. 

I received my groundsheet as a birthday present, in winter, and took it on a number of walks, where its small packed size of  21.5x8x11cm (8.5"x 3.25"x 4") and light weight 295g (10.4 oz) made it an inconsequential daypack or cargo pocket addition.

Made from a tough Ripstop nylon construction, dual-coated with 3000mm Silicone and PU, it is fully seam-sealed with heat tape to be both 100% waterproof and puncture resistant. When staked out the Bathtub Groundsheet measures : 210x90x15cm (6'11"x2'11" x 6"), plenty big enough to fit me, and my gear, and the bathtub wall height is plenty big enough to keep my bedding in, or incidental wet out. 

The corners are heavily reinforced and tailored to stand upright without stressing the seams and feature tape reinforcement to hold upright without sagging. This is bolstered further by built-in metal posts in the corners to hold it up, as well as sewn in buttressing peg-out loops extending outwards. the top edge of the corners also feature a loop sewn in to fit fly poles if used, and sewn in snap-points allow the groundsheet to marry up with the compatible Ultralight Ground Bug Net to create a fully-enclosed sleep system by pairing with this groundsheet. Nice forethought. 

The included 4 Y cross-sectioned 7001 aluminium pegs have retention notches and a built in pull-cord for ease of removal.

When fully staked out and pulled taught, the bathtub effect is very stable, and provides a good barrier against the outside. the ripstop nylon is smooth and whilst not breathable, very comfortable to lay on directly, even after being in full sun. 

I liked that it was big enough for me to fully stretch out on, as i'm quite tall. i'd want a tarp strung up over it to sleep on, just to give some cover, and I suspect leaving the most down-hill corner flat to allow any water a drain-off spot might be prudent without one. 

I've woken up in a pool of water once whilst camping and don't recommend it. 

The whole system comes with own drawstring bag for ease of carry and is small and light enough to be stuffed in a cargo pocket. I have been keeping it in my car along with some light picnic hiking gear and have used it as a picnic blanket a number of times. I think i'll be picking up the bug net and one of the Alton goods tarps to complete the set, and will test it out for sure.


Tuesday, September 6, 2022

Review: Streamlight - Wedge flashlight

Sharpie for Scale
I'd been without an EDC flashlight since loaning mine to Tactical Baby for school camp, never to be heard of again. (the light, not the TB, she had a blast). I made do with a petrol-station bargain bin LED light that was usually functional but not especially bright or reliable. So when an opportunity came up to  try out another I jumped at it. I had never heard of Streamlight or their Wedge light but as soon as I looked it up I knew it was the next light or me.
 
I liked the look of its sleek but robust design, bulkier than a pen-light and that it looked like it was designed for both pocket and PALS/MOLLE carriage. I have a Fellhoelter bolt-action pen light on my Hazard 4 chest harness (which is pretty much my principle EDC go-to), but its not much more than a "dropped my keys" or pupil-dilation checking tool. 

The Wedge has a pleasant solid heft to it at 4oz (113.4g) and it fits the hand nicely, with the finger groves fall naturally into index and pointer fingers, placing the wheel button squarely under the thumb. The heel of the palm seats the butt-end of the light, tucked in securely by the pinkie finger. It measures 5 4/5"X 2/5"X ~1" (13.87 x 1.52 x 2.54 cm) overall, ( not counting the subtle pen clip ( which is reversible for lefties or righties). I tend to wear it in my front right pants pocket with the short paracord loop easily hookable for easy access. A month of daily carry has worn the anodizing of the tip, to zero functional effect.

candle Mode 
The light is activated by rolling the wheel button forward to the stable mid point, producing a bright, clear white light rated at  300 Lumen. This is the Constant-On Mode, which has a 3 hour runtime. When engaged, a small green LED behind the wheel is illuminated. This seems redundant as the main emitter LED is very clear. My own testing has the battery life lasting over 4 hours but 3 hours is a safe benchmark.  The green LED shifts to red when battery life is low, which is a nice feature. Even after my 4 hour test it wasn't especially hot either which was nice, the heat-sink of the all metal body works well. 


Standard mode activate

The built-in Lithium Polymer batteries are charged via a recessed, waterproofed USB-C port in the butt of the Wedge. When charging, the behind-the-wheel LED is red until full charge at which point the indicator light goes green.

But this is where the extra distance on the wheel button comes in. If you push the wheel beyond the constant-on mid-point, you activate the THRO, (Temporarily Heightened Regulated Output) mode. This kicks the constant-on 300 Lumen up to a dazzling 1000 Lumen output. Light throw is rated at 225' (69m) at constant-on and 360' (110m) in THRO mode. One thing that impressed me was the wide cone of light, with the main cone being around 120 degrees wide, with a secondary cone at around 160 degrees. This extra wide beam provides for an almost full room coverage from a doorway, which is very handy for those "bump in the night" investigations or "where did that battery roll under the bed" searches.

The constant-on setting is standard, with the THRO mode requiring constant forwards pressure to maintain it, such that an initial push forwards may move directly to THRO-mode then back to constant-on. This isn't too much of an issue, but I did find that some finesse was required to switch it on without moving to THRO-mode, or flickering ON/OFF. That can be a little annoying, specifically because when I want light, I want constant, stable light NOW. 


THRO mode active: wider, brighter, longer
Another thing I like about this light is its slim but not skinny-size making it convenient to deploy in a pocket, on a belt or even in the channels of PALS/MOLLE. Perfect for placement on a chest-rig or on a pouch. It's a snug fit, especially on a rigid surface, but that adds to the security of it's carry. The para-cord fob allows for easy draw, and just like that you have the utility of a bright sharp white light at the slide of a thumb.

The base of the light, even with its recessed USB-C charging port and pen clip sits flat nicely allowing the Wedge to be stood up in "candle mode" and given it's wide arc, it will illuminate a whole tent, room or goodly sized cave. 

MOLLE carry
The lens glass is slightly inset from the rim of the frame, offering it some measure of protection against  scratches and impacts. Whilst I wouldn't recommend using it as such  I suppose one could grip it like a kubaton for self defense purposes. Every tool is a weapon if your imagination can stretch far enough. It's not going to do you as a set of brass knuckles, but if you ice-pick your grip you'll make a bit of a impact focus point, even if you have to drive the switch with your pinky. Good for temple-indexing, OK for cool. 


ergonomics
I really like how the light indexes in my hand, how easy it is to activate and the sheer volume of the light it emits. It is certainly one of the most powerful lights (especially for its size) that I've had. Its sleek form factor makes it unobtrusive and easy carry and quick to deploy. My only complaint would be that the thumb switch slips back from ON to OFF too easily, if its not seated quite right. This may "wear-in" over time, and hopefully in the right direction, but isn't enough to put me off this light. I've subsequently found that flicking it to "ON" then getting my thumb of the dial reduces this stutter effect, so i'm willing to concede some user error may be in play here

One last thing, if you ever felt the need to illuminate your brain, the emitter end will fit up the standard adult nostril and will light your honker up like Rudolph. Tastes like Crayons too.

Tuesday, August 2, 2022

Nano Oil for your Knives, Tools, and Firearms

Another Guest Author, by way of BB&C,  Jim Davis presenting Nano Oil:


Always on the lookout for cool, different ideas, I happened upon a product that caught my eye. Not just for the content of what's in the containers, but the way the containers deliver it to the target. Nano Oil offers some unique and innovative methods of dispensing lubricant onto firearms, knives, and anything else where you want to deposit a controlled amount of oil into a small space.

They have a few various dispensing containers that I'll outline here.

Nano Oil containers
Nano-Oil comes in handy, syringe-like containers. Here is a package with three different weights: 5, 10, and 85 weights.

What Is It And What's It Good For?

First, though, a bit about Nano Oil. It does not contain any of the following: Silicone, PTFE Resins, Graphite, Molybdenum Disulfide know as Moly, Teflon, Copper, Lead, or Silver. They state that there are "absolutely no metals or harmful solvents."

StClair claims that Nano Oil is suitable for high temperature applications, extreme pressure (load bearing metal to metal), roller bearings, chains/sprockets, machine tools, marine equipment, metal working, mining and printing equipment, armaments, knives & multitools, and a ton of other uses. The list is quite expansive.

It works on bicycles, motorcycles, cars, tractors and farm equipment, and RC racers.

Regarding armament, they claim that it increases muzzle velocity and smooths all moving parts while protecting from rust and corrosion. The oil adheres to microscopic crevices and penetrates metals, which provides a very low friction dynamic.

Weights

There are a couple different weights that are offered for various uses.

*5 Weight. This is the lightest weight oil that is offered, noted for deep and fast penetration. They refer to it as "WD-40 on steroids."

*10 Weight. This is a light weight oil that is suitable for guns, flashlight threads, knives, fishing reels, locks, hinges, bicycles, bearings, cables, chains, sprockets, motorcycle forks, electric motor bushings, model railroads, and more. This one seems to be the most useful weight, in general, as it addresses a lot of different uses.

*85 Weight. This is a heavy weight formulation, developed for the M-14/M-1A and other rapid fire firearms.

I ordered and received one each of these weight lubricants in the Micro Oiler with stainless blunt needle, which contains 8cc/ml of oil. These are extraordinarily handy because that needle can get the lube precisely where you want it. Note that the same weight oils can also be had in 1/2 ounce and one ounce bottles.

Nano Oil containers and applicator tip
One of the beautiful aspects of Nano-Oil is the blunt metal applicator tip that allows the user to get the oil where it needs to go. These are the micro oiler containers.

I also received an applicator of Nano-Grease NGL, which is a Lithium Complex Hi Temp & Extreme Pressure lubricant. The uses for it include bearings, boats, buses, cars, bicycles, chains, conveyors, dozers, excavators, graders, laundry equipment, and a bunch of other items. And since the M-1A/M-14 series of weapons are supposed to be lubed with grease, that was my main intention of buying this, as I am using it with my M-1A Scout Squad Rifle.

Grease syringe M-1A
With the grease syringe, getting into the chamber area of the M-1A Scout Squad Rifle a snap.

Chamber area of the M-1A
Greasing up the operating rod on the M-1A is no longer difficult either.

Operating rod on the M-1A
Nano Oil states that adding its formulations to other existing lubricants will improve their anti-friction qualities.

I have not tried the following, but they are listed on Nano Oil's website:

Gasoline Engine Oil Treatment, Diesel Engine Oil Treatment, Manual Transmission Oil Treatment, 4-Stroke Engine Oil Treatment (Motorcycle, ATV, Snowmobile, Outboard Motors), Small Engine 4-Stroke Oil Treatment, Automatic Transmission Oil Treatment, and Marine Outboard Drive Treatment.

Dispensers

The first is a pen that has something similar to a ball point. The user presses the tip onto the surface where he wants to deposit oil, and the oil comes out. It's fairly controllable too, so you can get a small dot, a larger puddle, or a line. The pen container I received contains 16cc is 10 weight oil, which is listed as "All Purpose." I'd say it would work great for firearms, knives, and anything with moving parts in general. The cap even has a protrusion for hooking onto the user's pocket, so it can be conveniently carried anywhere. The container is white and not see-through. At the time of this writing, one of these pen dispensers costs $27. It appears that it should last quite a while.

Nano oil Applicator
The pen is a very handy container to have around!

Tip of Nano Oil Pen Applicator
The tip of the pen is similar to a ballpoint pen, in that when the tip is pressed, it dispenses oil. The user determines how much oil he wants to come out.

The next type is a Micro-Oiler, which is see-through and has a long, blunt, metal needle for getting the lubricant just where you want it.  This is especially useful if oiling knives and firearms. Normally, I run my knives dry or nearly so because oils tend to attract dirt and other gunk. The 5 Weight oil will be especially useful for knives because when it dries, it leaves very little residue behind, yet still retains lubricant qualities. This is good stuff!! A 3-pack of these dispensers with 5, 10, and 85 Weight lube, at the time of this writing, costs $49.00. At the rate in which I use lube, I believe these will last me for quite a while.

Finally, the grease dispenser is like a giant syringe that comes complete with a long, blunt metal needle, which gets the grease into those hard-to-reach places. This is especially useful when applying to the M-1A rifle, as it allows the user to get the grease into the areas where the bolt rides in the receiver. Those little grooves can be a pain to reach by other means, but with this setup, it becomes very easy. At the time of this writing, this one costs $21.75.

Nano Oil Grease syringe metal tip
The grease syringe has a large volume and the metal tip is perfect for getting the grease where you need it to go!

Does It Work?

Naturally, I went totally overboard trying Nano-Oil out on most of my firearms. Those that know me will not be surprised, as I tend to go all-in on my endeavors.

So far, I've used Nano-Oil on my S&W CSX 9mm, S&W Airweight .38 Special Revolver, Glock 43X, Ruger MK IV .22 Long Rifle pistol, Two AR-15s, an AK-47 (AK-63D) Underfolder, and my M-1A Scout Squad Rifle from Springfield Armory. I plan to use it on my bolt action rifles and my Henry Arms Survival Rifle (AR-7). In other words, I will use this stuff on all my firearms and knives.

 AR Pistol and AK-63D Underfolder
This AR pistol by Xtreme Gun Worx (of Emmaus PA) and the AK-63D Underfolder benefitted from an application of Nano-Oil.

Ruger MK IV .22LR, Glock 43X, S&W CSX, S&W Airweight 642 .38 Special revolver
The pistols that I tried Nano-Oil on, from top to bottom: Ruger MK IV .22LR, Glock 43X, S&W CSX, S&W Airweight 642 .38 Special revolver. They all said they liked Nano-Oil!

Speaking of knives, I've used it on my Emerson Knives Desert Roadhouse. Some of my Spyderco folders will also see Nano-Oil. The nice thing about the 5-weight oil is that it dries up and doesn't leave a gunky residue on knives, but the lubricating benefits still remain.

Nano Oil being applied on a Emerson Desert Roadhouse knife
Getting oil into specific points of a knife action is now easy! Here we see the Emerson Desert Roadhouse getting some care.

I can honestly say that Nano-Oil is good stuff; my firearms' actions were nice and smooth after using it on them. So the quality of the oil and grease itself is sound. Beyond that, what I really found refreshing is the applicators that come with the oil. These really made all the difference when I used them to apply the oil, and they made the job so much easier on most of the guns.

Glock 43X Frame Rails with Nano Oil
Glock 43X frame rails getting a dose of Nano-Oil. Nano Oil is an obvious choice for gun care, but works well on a variety of other things as well - particularly knives and tools. 
Inside of the Glock 43X Slide
And don't forget the inside of the slide where parts create friction.

Those hard-to-reach places that used to be a pain to get oil into now are easy to reach, so I expect this will improve the reliability and longevity of my firearms.

Cylinder of the S&W 642
The cylinder of the S&W 642 getting some lube.

Ruger MK IV bolt being coated with Nano Oil
The Ruger MK IV bolt being coated with 10-weight Nano-Oil. Getting oil inside the receiver is now easy as well.

A special mention here goes out to the Nano-Grease. Applying it to my M-1A Scout Squad rifle is so much easier than trying to get grease into the area where the bolt goes than using a Q-tip. The metal syringe tip placed the grease precisely where I needed it, not only for the channel where the bolt goes inside the chamber and on the receiver, but also onto the operating rod. Kudos to Nano-Oil!

M-1A Scout Squad Rifle
The M-1A Scout Squad Rifle from Springfield Armory is basking in the glory of being freshly lubricated by Nano-Oil.

The Ruger 10/22 will function smoothly with Nano-Oil applied. This is the compact model.

As well, applying it to knives also becomes a breeze, getting the oil in those hard-to-reach places without saturating the entire action of the knife in oil. The user has good control over how much oil comes out of the needles.

All in all, Nano-Oil has a successful product that really delivers (no pun intended). The price is not too high for what the user gets, and the supply should last quite a few cleaning and lubes for one's firearms. This is a great product that I wholeheartedly endorse.

About the Author:

Jim Davis served in the PA Dept. of Corrections for 16 ½ years as a corrections officer in the State Correctional Institute at Graterford and later at SCI Phoenix. He served on the Corrections Emergency Response Team (CERT), several of those years as a sniper, and also the Fire Emergency Response Team (FERT). For 25 years, he was a professional instructor, teaching topics including Defensive Tactics, Riot Control and Tactical Operations, Immediate Responder, and cognitive programs as an adjunct instructor at the DOC Training Academy. He was then promoted to the title of corrections counselor, where he ran a caseload and facilitated cognitive therapy classes to inmates. His total service time was close to 29 years. He was involved in many violent encounters on duty, including incidents of fatalities.

Jim Davis


Tuesday, May 31, 2022

Review: Sailors Compass - Oceanus Brass

I've covered compasses before, mostly as a generic " have a compass, navigation is important" tool and as part of a variety of multi-tool items or kits that include a compass but this one is a little different. I backed a kickstarter for a boutique compass with maritime style. Oceanus Brass specialize in nautically inspired items milled in brass. This is the Oceanus Brass - Sailors compass. Which I backed on Kickstarter. They're in full production now, so you can pick one up, or anything else in their range. Their latest Kickstarter is for a plastic bottle cord maker and looks great too
Brass is an excellent material for traditional nautical kit for several reasons: It is hard wearing to withstand long periods between resupply or repair options. Corrosion resistant to resist saltwater exposure. Non-sparking to keep powder and timbers safe and non ferro-magnetic so as not to throw off your compass needle. It also has a pleasing heft and a bright luster. 
The sailors compass comes as an un-embellished and unadorned puck, with a seam line running its circumference at the 2/3 of its height. The seam line is narrow when the lid is secured and both top and bottom edge of the puck are evenly beveled and smooth. The "lid" unscrews for two full rotations  along finely machined threads, with just index and fore finger and thumb vs palm needed to open it.
Inside the compass is a liquid filled needle chamber, with a well defined needle including a nicely pointed "head" featuring a glow in the dark "dot" for night-time navigation. The tail end flight is subtle and balances the needle both physically and aesthetically.
 
The bezel is gently notched for easy grip and rotates smoothly and features degree markings, in 20 degree major spacings, with minor marks for 10 degrees and 2 degrees. It's firm enough that it won't slide of its own accord but smooth enough that it will turn with a finger-tip's pressure. The backing of the bezel is a ring of glow in the dark material to provide a readable back lit bearing in the dark. A fixed red line serves as the index mark and a pair of embedded glow-dots in the base of the bezel chamber lines up with the North indicator. A central dot completes the after-dark navigation picture. 

The compass is moderately large for an EDC pocket compass, at 2" (55mm) in diameter, 5/8" (17mm) in height and 6.8 oz (194g) in weight, but its smooth and solid design makes it an easy carry. Whilst it would not take the place of a good lensatic compass for navigation. It certainly does the job for simple wayfinding navigation. 


 Solid brass construction provides sea-worthy durability. The Sailor's Compass can be dropped, frozen, banged, forgotten until it isn't. If i had to pick something I didn't like about the compass it would be that it's too smooth. The unadorned surface might lead to slick, fumbly fingers to drop a vital piece of kit and some knurling or a dummy-cord knob or thread-hole might go a long way to securing it. All told though, it makes for a very pleasant EDC pocket addition. 

Saturday, May 28, 2022

Sean O' Hare's Knife, the Badger

Here's a guest post, in conjunction with the good folks of Breach Bang Clear!


Sean O’Hare Knives has been making custom knives since 2001, and Sean began doing it full-time in 2009. He hails from Canada, and he is also a very skilled photographer. Sean makes fixed blade knives, including drop point hunters and tactical tantos, and folding knives, including flippers. If you’re into knives, you owe it to yourself to look him up on the ‘net and check out his knife creations. They are utterly beautiful, both in form and function. A Sean O' Hare knife can be very dressy and ornate, while others are simply well-executed and practical. For certain, he makes something for every taste that’s out there.

The fit and finish of his knives are extraordinary, whether we’re looking at the dressier knives or the knives intended for more hard, practical use. He prefers G10, stabilized woods, and Micarta for handle material on his fixed blades. He uses the stock removal method.

Sean O' Hare knife grip
The grip fits most hand sizes like a glove!

The Badger Model   

I have an example of one of Sean O' Hare's knives that I’ve owned for quite some time, over ten years. The Badger model falls under the tactical class of knives, although it could certainly be used for a host of duties, including Bushcraft/Survival, defense, hunting, or knife reviews.

Blade

The blade of the Badger is made from CPM 154CM steel and is approximately 4 ½ inches long, although the choil adds a bit of length (I did not count the choil portion as part of the blade). Blade configuration is of the drop point variety. The blade stock is somewhat thick and stout, but the flat grind lends this blade as an excellent slicer. The CPM 154CM steel is not the latest, greatest wonder-steel, but it is a solid performer that’s been around for quite a while. Its virtue is that it is relatively easy to sharpen and holds an edge for a decent time under use. I’ve been delighted with it.

Sean O' Hare knife striking pommel
The Badger in its natural environment. Note the striking pommel.

Pommel and Handle

A guard is built into the knife in front of the handle to keep the hand from sliding up onto the cutting edge. In front of that is the aforementioned choil, which is helpful if the user wants to choke up on the knife for added control during finer cutting chores. The handle of the Badger is full tang, and it has a triangular striking pommel at the butt of the handle, complete with a lanyard hole and jimping. The pommel edges were sharp and tended to abrade my side when I carried the knife, so I took a diamond stone to them and rounded off the edges ever so slightly, fixing that issue. However, it would still be very effective as a striking surface.

Holding the handle on are three mosaic pins that go all the way through, securing the scales solidly. The handle is made from smooth dark green canvas micarta, yet it provides enough traction for a positive purchase. It allows the hand to slide around enough to reduce friction and eliminate “hot spots” when chopping with the knife so that there is no discomfort to the user. At the same time, the knife is not likely to slip out of the hand during use. Sean got this aspect spot on! In addition, the shape of the handle fits wonderfully into the hand, filling the hand well but not being so large as to be uncomfortable. Several people have tried the knife and, despite having various sized hands, each remarked that it felt as though the knife had been made just for them.

There is jimping on the spine of the blade, where the thumb is placed, which does a perfect job of anchoring the thumb to that spot while not being overly abrasive to the skin.

Sean O' Hare Knife Feel and Finish

In the hand, this Sean O' Hare knife has the most “lively” feel of any fixed blade I’ve ever handled. Not to sound corny, but it almost strikes me as “magical,” the balance, weight, and configuration just become a perfect extension of my hand when gripped. The knife’s weight is 6.2 ounces, and I’m sure the low weight contributes to the liveliness in the hand. The balance point is right where the handle ends, and the guard begins, making the balance perfect. Sean did his homework on this point, and the finished product reflects that.

The finish of the metal appears to be hand-rubbed satin, which gives a pleasing appearance. The overall fit and finish of this knife is outstanding.

Personal Opinion

For years now, this has been my go-to fixed blade when I’m venturing into the outdoors and deciding to have a fixed blade with me. I would feel very comfortable using this knife for camp chores or other woodland tasks such as building a shelter.

Sean O' Hare knife with Spyderco and Glock
A great carry package for woodland jaunts. Fixed blade Badger, Spyderco Native, and Glock 43X.

Beyond that, I look at this blade as a serious defensive tool if it ever came to that. Let’s face it, if we ever have to use a Sean O' Hare knife to defend ourselves, we’re having an exceedingly bad day, but it is what it is, and I like to be prepared for all eventualities. And these days, one never knows what sort of misadventures might rear their ugly head. Knives never run out of ammo, if you know what I mean. And they’re relatively silent in operation. This particular knife would work great for defense, given its lightweight and nimbleness in hand.

The Badger is not huge, nor is it small, by any means. I’d call it slightly larger than medium-sized. It’s not something I conceal on my person when going about my daily travels. But for hiking and the like, it is just what the doctor ordered.

Sean O' Hare knife belt clip
Here the belt clip can be seen. Clipping onto and off a belt is quick and easy, but the sheath is held securely once clipped on.

 Sheath and Sharpness

A word about the sheath: it is simple and excellent. Period. It consists of a piece of Kydex folded over and secured with rivets that allow cordage to pass through them if you want to lash it to a part of your kit. It has a belt clip that slips over your belt and hooks over it so that when you draw the knife, the sheath will not follow (see the photos, my description may not be the best here). It can be donned or removed quickly and easily yet remains secure when it’s on your belt. Tension retains the Badger in the sheath until it is drawn out.

Sean O' Hare knife sheath
The Badger in its sheath is a compact carry package.

How does it cut? Fabulous! Light wood cutting, chopping small branches, slicing through paracord, and a myriad of other tasks, passed with flying colors. However, it’s not a blade that I use regularly; I have smaller folding knives as my workhorses. Instead, the comfort that this blade provides simply by being there on my side makes it golden because I know it will perform, and it’s dependable when needed.

Final Thoughts

On top of all of what I listed above…this Sean O' Hare knife is simply a work of art. There’s no other way to put it, it just looks fantastic on top of being a functional piece of gear. Sean O’Hare is a real artist when crafting sharp, pointy things. If you haven’t checked out his cutlery, jump on the internet and look him up. Be aware, though, his knives are very much in demand, so it’s not certain if he will have inventory lying around ready to go out the door. There may be a bit of a wait, but I can personally tell you that it is worth it! There’s just something about holding a hand-made tool like this in your hand that gives a feeling of satisfaction.

These days, his fixed blade knives seem to be in the $425-$450 price range, but don’t quote me on that. Check ’em out, you won’t regret it!


About the Author:

Jim Davis served in the PA Dept. of Corrections for 16 ½ years as a corrections officer in the State Correctional Institute at Graterford and later at SCI Phoenix. He served on the Corrections Emergency Response Team (CERT), several of those years as a sniper, and also the Fire Emergency Response Team (FERT). For 25 years, he was a professional instructor, teaching topics including Defensive Tactics, Riot Control and Tactical Operations, Immediate Responder, and cognitive programs as an adjunct instructor at the DOC Training Academy. He was then promoted to the title of corrections counselor, where he ran a caseload and facilitated cognitive therapy classes to inmates. His total service time was close to 29 years. He was involved in many violent encounters on duty, including multiple unfortunate incidents of fatalities. He is a regular contributor to the KEEN INSIGHTS column on The Mag Life.

Sean O' Hare


Related Posts Plugin for WordPress, Blogger...