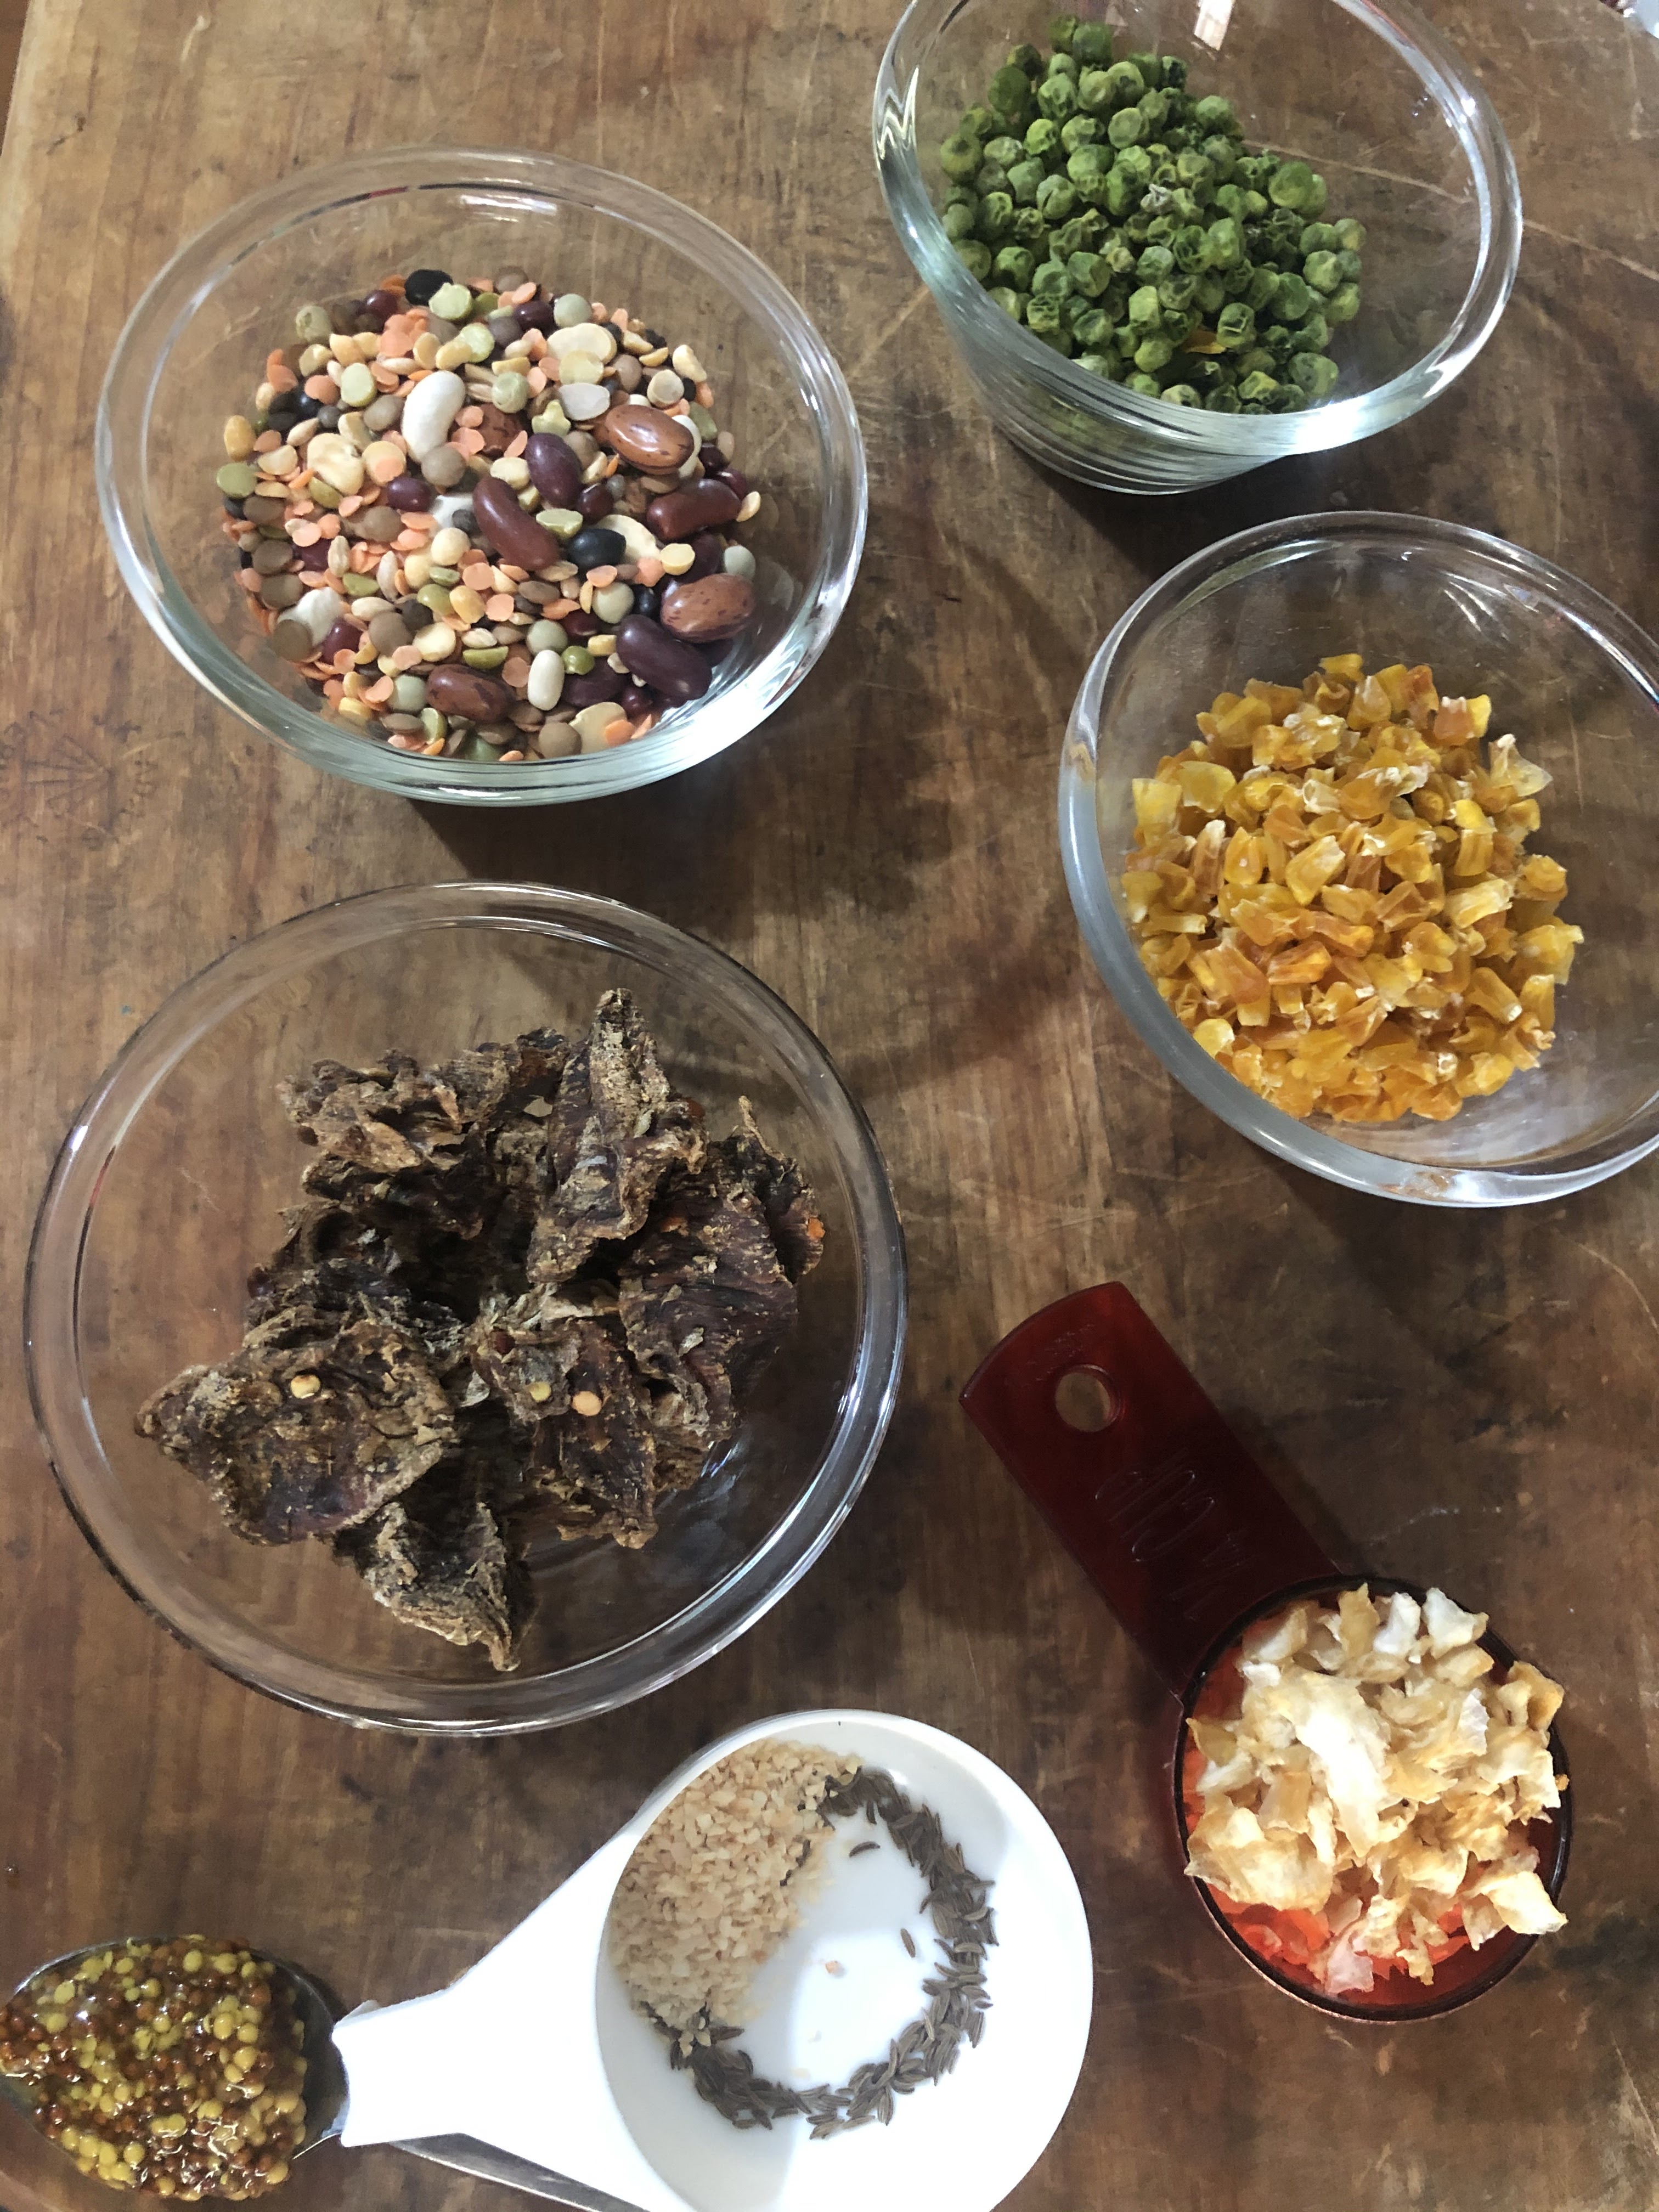
 Pushing on with a food and meals theme, I thought i'd make a start with this simple meal. I started out by collecting my ingredients. I'm a big fan of dehydrating food and I wanted to try my home-dehydrated items out. I had bought and dehydrated bags of frozen peas, corn and diced onion. ( hint for the novice, do these all separately to avoid mixing when they fall through the grills when shrunk by dehydration).1kg frozen peas yielded 252g and 1kg frozen corn yielded 223g corn kernels. Pictured here was 1 cup of each, a half cup of dehydrated onion, 1 cup of "soup mix" (beans, split peas, lentils, I also used a handful of hard jerky I had made, cut into 1" squares, a tablespoon of seedy mustard, and a half teaspoon each of granulated garlic and fennel seeds. So the only wet ingredient was the mustard. The rest could be stored in a sack and if in a decent jar, would last pretty much indefinitely.
 I wanted to push the rustic angle so
 With plenty of water and a long and slow cook everything re-hydrated nicely and with a couple of stirs to blend flavours, it came together nicely. The jerky softened up and the peppery marinade I had made it with blended into the stew just a little, but pleasantly so.
The peas, soup mix and onions all softened up and thickened the soup into a hearty stew. The corn re-hydrated about 70%, enough to be tender, but not juicy.
I tested it after a couple of hours, stirred it and added a little more water then left it to bake some more. The beef softened up but was still a bit tough. smaller chunks or perhaps some beating to soften the fibres might help next time.

If and when i make this again, I think id use beer or stock for the liquid base, and add some form of fat or oil just to bolster it and add richness. Perhaps bacon or spec in chunks?
Some additional seasoning wouldn't go astray, perhaps even just a bay leaf or two.
It was certainly a good way to make use of my dehydrated ingredients and made a very satisfying set of meals for what would be a very light batch of ingredients (I forgot to measure, bad scientist).
 What else should I add? Might try dehydrating frozen carrot next.
This kind of meal is called a pulse. It is very ancient and exceedingly simple to make. Next time with more rigorous record keeping.

This is certainly a meal one cold make in the coals of a campfire, even semi-buried in ashes and returned too after ranging for a solid evening meal. Well worth trying, even with the risk of burning.
dehydrated MRE style meal
dehydrated MRE style meal


