Showing posts with label food. Show all posts

Tuesday, October 27, 2026

Review: Fallout The Vault Dwellers Official Cookbook

 Fallout meals: fallout the vault dweller's official cookbook - Flip eBook Pages 1-50 | AnyFlip

I had the good fortune to have the opportunity to do a book review, for something that really interests me, Fallout and Cooking. The Fallout: Vault-dwellers Official cookbook. This 190 page, full colour hardback, in-universe cookbook features all kinds of in-game content, jargon, names and certainly has the feel of the Fallout universe. As well as an entertaining read, chock-full of game references without being cloying, but also full of very appealing recipes.  

The cookbook is laid out by courses, in usual cook-book style, which makes for convenient selection of recipes: Appetizers, Soups and Stews, Sides, Mains, Desserts and Drinks ( including, excitingly, a recipe for Nuka Cola Syrup). 

I wanted to try out some meals and keep it somewhat in-world, Sole-Survivor style, so I opted for finding three bush-pot, one-pot style meals. One-pot meals reduce loss of resources and ensure maximum nutrition retention, which is a good lesson for any lone survivor. I used my big cast iron cook pot for a good rustic authentic feel.  I settled on Cabbage soup, Pork and Beans and a game-meat stew. 


I wanted to go with simple and easy to come by ingredients to better mimic what a vault-dweller might come across on the Surface. The book has well laid out ingredients lists which made scavenging for ingredients from the ruins of Super Duper Mart or trading at a settlement for caps a breeze. I made these three dishes over the space of a few weeks to spread the potential impact to my family out a little. More out of a desire to pad out the potential stigma for "nerdy Fallout meals" rather than commentary of the cookbook or my cooking. 

First up was the Cabbage soup, not a glamorous start for sure, but wholesome and easy. This one called for:, Onion, Shallot, Butter, Celery, Carrot, Green cabbage, Purple cabbage, Vegetable broth, Red potatoes, Tomatoes, Parsley. just some salt and pepper to season.

The recipe was very easy to follow, the steps simple and efficient and after a couple of hours slow cooking, it was ready and delicious. I threw in some thinly sliced dried salami to increase the protein a bit, something my Hungarian ancestors would no doubt approve of. We ate it with some crusty bread rolls and it made for a filling, warming couple of meals for the whole family. Even the fussy eaters ate it, with some reservation.

The batch size made enough for a couple of nights worth of meals and whilst a robust meal, repeat reheatings made it a bit sloppy by night three. It could do with more meat, though the recipe didn't call for any.

Id heartily recommend hearty cabbage soup for any Vaultie that finds themselves with a sack of looted veggies and mouths to feed.


Second meal from the book was a more seemingly traditional survivor / frontiersman meal the redoubtable Pork n beans that any good cowboy would recognize. The recipe called for ingredients easily salvaged from suburban wastelands or the dusty back storerooms of long abandoned roadside diners, with the possible exception of bacon and onion.

The full list is here: Bacon, Onion, Jalapeño, Garlic, Ketchup, Brown sugar, Honey, Cider vinegar, Ginger, Mustard, Worcestershire sauce, Lima beans, Canned pork n beans. Not too bad of a shopping/scavenge list. I opted for canned Lima/butter beans, but dried beans in a sack would work just as well if take just a bit longer with a soak first.

In place of sliced bacon I used a small picnic ham and cubed it to add a meatier bulk to the dish, to make up for the light meat content of the Cabbage soup. I skimped on the Jalapeño as a concession to delicate palates but the recipe was very flavorsome even with only very simple seasonings. The flavors came through in the cooking and long simmering blended it all together nicely.

Eminently suited to a big cast iron pot, from the browning of the ham/bacon and the onions to the caramelisation of the honey and ketchup. I purposefully let it thicken up quite a bit as I didn't want to serve it with rice, but if you did ,leaving it a bit runny would be an easy enough variation.

For the third meal I wanted to make something a bit fancy, but in keeping with my "one-pot meal" idea, I opted for this game stew. 
Ok, lets be fair, this is a curry, and I used goat. It's goat curry and it was delicious. I like to think that goat would make a good stand in for something like a white-tail deer, though hopefully someone who's eaten both can let me know. Though I suppose either would be a good choice for a RadStag. I could have gone with venison from our local butcher, or even kangaroo but I thought goat would be a more in-keeping with the theme of the meal and everyone in the Vault loves goat.  


This recipe called for the most intense ingredients list, which might require a salvage/scrounge mission to  Super Duper Mart unless you happen to have a local spice-hut to hit up, but that said the ingredients weren't that exotic or hard to come by: Ginger, Garlic cloves, Lemon grass, Onions, Turmeric, Coriander, Cumin, Garam masala, Cayenne, Fennel, Serrano pepper, 2lbs goap/ Bambi, canned tomatoes, Bay leaf, Coconut milk.

After toasting the spices to release their aromatics the goat gets browned then spiced, before the wet ingredients (coconut milk and canned tomatoes) go in. Then it slow simmers till the meat is tender and falling off the bones tender. (beware small sharp bones).


I served it with plain white rice, and a sprinkle of coriander as garnish. It was delicious and well received. I accompanied mine with Mexican cola as we didn't make any Nuka Cola. (but there is a recipe for that!!!)

So, all told, three solid recipes, well documented, well laid out and adequately instructed. The cookbook itself makes a tremendous addition to any fan's library, both thematically and also in the context of an actual cookbook. Tall, hardback, glossy pictures and crisp printing. 

I'd have liked a bit more loot and salvage type content, but food health and safety obviously need to take precedence to avoid litigation. Be sure to grab a hard-copy before the EMP wipes out all the PDF servers!


Tuesday, December 17, 2024

Review: Survival Storehouse Tactical Tin

EDIT:I am now an AFFILIATE You’ll receive a unique discount code for 5% off the Tactical Tins (ammo tins packed with survival biscuits). USE CODE 'apoc25" at checkout to receive your discount!


Survival Storehouse kindly sent me one of their Tactical Tins recently and i'm pleased to present you with my review of it now. 

The tin itself is a standard 200 rnd .30 cal / 7.62 ammunition can, brand new and stickered with the BDH manufacturers ingredients and nutritional facts details. I love ammo cans; robust, resilient and ergonomic, lending themselves to stacking and packing. They also feature a rubber gasket on the removable, latch locking lid for an air and watertight seal. This means from the get-go you have a  sealed, crush-proof and portable storage for your food. The added weight of a steel can is mitigated by its utility and reliability. 

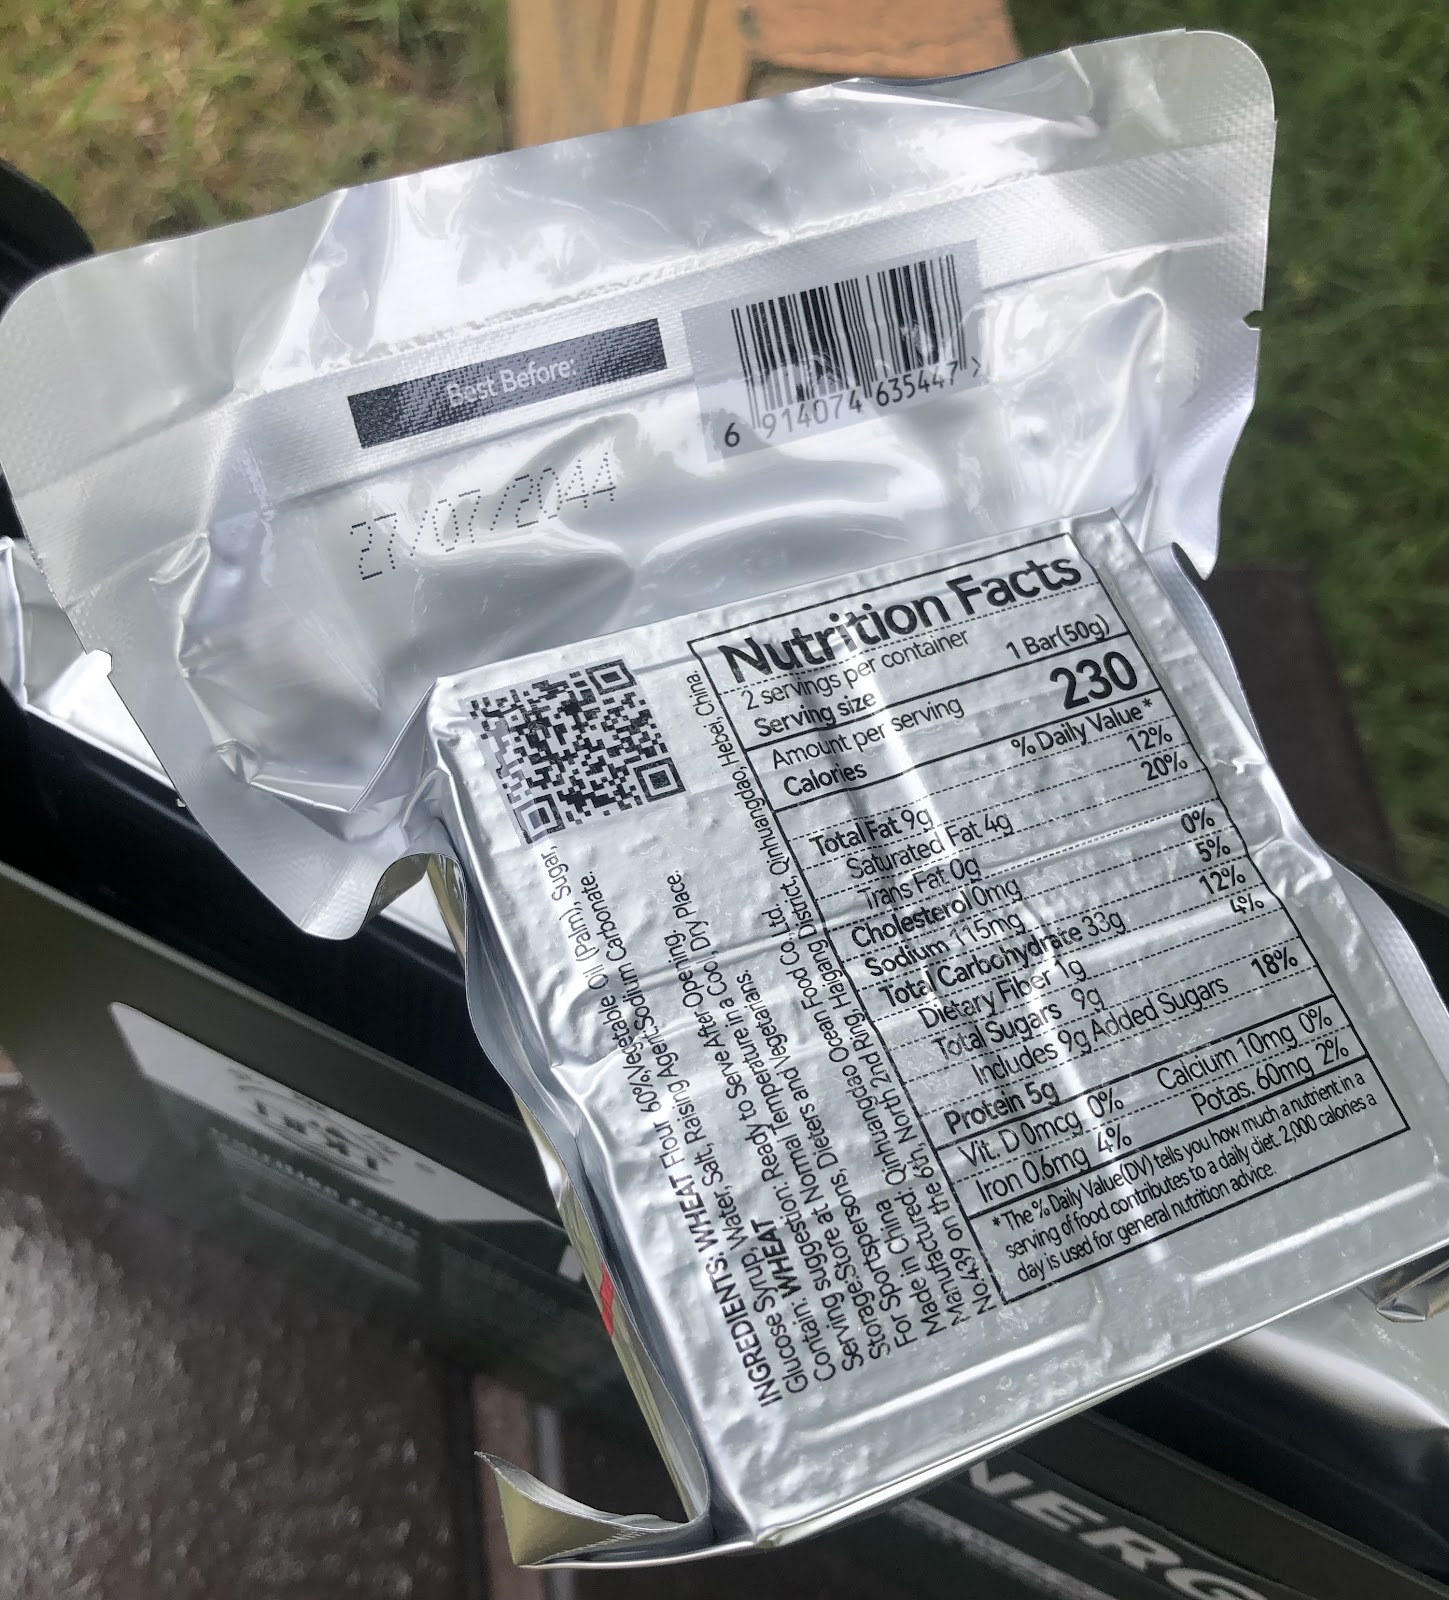
Inside the can are 12 individually packaged high density food bars. I've covered these before here and the ones included in the Tactical Tin are identical, produced by the same manufacturer in China, but the ones included in this Tin were manufactured in August 2024, with a 20 year expiry, good out till 2044! 


The vacuum sealed Mylar sachets each contain 4 individually plastic wrapped biscuits, each block of four weighs 200g (7 oz)  and each 100 g ( two bars) contains 2000 Kilojoules or approx 300 calories. (2000 calories / day is USFDA recommended)

Ingredients: wheat flour, palm oil, sugar, glucose syrup, water, salt, food additives, baking soda, edible essence. This is the standard flavor, but they also come in chocolate or peanut butter varieties. Which I haven't yet had a chance to try. 

I find them very tasty and keep a couple in my car, in my day to day get-home bag and even at my desk at work. Great for a pick me up snack or a "forgot breakfast". 

With up to 20 year shelf life from manufacture date if stored in a dry cool place. These are a reliable and long term food supply, packed with energy and vitamin enriched. Shipped from Survival Storehouse's warehouse in Australia. The combination of the bomb-proof ammo-tin and the super dense food bars makes the Tactical Tin an ideal first stop in any prepping adventure. Perfect for back of the closet, car trunk or bunker load-out!

Thursday, December 5, 2024

Home Front: bean and rice survival soup

A while back I secured a copy of the impressive and practical goldmine of prepping projects: 

 NO GRID Survival Projects (How To Produce Everything You Need on Your Property) by Amber Robinson, Claude Davis, and James Walton

One of the included projects was a long term storage meal of Rice and beans, Bean and Rice Soup. After collecting and portioning out the ingredients into 1.5L long term storage jars. They then sat under my desk for some months until I  realized I hadn't even tested it.
One of the important things to do with any food-prep items are to test it in a non-crisis to ensure you'll want to eat it in the event of a crisis. 

So I set about making a batch of this. The soup is remarkably simple, the first stage is the bean mix: Brown beans, white beans, lentils, split peas, chickpeas.(370g/ 13oz)  These go on with plenty of water (3L/3qt) to boil. Next in goes in the spice and seasonings mix:

Bullion cubes, garlic and onion powder, cumin, salt and pepper and dried mushroom, dried tomatoes. This cooks on low until the beans all soften up. At this point there was still a fair amount of water in the pot and the rice goes(210g 7 1/2 oz)  in. The soup was tasty if watery at this stage but the addition of the rice soon thickened it up into a very solid stew. I ladled myself out a healthy serve and got stuck in.  It was delicious, filling and hearty. 

I went back for seconds and had leftovers for lunch AND dinner the next day. This "quarter ration" ( being half of one of two jars I had made up, and it served 6 hefty servings. I was a little concerned that such a legume rich meal would lead to intestinal distress or gas but no such occurrence developed. 

I call this a resounding success. Admittedly it was a long cook-time ( several hours) and used a lot of water, but turned very cheep and light ingredients into a lot of very tasty food. I wouldn't call the end result a soup by any stretch of the imagination, it's a stew or pottage. The 1.5 kg jar of dry mix serves 12

The re-stocked and sealed jars are going into my prepping cache and the No Grid Survival Projects book is going into high rotation. 


Thursday, August 8, 2024

Home Front: Dried food stew

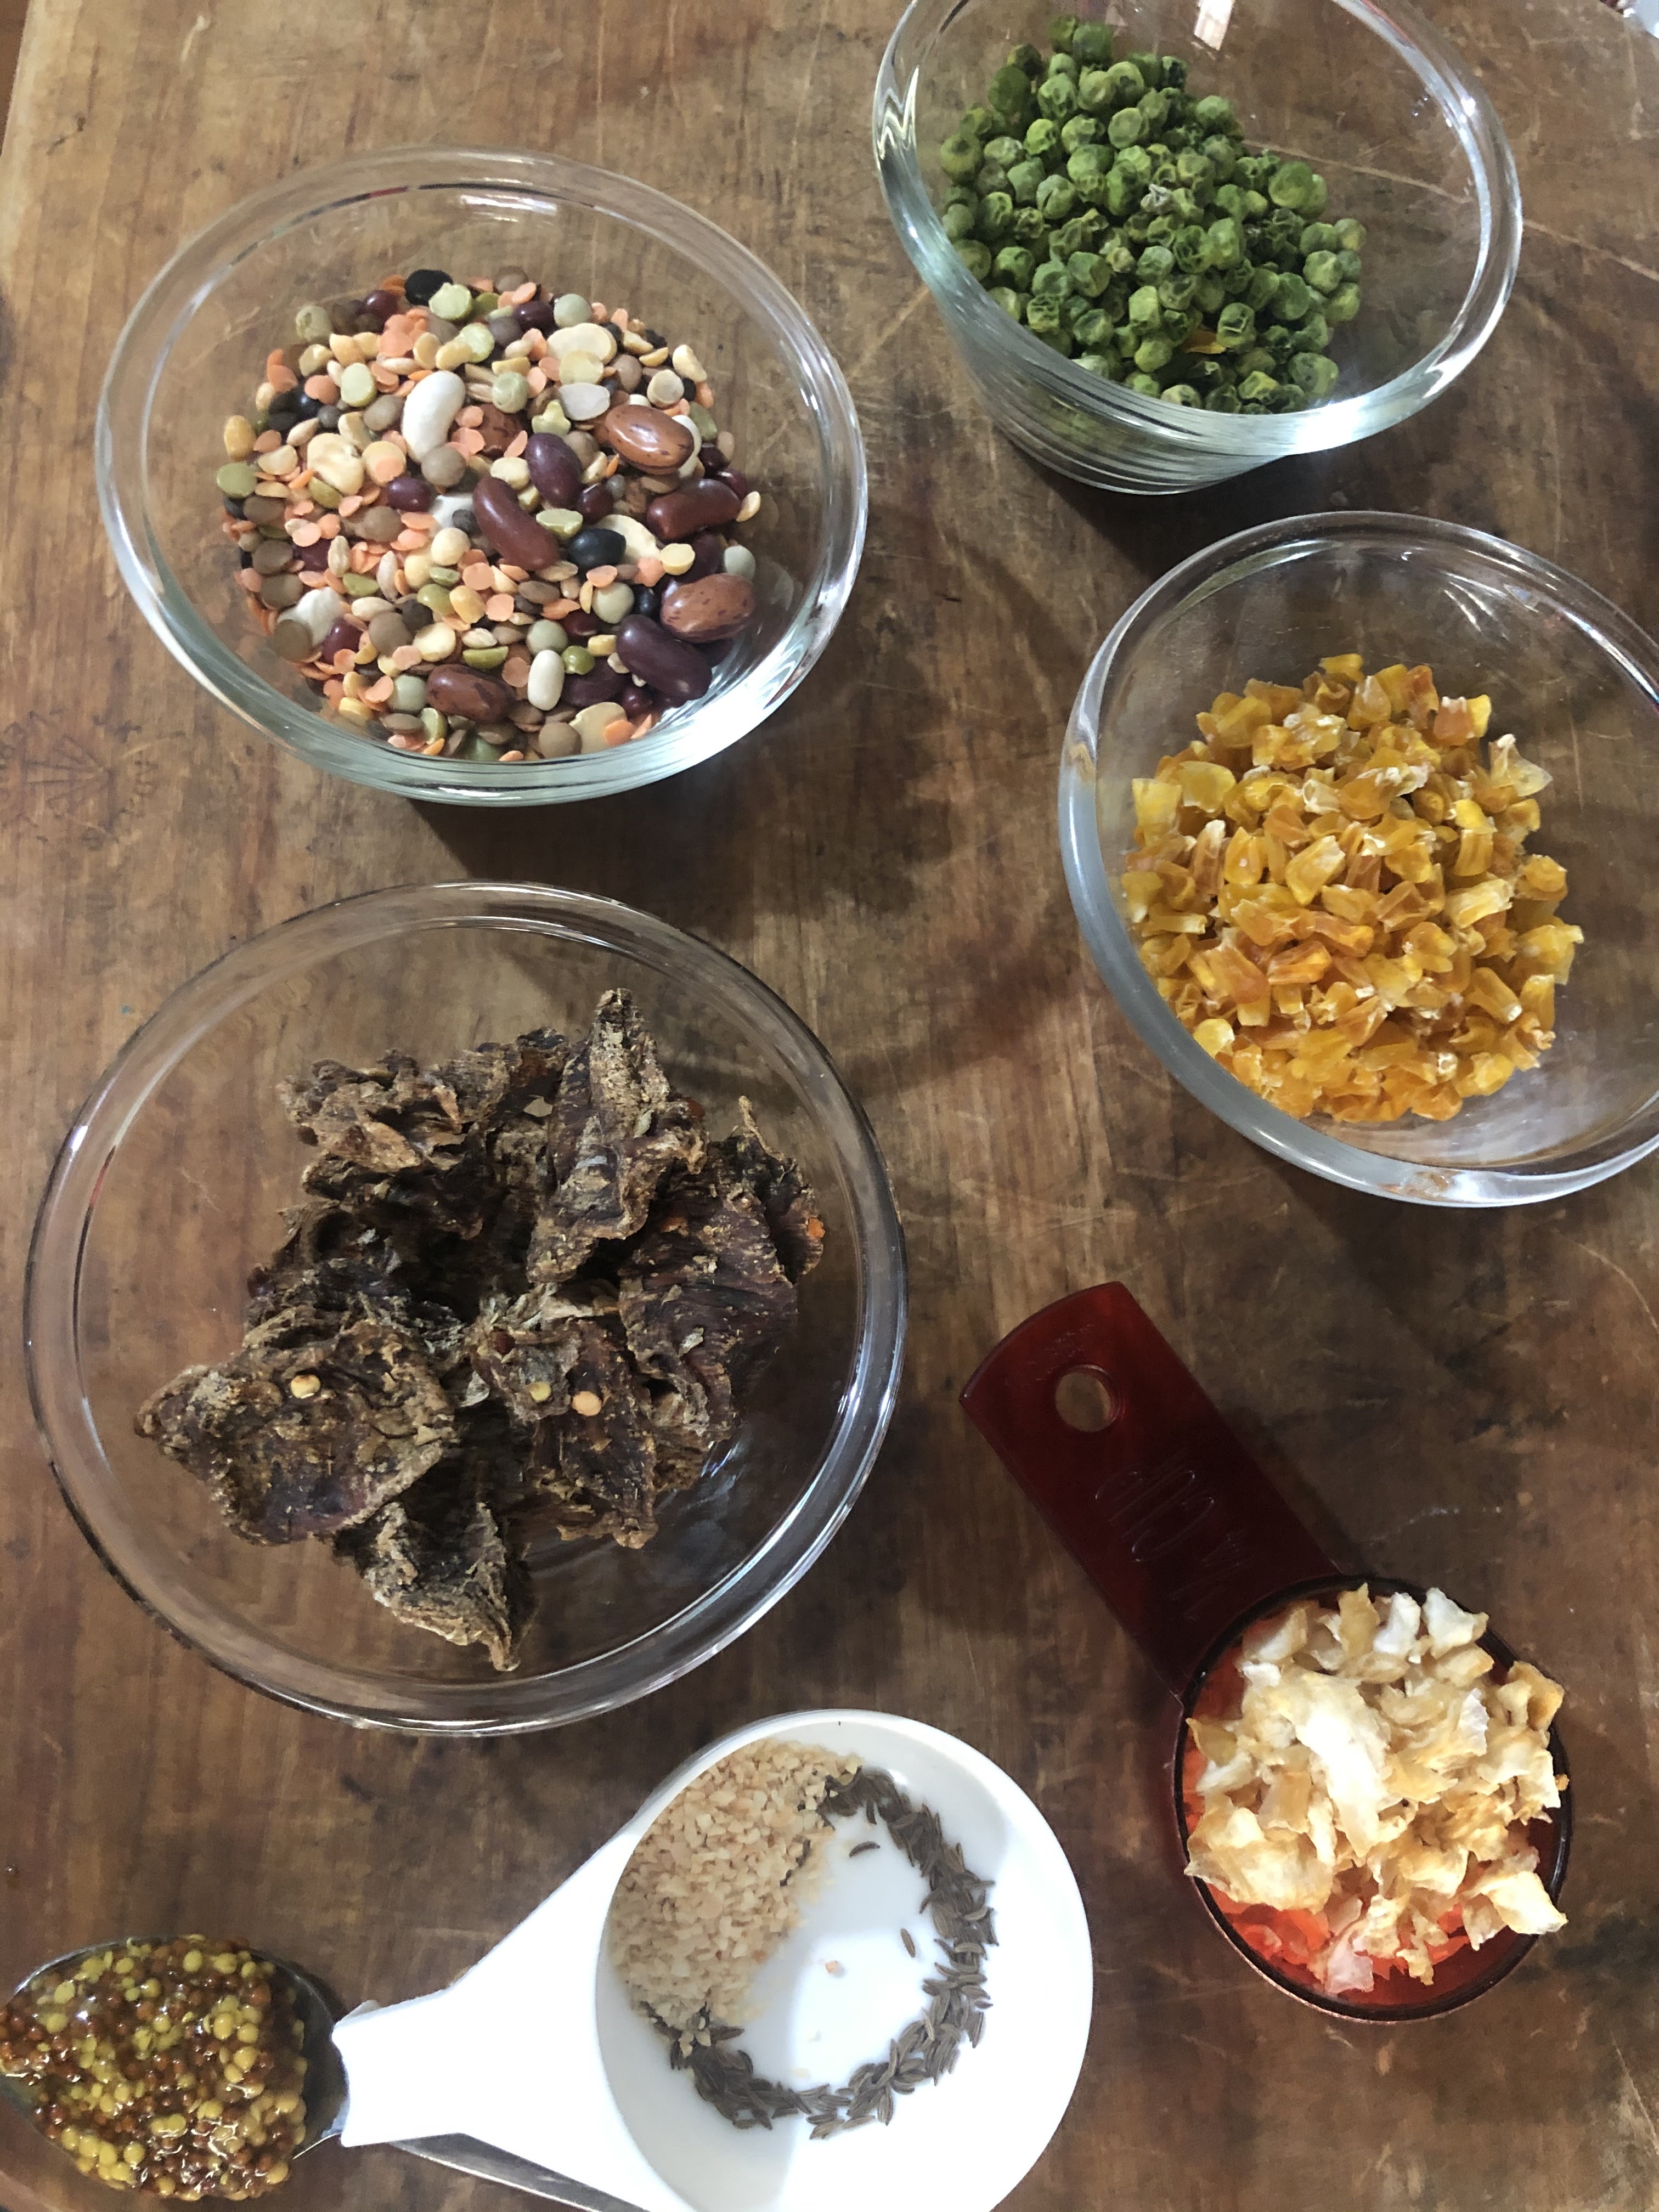
 Pushing on with a food and meals theme, I thought i'd make a start with this simple meal. I started out by collecting my ingredients. I'm a big fan of dehydrating food and I wanted to try my home-dehydrated items out. I had bought and dehydrated bags of frozen peas, corn and diced onion. ( hint for the novice, do these all separately to avoid mixing when they fall through the grills when shrunk by dehydration).1kg  frozen peas yielded 252g and 1kg frozen corn yielded 223g corn kernels. Pictured here was 1 cup of each, a half cup of dehydrated onion, 1 cup of  "soup mix" (beans, split peas, lentils,  I also used a handful of  hard jerky I had made, cut into 1" squares, a tablespoon of seedy mustard, and a half teaspoon each of granulated garlic and fennel seeds. So the only wet ingredient was the mustard. The rest could be stored in a sack and if in a decent jar, would last pretty much indefinitely.  


It was light on seasoning, but I wanted to make as minimalist a meal as possible, to see what little you could get away with and still have a palatable meal. 

I wanted to push the rustic angle so 
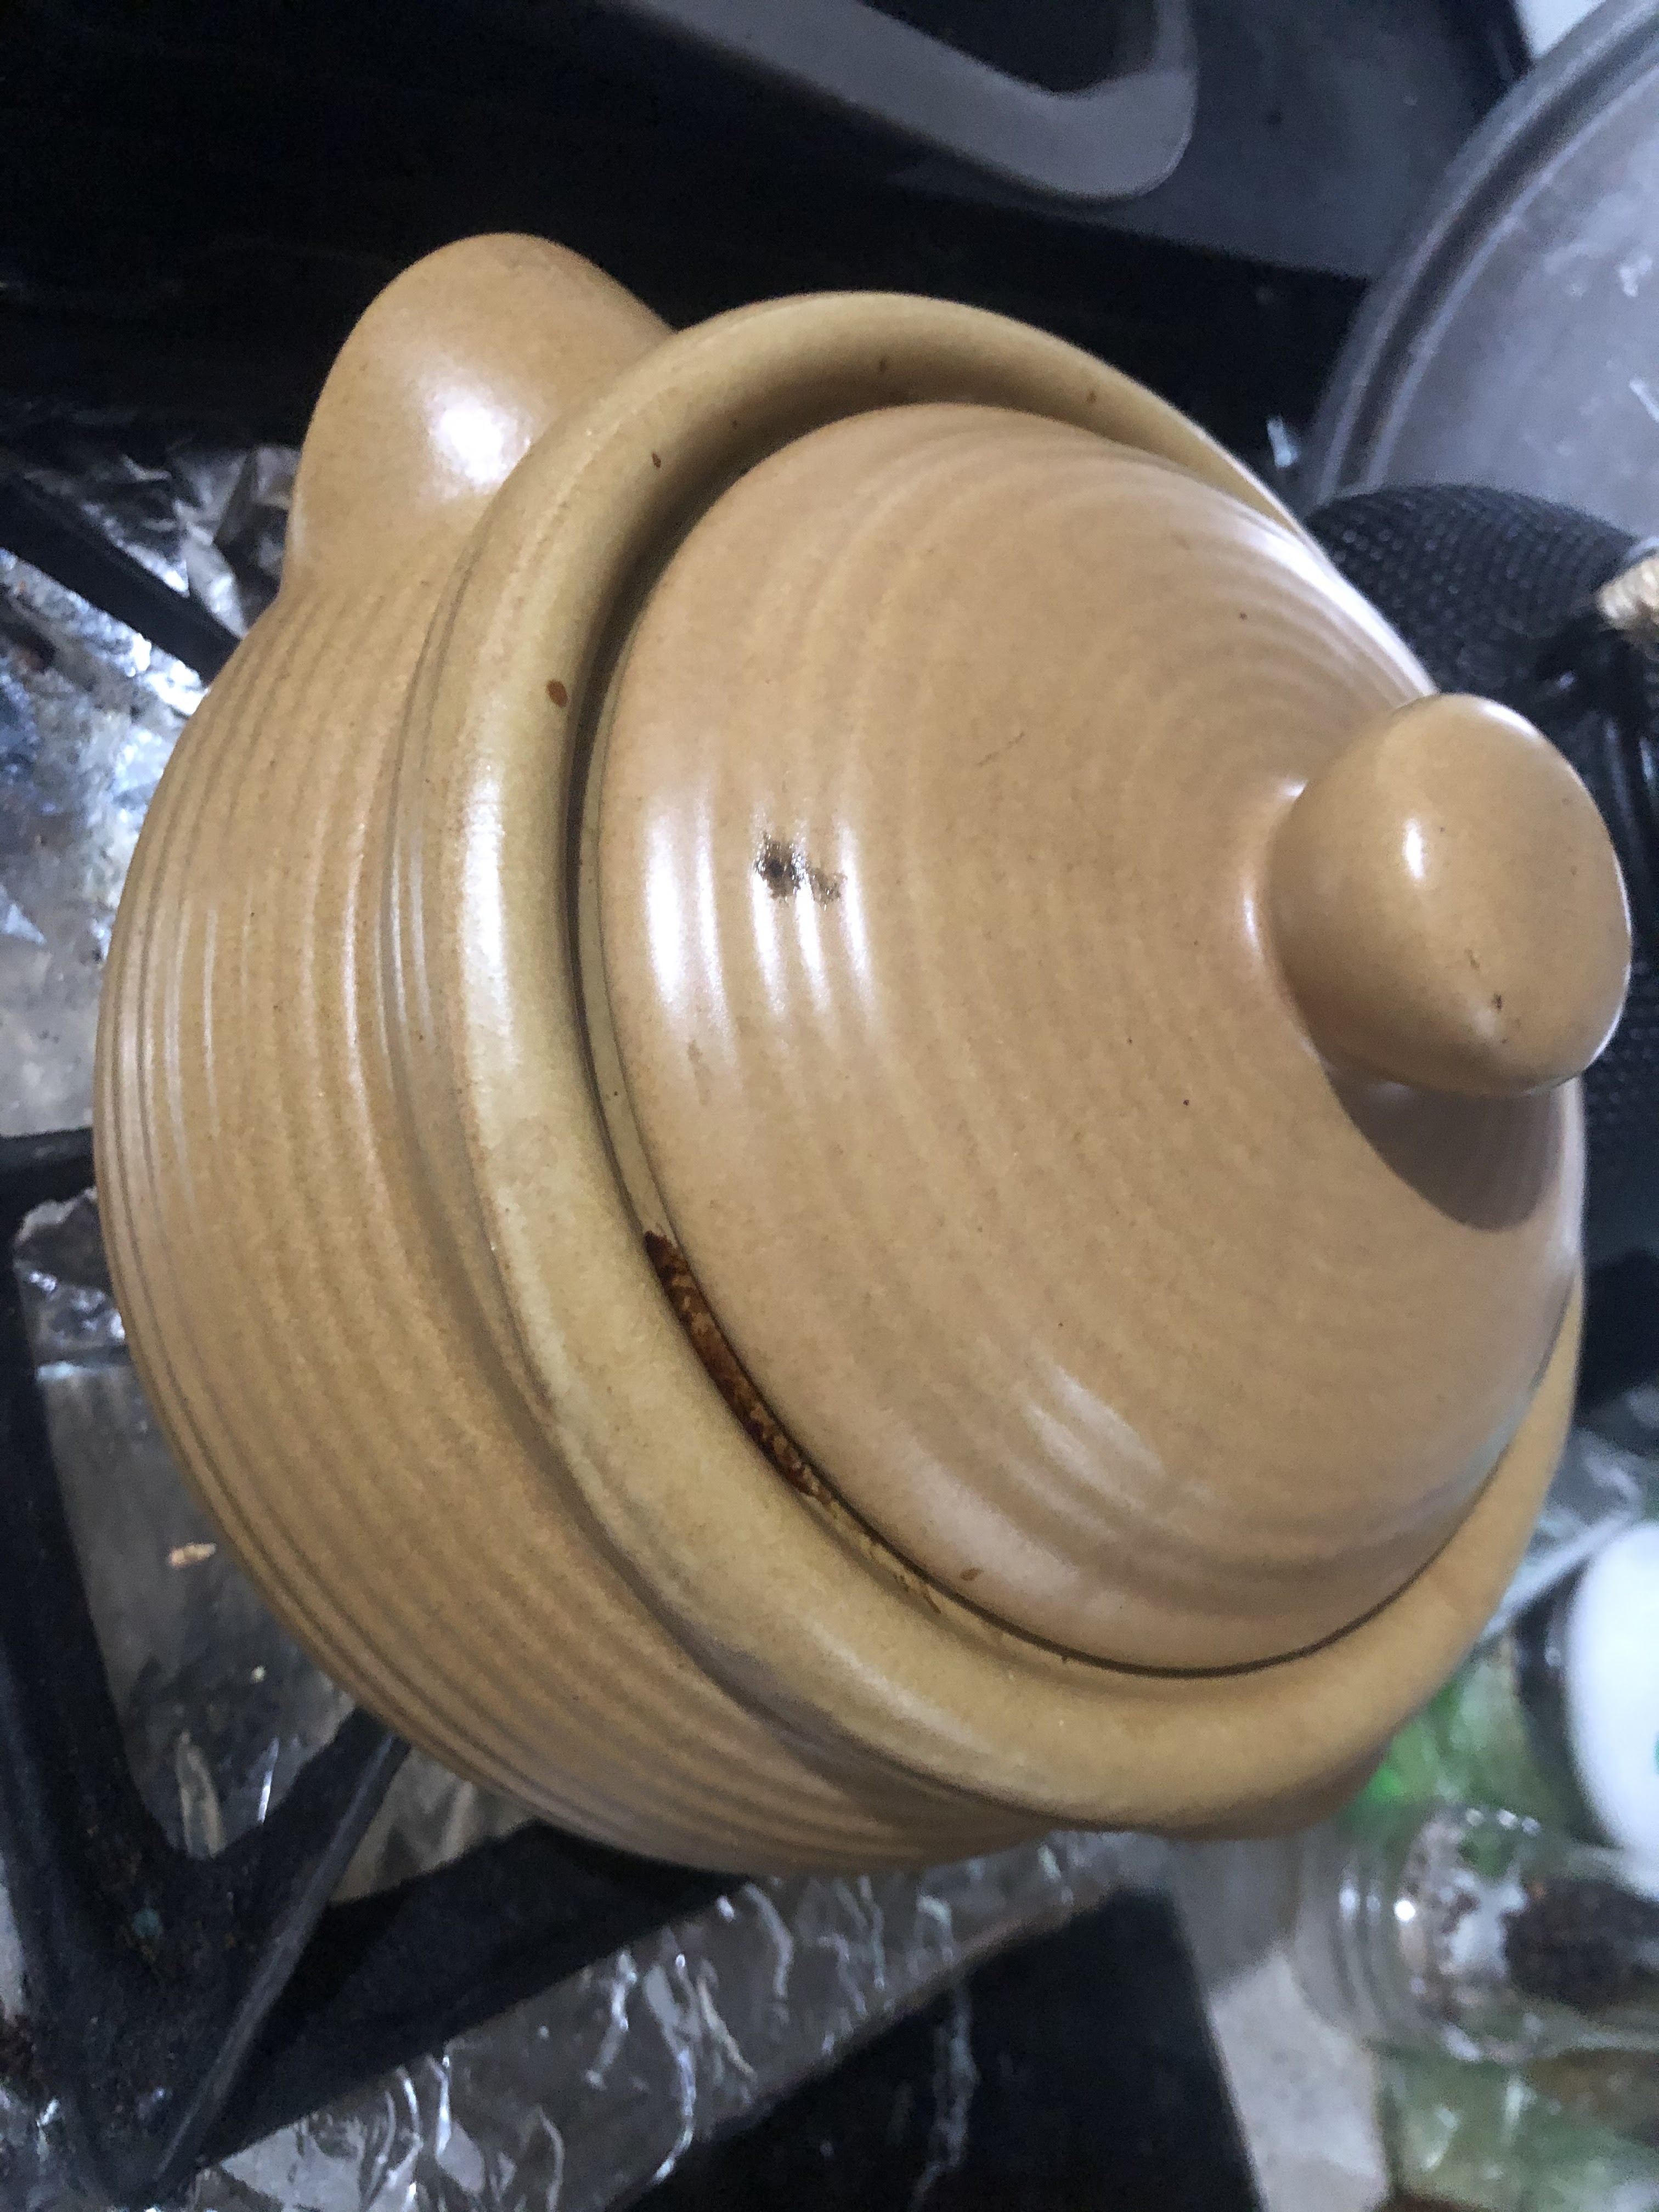
I opted to prepare this in a piece of stoneware I had acquired at an op-shop. This  Stoneware Tureen had a close fitting lid and wing-handles and similar items can be found elsewhere too. I put all the ingredients into the tureen and added 6 cups of water, put the lid on and put it in the oven on low for a number of hours. 

With plenty of water and a long and slow cook everything re-hydrated nicely and with a couple of stirs to blend flavours, it came together nicely. The jerky softened up and the peppery marinade I had made it with blended into the stew just a little, but pleasantly so.

The peas, soup mix and onions all softened up and thickened the soup into a hearty stew. The corn re-hydrated about 70%, enough to be tender, but not juicy. 

I tested it after a couple of hours, stirred it and  added a little more water then left it to bake some more. The beef softened up but was still a bit tough. smaller chunks or perhaps some beating to soften the fibres might help next time. 

I cooked it down till there wasn't any standing liquid, which might have been a mistake, but it was soft, not soggy when I decided it was "ready" and ladled myself out a serve. It smelt great whilst slow cooking and whilst not exciting to look at, was both surprisingly tasty and filling, with a couple of good ladle fulls making a solid meal and this made several servings worth. 

If and when i make this again, I think id use beer or stock for the liquid base, and add some form of fat or oil just to bolster it and add richness. Perhaps bacon or spec in chunks?

Some additional seasoning wouldn't go astray, perhaps even just a bay leaf or two. 

It was certainly a good way to make use of my dehydrated ingredients and made a very satisfying set of meals for what would be a very light  batch of ingredients (I forgot to measure, bad scientist).

This kind of meal is called a pulse. It is very ancient and exceedingly simple to make. Next time with more rigorous record keeping. 
What else should I add? Might try dehydrating frozen carrot next. 

This is certainly a meal one cold make in the coals of a campfire, even semi-buried in ashes and returned too after ranging for a solid evening meal. Well worth trying, even with the risk of burning. 

dehydrated MRE style meal


Thursday, February 8, 2024

Prepping shed

As the final part of our move from the original home of Apocalypse Equipped Actual, we installed a garden shed in order to store my copious accumulated camping and prepping gear. No room in the new house or garage. My parents were kind enough to gift us this flat-pack, DIY ABSCO 3x3 shed. We built it over a couple of weekends, in a quiet corner beside the house, which was a nice project for me and my good-father. The shed consits of a frame to which pannels are afixed. Assembly is made easier with the help of pre-drilled holes and Absco’s patented SNAPTiTE technology that allows panels to lock into channels without the need for screws. (note, it came with screws and is screwed together, but self-tappers all the way.)

We found there was some manufacturing variance on the pre-drilled holes that needed occasional modification to set things secure and square. The shed is designed to be bolted onto a pre-poured concrete slab, but rental property constraints meant that we instead used a treated pine sleeper frame we anchor-plated together and bolted down to star-picket anchors we pounded into the soft ground. The bare grass we built over was covered in places by salvaged pallets or timber sleepers to set things upon. I put a long table in, along the back wall and a couple of ‘duckboards’ to avoid any seepage that might occur. 

I loaded my collected camping gear ( tents, sleeping systems, cookware and other needfuls, into some old ikea shelves on the table, and many, many stacked Tactical Milk Crates full of my other preps (canned goods, MRE's, and the like) that i'd collected before and during the Covid years. I also have spare tools, crockery and other super-numerate supplies. I also had a number as as-yet unpacked boxes of stuff from the previous house. Initially I just tetras-packed it all in, floor to ceiling in order to get it all in so I could free up other spaces and make them functional. This didn't lead to a very accessible and orderly storage system. 

A process of consolidation and rediscovery over a couple of sunny weekends enabled me to make a little more sense out of my collection, both for ease of access but also to make room to store more stuff and even use the space for additional supplies and furniture, like this cupboard unit, which makes for good assorted pack and kit storage (I have sleeping bags, hydration systems and some tools). 

I also managed to collect all our only occasionally used cold weather snow gear, as well as my various cammo outfits. Under the big table, I've been able to stack my foldable tactical crates. which makes good use of that space whilst having these easily available in the event of a bug-out or camping trip.

 The placement of the shed puts it in the shadow of our side fence and beside some trees and the back corner of our house. It's in the full daylight ark, but has some wind shelter. We placed it on a flat spot but the area is in a slight depression so the duckboards and pallets  keep all the stuff off damp ground. (I open the doors of windy/ sunny days to ensure it doesn't get too humid in there).

I'd noticed condensation on the roof and walls, so I made sure to space my stacks so there was some clearance on all sides (which also improves ventilation)and even though I have  a mix  of storage containers ( crates, chests and bags) I've managed to make an orderly store for my preps, in a safeish, dryish, dark place. I haven't yet put a thermometer in there. but I expect it gets pretty warm in there  (which will obviously affect shelf life of my food preps) but that's a next stage concern. 

How do you store and organise your preps?


Sunday, March 8, 2020

Home Front: COVID-19 bug-in cache

With the current COVID-19 pandemic scare going on, I thought it prudent to supplement my food stored in case we needed to enact the self-quarantine the Australian government is recommending in the case of exposure.  I suspected something like this might occur so as soon as i heard of an outbreak in China. Mostly due to the risk to supply chains.  Given the reported nature of the virus, in both infection rates and morbidity and mortality, I'm not overly concerned about the disease itself, but rather the disruption to supply lines.

This is the kind of prepping anyone can do and its as simple as picking up a few extra items each time you go shopping. Long lasting staples.  I chose things I like to eat, and things I will take camping.  I didn't pre-stockpile toilet paper which was the panic-buy item of choice  reported and experienced, but some judicial and crafty shopping saw us stocked without issue. Something to note for next time.

That said, here is a quick look at my very quickly and inexpensively put together bug-in food cache. Nothing too exciting, nor anything that will go to waste. this is all stuff  I will eat over time and replenish and build on as time goes on.

Red Feather Butter cans: Providing energy rich fats and good taste, for frying, baking, spreading on bread.
Spam cans 340g A traditional prepping staple. Long lasting, tasty and versatile, has its own opening  system and a Weird Al song and Monty Python skit. 3 year best-by date.  I prefer it sliced or diced and fried but its palatable enough eaten from the can with a spoon if you're in a bind.
https://en.wikipedia.org/wiki/Bully_beef, this mechanically reclaimed potted meat and rendered lard in a can. Bully Beef. Not a very exciting food, nor especially sophisticated but it is meat, long lasting, ready to eat and can be added to many other foods. 'Pocalypse Stew as well as the traditional 'shit on a shingle". (served on toast like pate) It kind of looks like pet food. 
Noodles: Ramen. packs Two-minute pre-fried noodles in a packet.  Comes with its own seasoning sachets. Best eaten as noodles in soup  (ready in just  2 minutes give or take) or eat dry sprinkling the seasoning on top as you munch. They also make excellent fire starters being dry and greasy. I prefer the "mi goreng" flavor which it includes a chili/sauce/oil sachet for added flavor variety and use in other dishes as needed as well as fortifying the meal.
Baked Beans  555g cans: Beans Beans ,good for the heart. Best served hot, "Fine like this" if you shun compromise and wear an ink blot mask. 
Stew cans, Braised steak and onion;  425g cans. A meal in a can, simple and tasty. good texture and serves two per can.
Soup cans, Chunky bacon and potato x3 505g cans. Another meal in a can, though not quite as satisfying as the stew cans. Better when combined with other foods.
MRE's: from a variety of sources.  Pre-packaged military style meals ready to eat. not fancy but very carefully put together and long lasting.
Water jugs: Every time I go camping I buy one of these 10L-20L bricks and take them to ensure I have clean water for drinking, cooking and even wash-ups. Afterwards I keep the jugs and with some simple cleaning and refilling with tap-water they're good to go for long term water storage.
Powdered Egg mix: 150g, equivalent to a dozen fresh eggs when reconstituted with water. can be used to make scrambled egg or omelette or as a binding agent in baking. 
Sauces/Soup Mix:  I keep the excess sauce packets from fasts food meals and also the soup sachets from ramen packets to act as soup stock and seasoning for other meals, especially the otherwise bland Spam, beans and corned beef. What otherwise might have been throw away I've kept and stored to supplement my meal stores. 
Mac and Cheese kits: x4 boxes 380g "serves 3. contains pasta packet and canned cheese for use as a sauce. Requires only water to cook. The canned cheese can be eaten separately or combined with other supplies. 
Pasta sauce, Jars of tomato paste with flavorsome herbs, good for making stews, pasta and adding flavor and nutrition to any meal.

Can Pie; Steak and Kidney. Pie including pastry in a tin. Designed to be cooked in the tin (Lid off) it is possible to bake the pie in coals, with some coals on top, by partially opening the tin.

In addition to these specific canned good stores i've stockpiled, I have routinely built up supplies, preserved foods like jams and jerky. Dry-goods like rice, beans, flour and sugar i've kept well stocked and stored in DPJ's  along with fruit preserves and even some pickled eggs.


Friday, March 6, 2020

Review: Red Feather Brand canned butter

I had heard and read about canned butter as a survival and prepping resource for years but had never seen it until doing some shopping at my local IGA super market (a small locally owned chain of community oriented markets) where I saw them stacked on a display. I grabbed one and took it home to try and have made a point to pick one up each time I go in as part of my on-going prepping.

This canned butter was from the Red Feather brand, which is an Australian company which takes Australian and New Zealand milk to make fine and traditional butter and have done so for over  70 years. Red Feather butter has no artificial colours or flavours, Each 10 oz ( 340g ) can is made only Pasteurized cream and salt. Sealed airtight for maximum freshness, this canned butter delivers convenience in the form of extended shelf life and easy storage without the necessity of refrigeration, with a manufacturers recommendation of a 2 year use-by, In ideal, cool conditions, an unopened can could be expected to last much longer than that and it is purported to be shelf stable for 10 years. I may put a can aside to see how this holds out. Time capsule anyone?


The can itself  comes with a plastic cap which allows you to re-seal the can after opening with  a can-opener. The conveniently stackable cans have one lip larger than the other.  One thing I found is one end of the can opens better than the other. The bottom end of the can has a better lip for engaging the can-opener and once open, the plastic cap closes the can up to maintain freshness. With regular butter I tend to leave the pat out to stay room temp for ease of spreading. In an Australian summer this occasionally leads to a puddle but being in a lidded can I've avoided this with the Red Feather butter. 

This also makes it camp-safe  to keep bugs and crud out of the butter and  also keeps it dry in you store it in an icy cooler.


As far as taste goes, I'd go as far as to say it's sweeter and creamier than the regular butter I buy from the grocery.  It spreads nicely at room temperatures, it fries well and is excellent on pancakes, an essential attribute.

I haven't tried powdered or freeze-dried butter but I think the Red Feather butter would make a very fine addition to your long term food stocks. It's a little more expensive than regular packet butter but the added value of long term shelf-life, stackability and good taste means I will be buying it for regular use as well as prepping needs.
I can believe it's long life butter.


Related Posts Plugin for WordPress, Blogger...