Showing posts with label cooking. Show all posts

Tuesday, October 27, 2026

Review: Fallout The Vault Dwellers Official Cookbook

 Fallout meals: fallout the vault dweller's official cookbook - Flip eBook Pages 1-50 | AnyFlip

I had the good fortune to have the opportunity to do a book review, for something that really interests me, Fallout and Cooking. The Fallout: Vault-dwellers Official cookbook. This 190 page, full colour hardback, in-universe cookbook features all kinds of in-game content, jargon, names and certainly has the feel of the Fallout universe. As well as an entertaining read, chock-full of game references without being cloying, but also full of very appealing recipes.  

The cookbook is laid out by courses, in usual cook-book style, which makes for convenient selection of recipes: Appetizers, Soups and Stews, Sides, Mains, Desserts and Drinks ( including, excitingly, a recipe for Nuka Cola Syrup). 

I wanted to try out some meals and keep it somewhat in-world, Sole-Survivor style, so I opted for finding three bush-pot, one-pot style meals. One-pot meals reduce loss of resources and ensure maximum nutrition retention, which is a good lesson for any lone survivor. I used my big cast iron cook pot for a good rustic authentic feel.  I settled on Cabbage soup, Pork and Beans and a game-meat stew. 


I wanted to go with simple and easy to come by ingredients to better mimic what a vault-dweller might come across on the Surface. The book has well laid out ingredients lists which made scavenging for ingredients from the ruins of Super Duper Mart or trading at a settlement for caps a breeze. I made these three dishes over the space of a few weeks to spread the potential impact to my family out a little. More out of a desire to pad out the potential stigma for "nerdy Fallout meals" rather than commentary of the cookbook or my cooking. 

First up was the Cabbage soup, not a glamorous start for sure, but wholesome and easy. This one called for:, Onion, Shallot, Butter, Celery, Carrot, Green cabbage, Purple cabbage, Vegetable broth, Red potatoes, Tomatoes, Parsley. just some salt and pepper to season.

The recipe was very easy to follow, the steps simple and efficient and after a couple of hours slow cooking, it was ready and delicious. I threw in some thinly sliced dried salami to increase the protein a bit, something my Hungarian ancestors would no doubt approve of. We ate it with some crusty bread rolls and it made for a filling, warming couple of meals for the whole family. Even the fussy eaters ate it, with some reservation.

The batch size made enough for a couple of nights worth of meals and whilst a robust meal, repeat reheatings made it a bit sloppy by night three. It could do with more meat, though the recipe didn't call for any.

Id heartily recommend hearty cabbage soup for any Vaultie that finds themselves with a sack of looted veggies and mouths to feed.


Second meal from the book was a more seemingly traditional survivor / frontiersman meal the redoubtable Pork n beans that any good cowboy would recognize. The recipe called for ingredients easily salvaged from suburban wastelands or the dusty back storerooms of long abandoned roadside diners, with the possible exception of bacon and onion.

The full list is here: Bacon, Onion, Jalapeño, Garlic, Ketchup, Brown sugar, Honey, Cider vinegar, Ginger, Mustard, Worcestershire sauce, Lima beans, Canned pork n beans. Not too bad of a shopping/scavenge list. I opted for canned Lima/butter beans, but dried beans in a sack would work just as well if take just a bit longer with a soak first.

In place of sliced bacon I used a small picnic ham and cubed it to add a meatier bulk to the dish, to make up for the light meat content of the Cabbage soup. I skimped on the Jalapeño as a concession to delicate palates but the recipe was very flavorsome even with only very simple seasonings. The flavors came through in the cooking and long simmering blended it all together nicely.

Eminently suited to a big cast iron pot, from the browning of the ham/bacon and the onions to the caramelisation of the honey and ketchup. I purposefully let it thicken up quite a bit as I didn't want to serve it with rice, but if you did ,leaving it a bit runny would be an easy enough variation.

For the third meal I wanted to make something a bit fancy, but in keeping with my "one-pot meal" idea, I opted for this game stew. 
Ok, lets be fair, this is a curry, and I used goat. It's goat curry and it was delicious. I like to think that goat would make a good stand in for something like a white-tail deer, though hopefully someone who's eaten both can let me know. Though I suppose either would be a good choice for a RadStag. I could have gone with venison from our local butcher, or even kangaroo but I thought goat would be a more in-keeping with the theme of the meal and everyone in the Vault loves goat.  


This recipe called for the most intense ingredients list, which might require a salvage/scrounge mission to  Super Duper Mart unless you happen to have a local spice-hut to hit up, but that said the ingredients weren't that exotic or hard to come by: Ginger, Garlic cloves, Lemon grass, Onions, Turmeric, Coriander, Cumin, Garam masala, Cayenne, Fennel, Serrano pepper, 2lbs goap/ Bambi, canned tomatoes, Bay leaf, Coconut milk.

After toasting the spices to release their aromatics the goat gets browned then spiced, before the wet ingredients (coconut milk and canned tomatoes) go in. Then it slow simmers till the meat is tender and falling off the bones tender. (beware small sharp bones).


I served it with plain white rice, and a sprinkle of coriander as garnish. It was delicious and well received. I accompanied mine with Mexican cola as we didn't make any Nuka Cola. (but there is a recipe for that!!!)

So, all told, three solid recipes, well documented, well laid out and adequately instructed. The cookbook itself makes a tremendous addition to any fan's library, both thematically and also in the context of an actual cookbook. Tall, hardback, glossy pictures and crisp printing. 

I'd have liked a bit more loot and salvage type content, but food health and safety obviously need to take precedence to avoid litigation. Be sure to grab a hard-copy before the EMP wipes out all the PDF servers!


Thursday, December 5, 2024

Home Front: bean and rice survival soup

A while back I secured a copy of the impressive and practical goldmine of prepping projects: 

 NO GRID Survival Projects (How To Produce Everything You Need on Your Property) by Amber Robinson, Claude Davis, and James Walton

One of the included projects was a long term storage meal of Rice and beans, Bean and Rice Soup. After collecting and portioning out the ingredients into 1.5L long term storage jars. They then sat under my desk for some months until I  realized I hadn't even tested it.
One of the important things to do with any food-prep items are to test it in a non-crisis to ensure you'll want to eat it in the event of a crisis. 

So I set about making a batch of this. The soup is remarkably simple, the first stage is the bean mix: Brown beans, white beans, lentils, split peas, chickpeas.(370g/ 13oz)  These go on with plenty of water (3L/3qt) to boil. Next in goes in the spice and seasonings mix:

Bullion cubes, garlic and onion powder, cumin, salt and pepper and dried mushroom, dried tomatoes. This cooks on low until the beans all soften up. At this point there was still a fair amount of water in the pot and the rice goes(210g 7 1/2 oz)  in. The soup was tasty if watery at this stage but the addition of the rice soon thickened it up into a very solid stew. I ladled myself out a healthy serve and got stuck in.  It was delicious, filling and hearty. 

I went back for seconds and had leftovers for lunch AND dinner the next day. This "quarter ration" ( being half of one of two jars I had made up, and it served 6 hefty servings. I was a little concerned that such a legume rich meal would lead to intestinal distress or gas but no such occurrence developed. 

I call this a resounding success. Admittedly it was a long cook-time ( several hours) and used a lot of water, but turned very cheep and light ingredients into a lot of very tasty food. I wouldn't call the end result a soup by any stretch of the imagination, it's a stew or pottage. The 1.5 kg jar of dry mix serves 12

The re-stocked and sealed jars are going into my prepping cache and the No Grid Survival Projects book is going into high rotation. 


Thursday, August 8, 2024

Home Front: Dried food stew

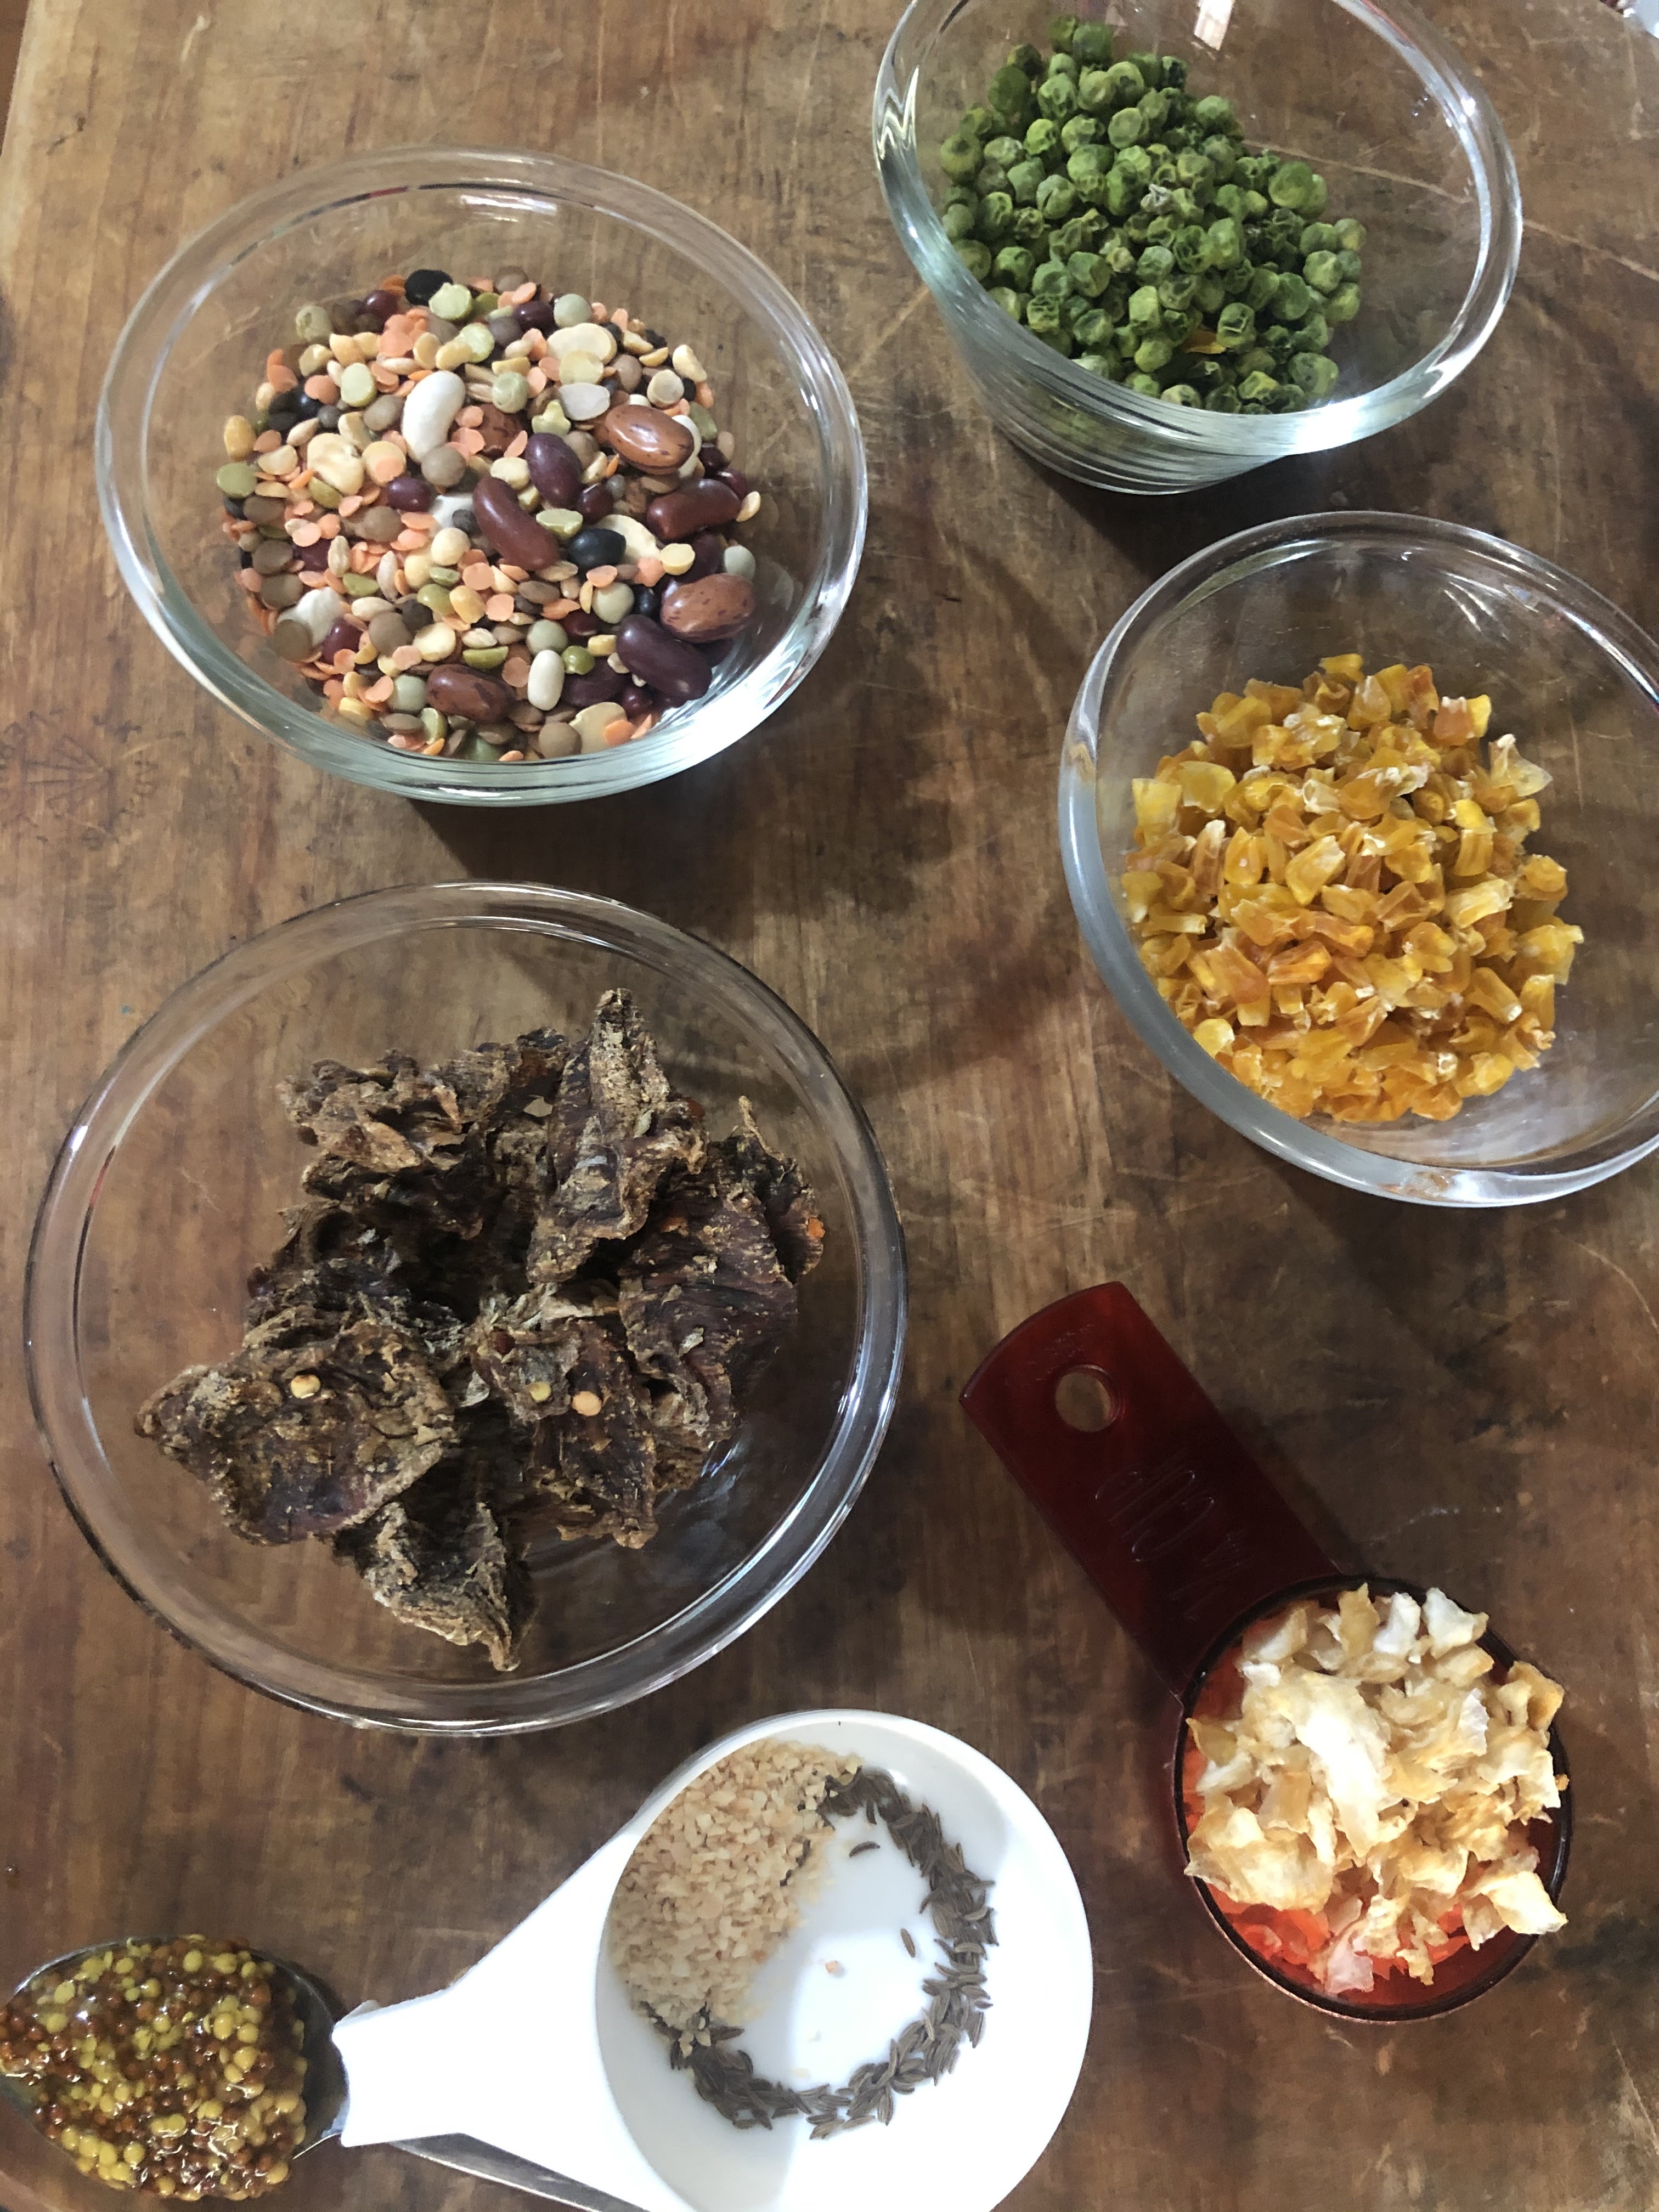
 Pushing on with a food and meals theme, I thought i'd make a start with this simple meal. I started out by collecting my ingredients. I'm a big fan of dehydrating food and I wanted to try my home-dehydrated items out. I had bought and dehydrated bags of frozen peas, corn and diced onion. ( hint for the novice, do these all separately to avoid mixing when they fall through the grills when shrunk by dehydration).1kg  frozen peas yielded 252g and 1kg frozen corn yielded 223g corn kernels. Pictured here was 1 cup of each, a half cup of dehydrated onion, 1 cup of  "soup mix" (beans, split peas, lentils,  I also used a handful of  hard jerky I had made, cut into 1" squares, a tablespoon of seedy mustard, and a half teaspoon each of granulated garlic and fennel seeds. So the only wet ingredient was the mustard. The rest could be stored in a sack and if in a decent jar, would last pretty much indefinitely.  


It was light on seasoning, but I wanted to make as minimalist a meal as possible, to see what little you could get away with and still have a palatable meal. 

I wanted to push the rustic angle so 
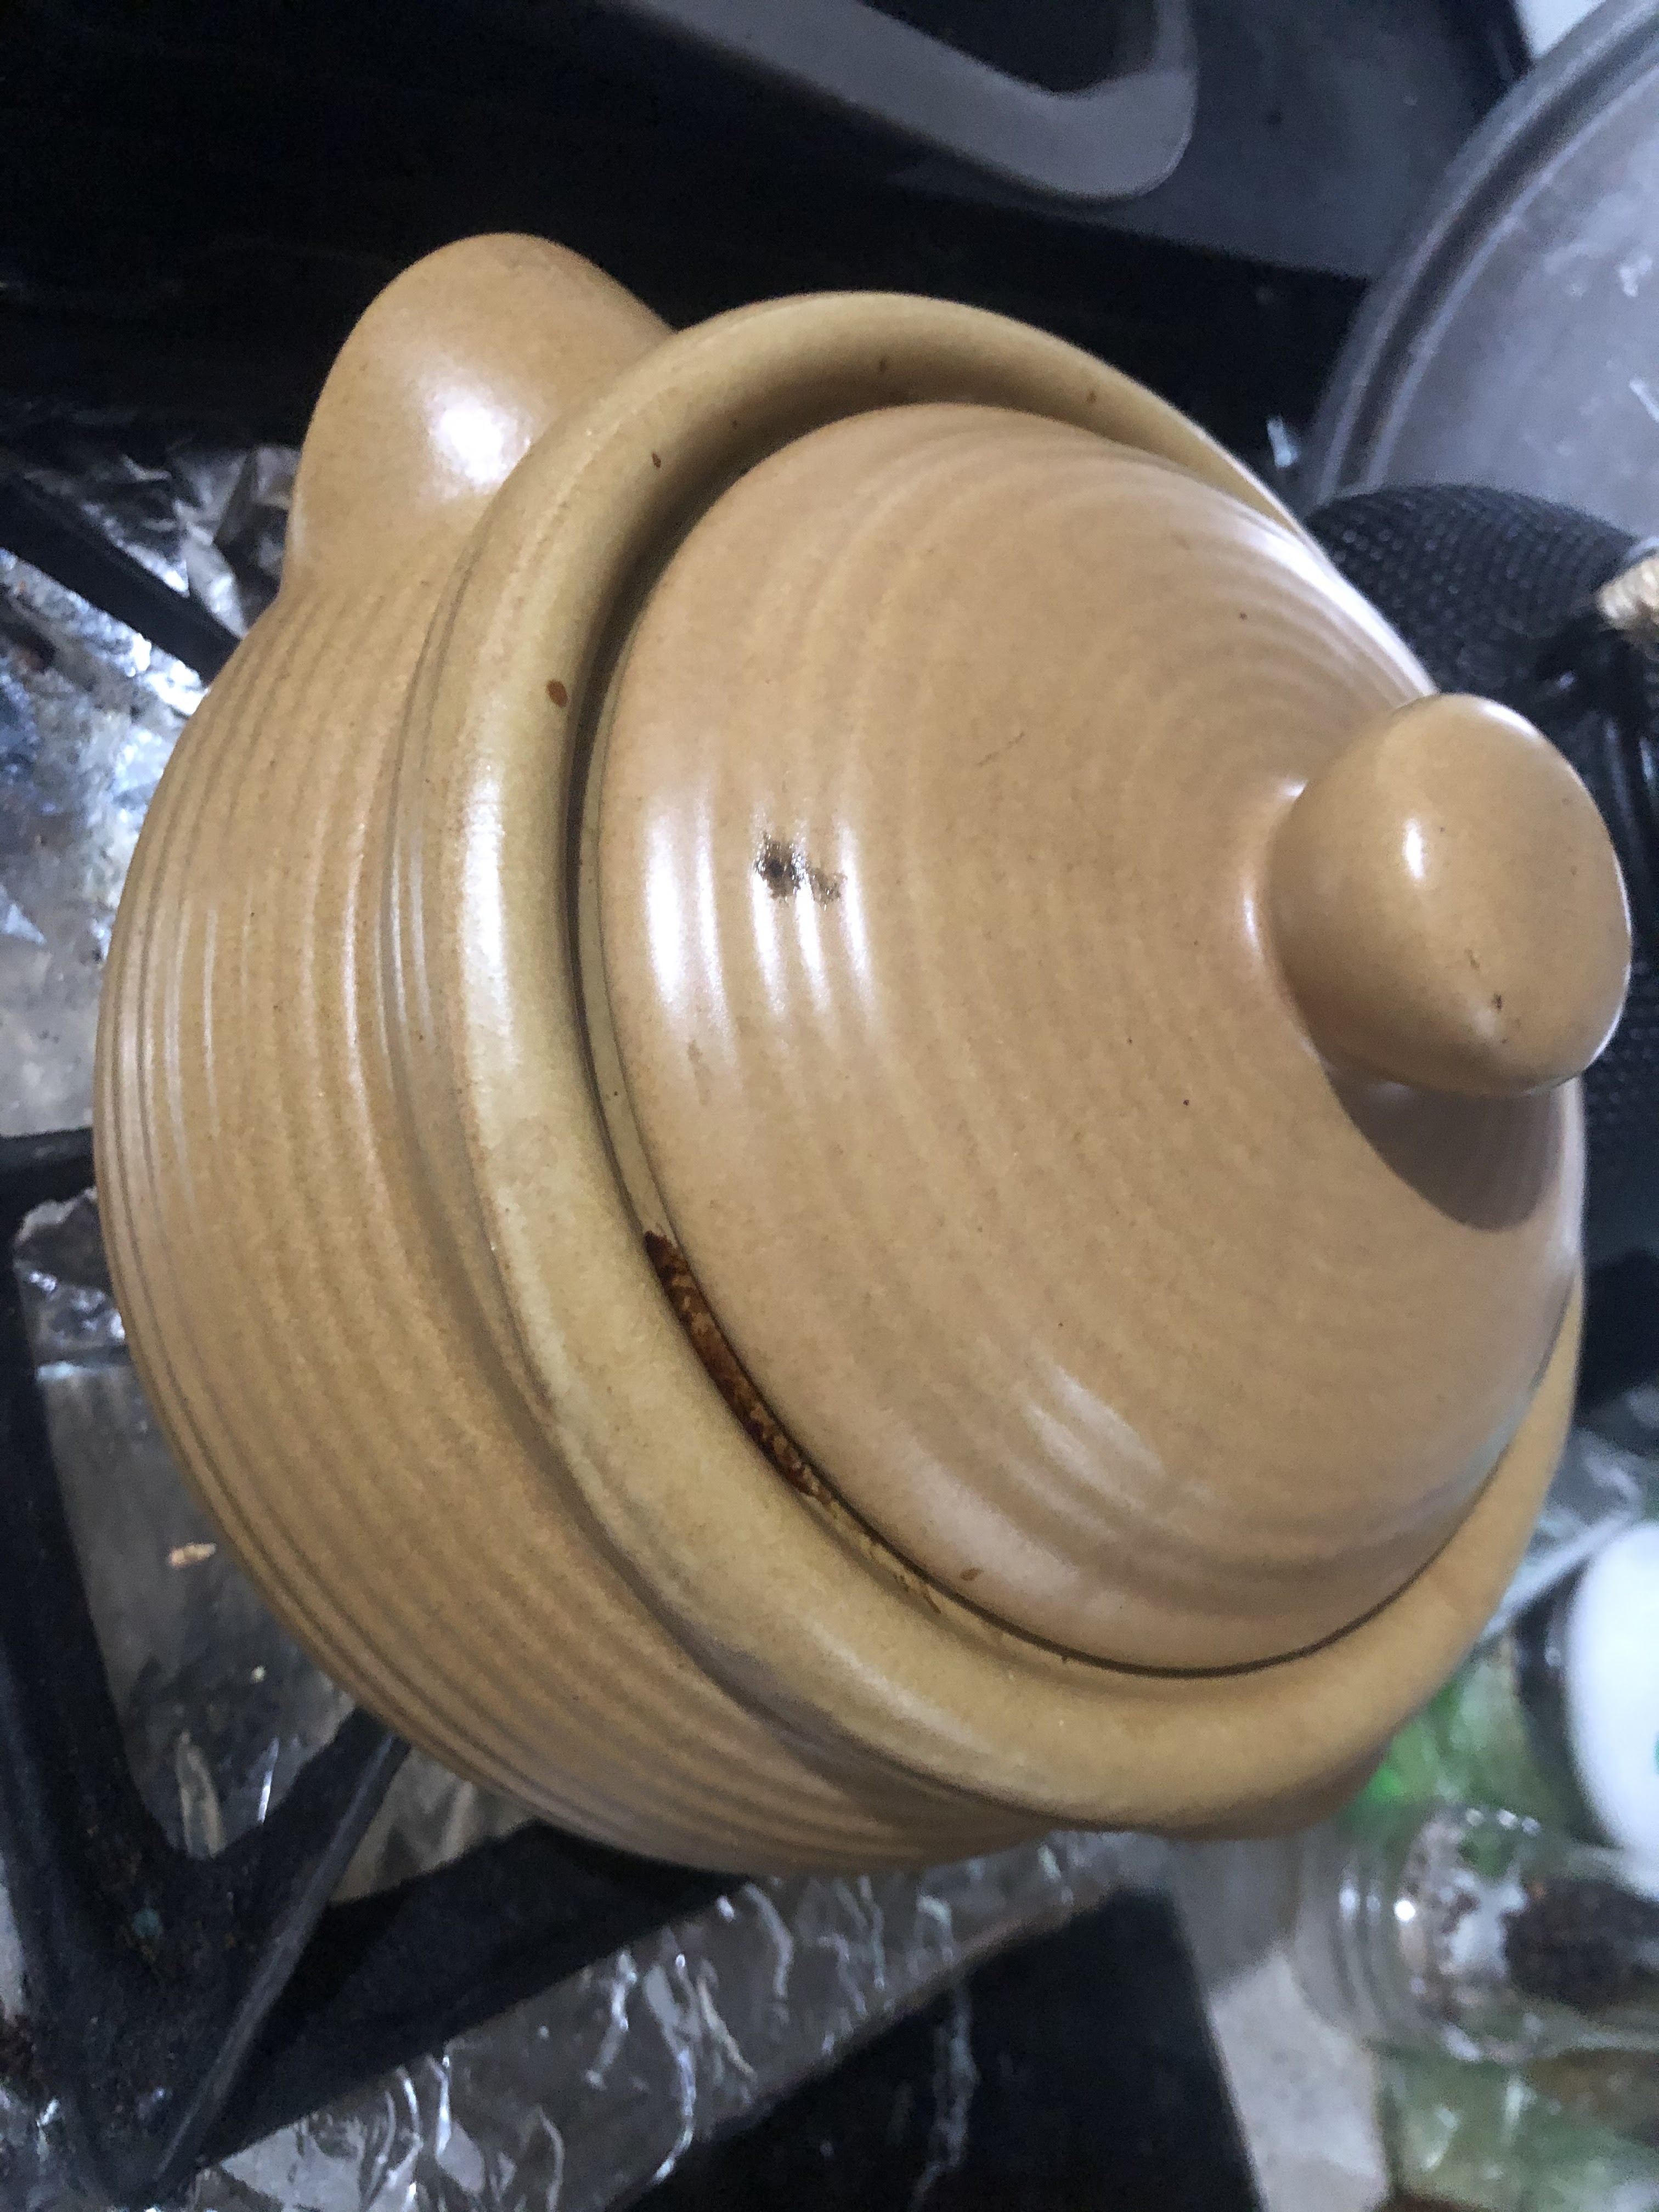
I opted to prepare this in a piece of stoneware I had acquired at an op-shop. This  Stoneware Tureen had a close fitting lid and wing-handles and similar items can be found elsewhere too. I put all the ingredients into the tureen and added 6 cups of water, put the lid on and put it in the oven on low for a number of hours. 

With plenty of water and a long and slow cook everything re-hydrated nicely and with a couple of stirs to blend flavours, it came together nicely. The jerky softened up and the peppery marinade I had made it with blended into the stew just a little, but pleasantly so.

The peas, soup mix and onions all softened up and thickened the soup into a hearty stew. The corn re-hydrated about 70%, enough to be tender, but not juicy. 

I tested it after a couple of hours, stirred it and  added a little more water then left it to bake some more. The beef softened up but was still a bit tough. smaller chunks or perhaps some beating to soften the fibres might help next time. 

I cooked it down till there wasn't any standing liquid, which might have been a mistake, but it was soft, not soggy when I decided it was "ready" and ladled myself out a serve. It smelt great whilst slow cooking and whilst not exciting to look at, was both surprisingly tasty and filling, with a couple of good ladle fulls making a solid meal and this made several servings worth. 

If and when i make this again, I think id use beer or stock for the liquid base, and add some form of fat or oil just to bolster it and add richness. Perhaps bacon or spec in chunks?

Some additional seasoning wouldn't go astray, perhaps even just a bay leaf or two. 

It was certainly a good way to make use of my dehydrated ingredients and made a very satisfying set of meals for what would be a very light  batch of ingredients (I forgot to measure, bad scientist).

This kind of meal is called a pulse. It is very ancient and exceedingly simple to make. Next time with more rigorous record keeping. 
What else should I add? Might try dehydrating frozen carrot next. 

This is certainly a meal one cold make in the coals of a campfire, even semi-buried in ashes and returned too after ranging for a solid evening meal. Well worth trying, even with the risk of burning. 

dehydrated MRE style meal


Saturday, May 11, 2024

Review: King's Adventure Stove

 During the opening rounds of Covid lockdowns in the summer months of 2020 it occurred to me that disruptions might linger on till at least winter. Though I live in a temperate city, which rarely dips below freezing, I wanted to ensure I had a source of heating for both warmth and cooking that was off-grid. I have a variety of BBQ's both charcoal and LPG (I also acquired spare LPG cylinders). At the time
I even had a cast iron wood-stove I was restoring. I had seen portable wood stoves for ages and even camped near some on occasion and thought they would suit my projected need quite nicely. Bigger than a backpack pot-stove but not as big as one of my kettle BBQ's or the cast iron one. I wanted something I could use to burn household and reclaimed timber if needs be, more so than logs and branches that an open-fire pit might be used for. Portability was also an important consideration.  

The ads I'd been seeing pointed me towards https://www.4wdsupacentre.com.au/ which seemed to be a reliable source for robust camping kit. Kings Premium Camp Oven Stove | Wood-Fired BBQ | Enclosed Firepit | Steel Construction | For Camping or Backyard Use - 4WD Supacentre

It seems the particular model I chose is out of production and the current models are square sided, rather than rounded, but this plays very little part in its utility as a camp-stove. 
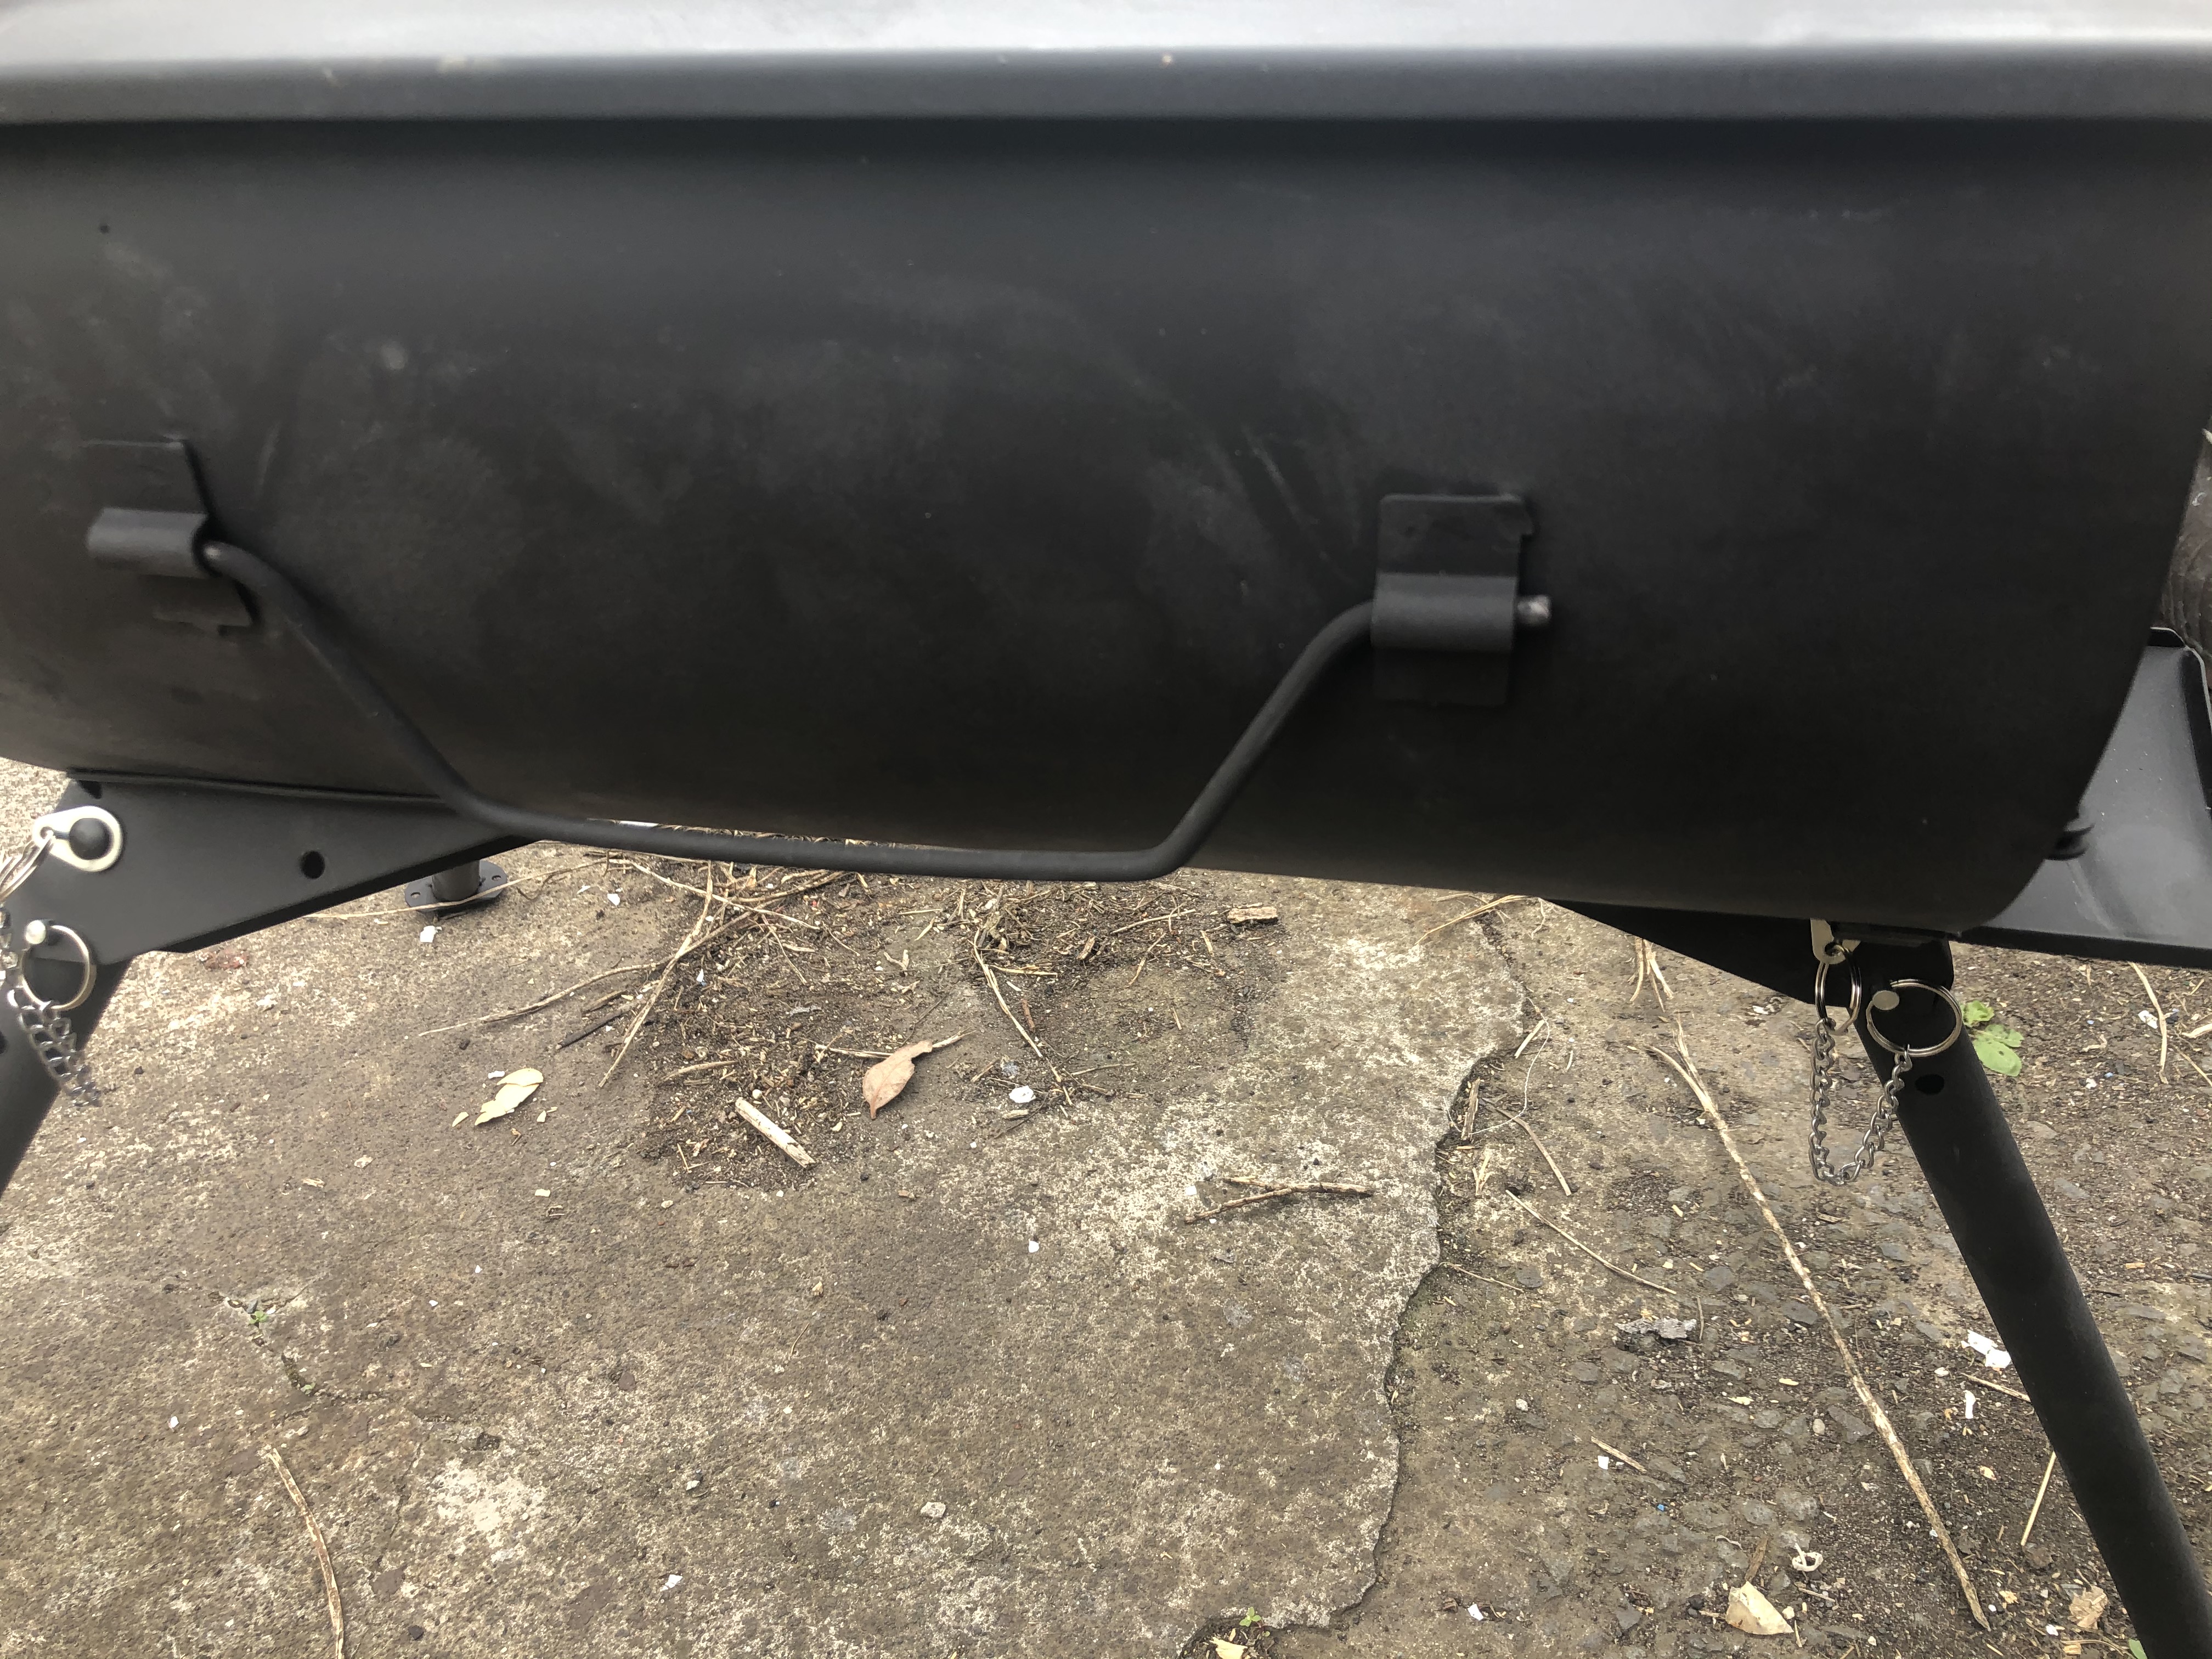
The curved sides of the stove feature a welded bar on one side, acting as a hanger for tea-towels, tongs of what have-you, for drying and keeping out of the dirt and off the stove itself. It also acts as a barrir to stop things touching the hot sides of the stove. 
 
Stove pipe sections all fit inside the stove for transport and storage. 
On the other side of the stove a similar bar forms a hinged handle for carryig the stove, briefcase style (before setting up). It could also be used for hanging things, but more care needs to bwe taken as its stand-off distance from the belly of the tove is far less than the fixed bar on the other side.  

The three legs of the stove are hinged and fold flush to the belly when in transit, held in place with pins, each with their own retaining chain. The legs each have a round foot, each with a couple of holes drilled through for tent pegs to secure the stove in place. 

The legs, once unfolded, are held in place by those same retaining pins as used for storage. The rigid stove-pipe sections are easily fitted to the stove-body, which features a small section proud of the cook-top for ease of mounting. Its worth noting that one section of pipe features a flue control valve, just a simple spinning disk on a rod that can be angled to choke down the fire as needed.  The five stove-pipe sections do not feature a spark arrestor, or an end-cap, but it has been easy enough to make one with a re-purposed soup-can and a couple of tent pegs. With all five pipes connected the whole stove tops out at 2.45m (~8'), which puts smoke well out of the way, but well worth staking the feet to avoid any tippage. The stove top measures  45 x 24 cm (1'5" x 9 3/4") and has a trio of divots pressed in for rigidity, as well as a 15 cm (3") diameter removable burner lid, with retaining notches and a recess for a hook to pull it off the fire. 

The door is a simple circle, hinged on one side, with a notched latch to secure the fire closed, or cracked open for air-flow. 

The door is also 15 cm (3") diameter, which along with the internal length of the stove at 43cm (17") or so, limits the sice of the wood it is loaded with, but not unreasonably so. A small curved ash-lip is also provided, and slots in under the door to catch and embers that spill whilst filling or stoking the fire. It also provides a nice rest for roasting foods on a stick, in the stove. 

With the burner lid off you can get quite a a roarimg fire going, especially good once the fuel has all caught and the flue is drawing any smoke through. This lets you build a good bed of coals to cook with. You - could- cook directly on the stove top as the bare metal gets quite hot, but I prefer to put a pan or pot on, to assist with cleaning. I've found that the surface does rust if left in the open so have taken to oiling it, as I would to season a cast iron pan which has helped protect it. Obviously this can lead to a bit of smoke as it burns on, but well worth it to keep the stove in good condition and leaves a great finish.


A piece of good fortune came in the form of the thick walled cast iron pot that I salvaged and restored fits perfectly into the burner lid opening, which both speeds the hating process but eliminates any smoke escaping. Its important to keep an eye on the cooking progress as with any wood fired stove, it can develop hot spots. 

Whilst obviously not a hiking stove, all together in its canvas carry bag the stove is quite portable, with space inside to carry the stove sections as well as a couple of fire poker tools. 

I dont have a hot-tent, nor much desire to do much cold -weather camping, but if I did, i'm certain this stove would make a fine addition to camp. My famly certainly enjoy the occasional fire-side, back-yard gather, without the concerns of smoke in the face or embers blowing that an open fire would bring. 

Whether its kranskies on-a-stick, a pot of beans, that old classic marshmallows, or a simple pot of tea, there is somehing magical about having your own fire. 

Easy enough for littlest-coyote to set up on their own, compact enough to throw in the back of the bug-out vehicle. 


Friday, February 16, 2024

Review: Back Country cusine Beef Terriyaki


Time for a food post. When on the trail, camping, bugging out or even bugging in, it is advantageous to have tasty, easy to prepare and storage stable meals. I've covered Back Country Cuisine meals before as well as the similar Outdoor Gourmet Company meals Even compared to the main meal components of MRE ration packs they compare well. One thing I really like about this kind of dehydrated meal (which I fondly recall from way back in my Houston childhood,) is the NASA like retort the meals come in.  The main meal  I selected was the beef Teriyaki, which weighed in at 175g dry, and called for 438 ml (1¾ cups or K2 fill line) of boiling water be added to meal pouch. Stir and stand for 10-15 minutes. Serving size 613g (once prepared). The pouch has an internal ziplock to seal in the meal and heat during the re-hydration process. The retort bottom blouses out at the bottom to allow it to stand on its own. 
The meal itself  consists of freeze dried beef, rice and vegetables in a soy flavoured sauce. The meal is both Gluten free and had no added dairy, both good to know for those with dietary requirements like Coeliac's such as I have in my family. One thing I neglected to pay attention to was the full ingredient list and one of the vegitable components was dehydrated capsicum to which i'm allergic. Thankfully I was able to pick out even after re-hydration, with no ill effects. The squares of dehydrated beef reconstituted nicely as did the rice. The dish, once water is added, and left to stand for 10-15 minutes, and given a good stir ( right down to the corners of the retort), the meal thickened up into a very satisfying consistency. Easily spoonable without being sloppy, it was easy shared out.  
I shared this meal in order to help vette it for future stock-ups  (a very good policy, taste-test your food preps). 
As well as  being a hot, fast and tasty meal, nutritionally they offer quite a lot. A single serve meal provides Energy 3180kJ (759Cal), Protein 34.1g, Fat 22.7g, Fat - saturated 9.3g, Carbohydrate - total 103g, Carbohydrate - sugars 27.1g, Sodium 1990mg. Probably not what you'd want to eat every day, but certainly suitable to have on adventures or whilst in the midst of crisis. The flavour was mild and inoffensive and as an all-in-one meal it certainly works. 

I've made mystery-can meals before, but having a balanced and blended meal was an excellent step up in preparedness and certainly a vast improvement in palatability over compressed rations biscuits. Family approved!


Hal


Thursday, January 4, 2024

Review: Campmaster single burner stove

Carrying on in the series of camp cooking posts, let me bring to your attention the utilitarian Campmaster Single Butane Stove. This simple and straightforward single burner stove only weighs 1700g (3 3/4 lbs), without a fuel canister, and  folds down into a very portable 343mm(13 1/2") x 280mm(11") x 118mm (4 2/3"). I've seen similar burners set up in Korean BBQ joints for at-the-table cooking. I've often used it for exactly that purpose, inside at the dining table and on innumerate picnic tables. The blue enameled steel frame is both sturdy and easy to clean. 

The stove takes standardized 220g Campmaster CRV Butane Gas Cartridges 4 Pack (Countersink release vent) safety cans which are explosion proof and they fit into a compartment on the side of the strove. The cartridge locks into place with a latch in the lip of the bottle and a lever beside the adjustable flame control needs to be engaged in order to connect the cartridge to the stove. The compartment closes when the stove is in operation to protect it and the user. it is well vented in case of leakages. 


The stove has a peizo-electric sparker, triggered by the Flame control dial which is handy. The stove has strong heating power: (Gas Consumption: 160g/h (7.9Mj/hr)) at maximum setting, which is plenty for a number of serves of a meal, or several rounds of quick cooking meals. 

The hob itself is cast aluminium, and the stove-top comes out and when flipped provides a trivet for resting pots and pans on, small enough to hold up an enamel mug for singular brews, perfect for cold mornings in a tent vestibule. The hob head is recessed in the stove-top to shield it from winds Though it should be noted there is a manufactures not not for use below 0oC freezing, presumably because the butane freezes up in the canister or in the tubes.

The stove is lightweight enough that its easily hikeable, especially important if you're going to a fire-free area and want to cook, without hauling a whole BBQ and gas bottle. I have to admit I stocked up on the canisters during the Covid lockdowns, in case there were mains-gas shortages or disruptions as part of my  bug-in / bug-out preparations, thankfully un-necessary. We did have several pleasant summer night al-fresco dinner cookouts, and I've even used it for at-the-table teppanyaki  and hibachi type meals. ( Be sure to ensure it is used in well ventilated spaces and that the stove is set up on a heat-proof location as radiant heat can scorch surfaces. ) The canisters are self-sealing and can be stored for lengthy periods between uses.

Tuesday, August 1, 2023

Review: Titaner titanium Bento Box


It's all good and well to load up with knives, axes, shovels and all manner of gadget and do-dad, but every-body has to eat. Old tin mess-kits are all good and well, light and compact, but not known for their durability or stealth.

I am very happy with my Heavy Cover canteen and mug set both as a hydration tool but also as cook-ware, so when the opportunity came to add to my titanium cookware collection in the form of the Titaner  Bento lunchbox Kickstarter. 

Pressed from food grade titanium, with titanium wire fittings, the bento box has a lid fitted with a tritan gasket inset into the rim. The lid is held in place with the two clasps at each short end. Along with the gasket, the clasps hold the lid water-tight, with a capacity of  600mL (20 1/3 oz), making it ample for cooking single serve meals as a small fry-pan or shallow pot. 120mm x 165mm x 60mm (4 3/4" x 6  1/2" x 2 1/3") 227g, (8oz). The inside is plenty big enough to carry an instant noodle packet and additions sufficient to make a decent trail-side meal. With some careful packing you could probably carry a half-dozen eggs in relative safety too. I might work on some inserts to do just that .

Speaking of cooking, the long titanium wire handle, which folds over one of the short sides, which provides a comfortable and stable handle to carry and manipulate the pan-side of the box allowing the user to adjust the pan over the fire. When using it, I have tended to clip closed the clasps in order to avoid any unwanted snagging and possible spillage.

The bottom of the pan has a slight inset bulge to reduce deformation and denting, and matches a similar bulge in the lid, allowing the pot to sit on the lid as a coaster or heat-shield. The rounded internal corners make for easy clean-up and ensure nothing gets stuck or burnt in to inconvenient spots. The gasket is easily removable for easy cleaning 

No coatings, no additional material other than the tritan gasket ring and the titanium, i'm confident that this is a healthy, resilient and robust piece of cook-ware as well as an eating surface, that also doubles as storage. The fittings don't rattle and hold it securely. I haven't yet found a pouch to slot it into but it fits into a napsack easily enough.  

Perfect size for 2-minute instant noodles ( shown here with spring onion, ginger chunks, lap cheung sausage and chilli paste.  All of which fit nicely in the box for easy transport. 


Thursday, April 20, 2023

Review: portable Campmaster dual-range stove

 Having a campfire cookout is a glorious thing: open flames, glowing coals, smokey flavors, but some times you want the surety and stability of a gas range, especially if feeding a family or in adverse conditions, something like this can really make a potentially miserable situation cheery again. 

The Campmaster Double Burner range is a collapsible unit that folds up into a 11cm (4 1/3" H) x 26cm (10 1/4" W) x 21cm (8 1/4"D) box weighing 3.1kg ( 4lbs 10 oz).It unfolds, with silver retention band folding underneath it to form legs. The adjustment knobs sit outside the frame, so you'll need to be careful of that when packing and transporting. 

When unfolded, the "lid" forms the splash-back and two wings fold up and "tab A into slot B" to secure the lid and form a windshield. The unit comes equipped with a detachable hose with a recessed port on the right hand side. the cylinder end of the hose fits 3/8" LHT gas cylinders, without requiring a regulator.


Unfolded and hooked up to a gas cylinder, the range has two burners each with independent control knobs, which throttle the fire from roaring fast-boil to gentle simmering. The burners are guarded by stainless steel wire grills much like  the retention bands/ legs. The base of the unit has a cut-out which serves as a drain spot for spills when in use, or as a handle to carry it when folded up. These are hefty enough to bear up under my biggest cast iron pots, though the wings and splash-back need to be folded back to make room, but certainly enough room for a good size skillet and a pot for full meal cooking.

 The unit can be used with Universal LPG from cylinders complying with AS2030.1 (or equivalent), which means it is compatible with Swap and Go cylinders

The stove doesn't feature a pizo-electric starter, so to ignite it you'd need a match, lighter or ferro-rod type system, that's not an issue for me as I carry multiple fire-starting options as part of my EDC. 

The wings and back form an effective wind-shield keeping the burners from blowing out and heat staying where you need, the blue enamel finish makes wiping down any cooking splatters or trail dust an easy task. Needing an LPG tank for fuel sort of restricts it to back-yard or tail-gate type events, unless you fancy hauling a cylinder about, but its reliable, powerful and super simple to use.

My parents gifted me this one, as they used it to cook on whilst having their kitchen renovated and are not big campers.

One final thing, the standard BBQ cylinders available to me don't have a 3/8ths" fitting,  so an after market adapter is required but these are easy to come by. 

I keep mine on the top shelf of my tucker-box /  chuck box which we built around this unit, where it not only stows nicely but can cook on, right in place. 


Wednesday, June 2, 2021

Review: Gerber - spork set

I treated myself a while back to a fancy new set of eating tools. Now, I am all for food on a stick, or if needs be, wrapped into a burrito or schwarma, especially when it comes to outoors cooking and eating. Every extra piece of tablware or cutlery you use is one more piece you have to bring, wash and haul back. A stick is good but limiting and eventully marshmallows and sausages loose their luster. Whilst I am also very fond of one-pot/one pan cooking, there are times when a fork and spoon are the right tool for the job, beans, scrambled egg and porridge don't work well on a stick. 

Gerber had an offering that I was keen on. A combi-tool set combining the Gerber Devour set with a plain spoon and spatchula to make a set called the Compleat.
The Compleat is made up of four individual tools; a Deep basin spoon, a long tined spork a spatchula with a serated edge and a multi-tool. the fork, spoon and tool all nest into a slot in the base of the spatchula securely until needed.

The spork has longer tines than im used to on a spork which is a nice change, making it easy to stab food and not drop it and loose it. They aren't yet so long as to be loose stiffness.  

The spoon has a nice straight edged tup, allowing it to scrape the bottom of a bowl or mug to get the last skeriks of food. The dish was deep enough to eat soup with and shovel food into my mouth without bulging out too much when nested. 

Both spork and spoon have a pattern of  stamped into their anodized 7075 T6 Aluminium handles. The spatula component is made of a high temperature nylon with a silicone overmold along the leading edge and one side. One edge has a serrated edge to use as a knife. The  knife isn't great but it'll do and the spatula isn't going to win any awards but it'll flip a pancake and get your eggs over-easy if you're patient. The nifty thing about this tool is that combining the fork or spork with the spatula will create tongs on one way and an extended stirring tool combined longways. Excelent for stirring with your face out of the smoke and for picking sausages out of a pan, respectively. 
 
The spatula's notched ends are directional and prevent the tools from falling apart mid-use. Though the spatula has an arrow molded into it but I routinely try to put them together the wrong way. I think  will scratch arrows into the spoon and spork end surfaces to remind myself in future.
 
I found the metal utensils comfortable to use, did not transfer too much heat to my hand and were certainly sturdy enough to both cook and eat with. 
 
They're also capable of lifting cast iron pots' lids off with ease thanks to both their curved cross-section but also the grip-improving texture lending them strength through engineering. I think I'd prefer the spoon and spork to be titanium rather than aluminium but it works just fine. The spoon/spatula combination tongs work well for fine tasks as well more standard kitchen tong uses. They work just fine ,with the plastic of the spatula providing sufficient "spring" for use, though they lack the "clack-clack" safety test-feature.


The last component of this set is the utility tool that serves to lock the other tools together. This powder coated steel tool features the following components; bottle opener of obvious utility, a sharp plane-style Veggie peeler, a Serrated cord-cutter and package opener hook/ can-opener and the all important bottle opener. 
 
All-over is sits at 20cm (7.75") long ant weighs in at a mear 65g (2.3 oz) which will neither overload or over encumber any but the most hard-core ultra-light packers.  
 
 
The set comes with Gerber's Limited lifetime warranty, but given its sturdy construction, youd have to be pretty careless with it to need that. The spatchula componant might burn/melt if left too close to your fire for too long, but it worked fine for my cooking needs.

 
Find it here on Amazon:


Related Posts Plugin for WordPress, Blogger...